-

- Forums
- Chatrooms
- Gallery
- Gameplay Videos
- Upload
- Articles
- Mod Reviews
- Shop SP: Games, Movies, Books
Prologue | Chapter 1 | Chapter 2 | Chapter 3 | Chapter 4 | Chapter 5 | Tales of the Sword Coast | Chapter 6 | Chapter 7 | |
BALDUR'S GATE - NORTHWEST SECTION
Schlumpsha the Sewer King
I arrive at the east edge of the northwest section of the city. I then make for a sewer grate due west. In SCS, Phase Spiders in the area will teleport and come after me right away so I oblige.
I then continue southwards along the tunnels, killing more Spiders along the way. At some point I run into a strange creature named Shvertzsche, who appears to have been glad at having been turned into slime.
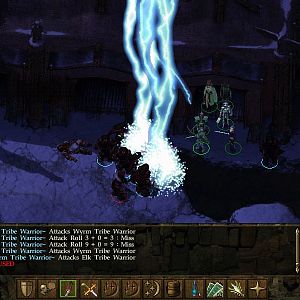
I continue in a southeast direction, and run into Schlumpsha the Sewer King and several of his Sewerkin. Combat is inevitable. Whether it's vanilla BG1 or SCS the solution is the same, blast them away with Fireballs.
The video concludes with me making my way back out of the Sewers.
Quinn
Now I enter a house just south of the sewer grate. A Gnome wants me to retrieve the dagger of his friend, Nestor, who was killed by an Ankheg.
So I return to Wyrm's Crossing, north of the child priestess' house, and find a lone Ankheg. I kill it and then pick up Nestor's Dagger.
I then return the dagger to Quinn for 950xp, +1 to reputation, and a Shandon Gem.
Laerta and Louise
Now I enter a house that is more or less in the center of this section of the city. In a room to the west a couple of twin sisters, Laerta and Louise, are scared of a bogeyman who looks through their window at night.
After this a wizard named Gervisse comes through the front door and claims to want to protect the twins from a Druid named Voltine. Voltine will then appear in the northeast corner of the house and explains that Gervisse is the bad guy, which he is.
As for Gervisse, the same tactic that I used for Yago will work as well. Jaheira begins a casting of Dispel Magic, and then Avastrian talks to Gervisse just as the casting is about to be completed. With good timing the Dispel Magic will tear down Gervisse's protections just as they come up and leave him vulnerable. The party then hacks him down. He leaves behind a Robe of Fire Resistance.
I then speak to Voltine, and she rewards me with a Wand of Polymorphing. I then speak with the twins and get rewarded with 1,000xp and a scroll of Protection from Evil.
The video concludes with me stealing a Splint Mail +1. Note how I positioned most of the party by the door, while I had Avastrian (able to carry more and wearing Boots of Speed) do the actual lifting of the armor. This way I can get out of the house before the guards show up.
Phierkas and Algernon's Cloak
Now I enter a house somewhat west of the twins' house. A Dwarf woman named Pheirkas potentially offers a quest, but apparently doesn't think my party is up to it. Maybe cause I don't have a single-class thief?
The quest involves stealing Algernon's Cloak, but without killing him. Now I return to Feldepost's Inn in Beregost. Imoen uses her Book, and then a Potion of Master Thievery. She then pickpockets Algernon for Algernon's Cloak (+2 Charisma, Charm Person with limited charges). I may as well keep it and have Khalid wear it, handing over the Cloak of the Wolf over to Yeslick (yes, the cloak is useless and I'm just holding on to it for the sake of everyone having a complete inventory).
I then return to the northwest section of the city.
Gorpel Hind and Gretek
I then enter the Helm & Cloak Inn, which is towards the southeast corner of the section. A fight is coming up against a crew that was pretty tough during BG1, and certainly tougher during SCS. So I make a few preparations.
Imoen uses her Book, and casts Mirror Image on herself. Avastrian protects himself with Stoneskin and Mirror, and then casts Haste on the party. I then start to position the party. Avastrian and Jaheira place themselves more or less where I expect the enemy Mage and enemy Cleric to appear. Imoen positions herself well back and to the west. Yeslick puts himself next to Gorpel Hind.
Yeslick then starts the conversation with Gorpel Hind, and chooses the dialogue options that involves an exaggerated version of my adventures through the Cloakwood Mines. As soon as this ends Imoen immediately begins to cast Remove Magic. Gretek soon shows up, and I deliberately choose the non-confrontational dialogue options. The reason for this is that I need to try to avoid confrontation, and to avoid any patrons getting hurt or killed, in order to avoid the Bartender going hostile on me.
Once the dialogue ends the fight begins immediately. Imoen's Remove Magic is timed perfectly, removing the enemy spellcasters' pre-set buffs while leaving those of her party intact. The party makes a point of taking out first the Mage, and then the Cleric, in order to minimize their spellcasting.
Yeslick starts to cast useful spells at a distance, starting with a Hold Person that paralyzes the enemy Fighter/Mage, and then casting Doom on Gretek, who's the most dangerous fighter in his group.
The party then takes out the Fighter/Mage, and then Gretek. Jaheira adds in a Defensive Harmony to ensure that the party can go the distance with Gretek and bring him down. Once he and the enemy spellcasters are dead, the rest becomes a mop up.
The loot includes Bracers of A.C. 7, a Longsword +1, a Traveller's Robe, and a Battle Axe +2.
Degrodel
Now the party leaves the Helm & Cloak, and heads for a house due west. Imoen unlocks the door.
On the other side of the door is a pretty tough battle against 3 Helmed Horrors and 3 Invisible Stalkers. So I prep to the max, Mirror Images, and Stoneskin and Haste from Avastrian. Once I do step through, I wait until the enemies crowd around me. Once they do, Avastrian casts Slow, and Jaheira casts Defensive Harmony. Joining these spells together, Haste, Slow, Defensive Harmony, can drastically tip melee combat in your favour.
Jaheira adds an additional touch by casting Call Woodland Being. This summons a Nymph, who can cast healing spells and thus 'passively' recoup party members' hit points. Imoen meanwhile targets Helmed Horrors with her Wand of Paralyzation, stunning at least two of them.
Avastrian speaks with Degrodel, who tasks me with finding the Helm of Balduran for him. He then gives me several scrolls of Stone to Flesh to free the adventuring party that once had the Helm.
Helm and Cloak
Now I take the scrolls of Stone to Flesh to Felonius Gist's Manor, towards the north and center of the central section of the city. Once I step through the door I use the scrolls to free the statues from petrification. I then speak to the Elf who's flanked by the others, Vail. I press for the Helm but he tells me to speak with his consort, Quenash, in the Undercellar in order to get his cloak as a consolation prize.
The main entrance to the Undercellar is through the Blushing Mermaid Tavern in the northeast section. The Guard tries to collect an entry fee, but I bluff my way out of it.
Quenash can be found near the end of the hallway, and to the left. I have to ask for the cloak, and then describe Vail to her correctly, Elven and Blond. She then gives me the Cloak of Balduran (+1 armor class, +25% magic resistance). This will be Avastrian's Cloak for the rest of the game, and often helps with his role of being the foremost character in many situations.
I also get the Helm as well. I head back to the Helm and Cloak tavern. I then go up the stairs towards the north side. Imoen then goes towards the northeast corner of the upper level, and disarms a trap on the painting. She then loots the Helm of Balduran (+1 armor class, +1 THAC0+1 to saving throws, +5 to hit points). This will be Avastrian's helmet for the rest of the game, as the bonuses to armor class and THAC0 on their own will be helpful for a Fighter/Mage in the early stages of his career.
The video concludes with me getting the most benefit out of this adventure that I can. I head back to Degrodel, and surround him completely, buffed to the max with Haste and other spells. I then temporarily give him the Helm of Balduran. He then summons more Doom Guards and Invisible Stalkers to 'escort me out'. Except I now grab the opportunity to attack him and chop him down before he gets away. I then kill off his minions. Avastrian then reclaims the Helm of Balduran from Degrodel's corpse.
Lastly, the southwest section of the city awaits.