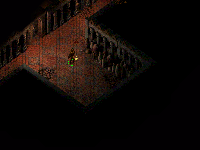
Arrive from Brynnlaw.
Welcome, wench, to your personal prison. You will learn to call this home in due time even if you're here to save
someone from the hells that will be found within. Your visit will be welcomed but it is your stay that will linger in our hearts for all of eternity.
Enjoy Spellhold and may you find yourself within like the rest of the residents have.
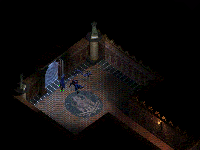
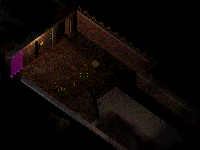
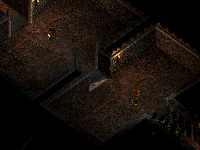
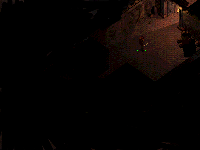
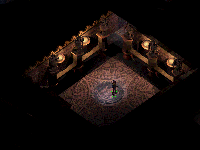
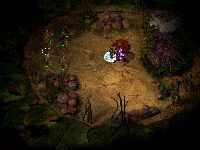
| Spellhold - Outside - The Front Door |
|
|
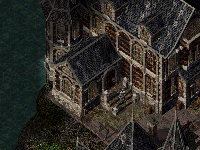
Outside Spellhold
|
|
|
There is only one entrance to Spellhold, and that is to make your way along the stairs and climb your
way to the front door. There will be two battles that you will encounter on your way there and depending on the time of day, you will come face to face with
different creatures.
The first platform you climb up to will have a group of Lizardmen that will greet you with snarls and jabs from their weapons. If
you're arriving at night, you will have to battle your way through some Poison Mists, Vampiric Mists and Wandering Horrors.
The last stage of your climb will take you to the door of Spellhold and once again, the beasts you will face will
depend entirely on the time of day. At night you will have to battle Shadows and Wraiths while during the day you will only have to deal with an Air Elemental.
Obviously coming here during the day will be easier on the party but you will gain more experience if you battle your way through the night. Once
you're ready, open the door and let us begin your journey into Spellhold.
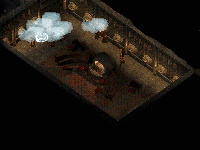
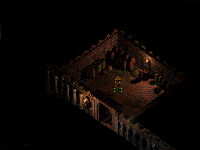
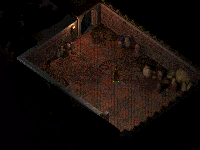
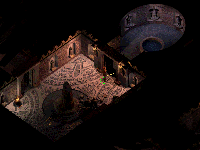
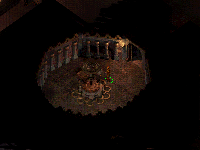
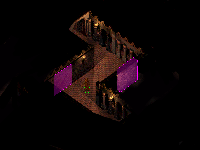
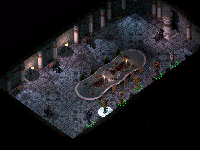
| Spellhold - Level 1 - Welcoming Hall |
|
|
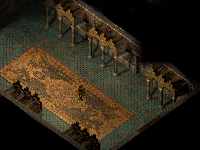
Welcoming Hall
|
|
|
A familiar voice will greet you as you are met by the Coordinator of Spellhold and if you still have yet to
realize who this is, just sit back and allow to be taken on a guided tour of Spellhold. Eventually, it will come to you and if it hasn't
by the end, the source will be revealed.
This grand entrance chamber with its rich arches and design certainly seems out of place when one first gazes upon Spellhold from
the outside. The rotting wood and growing weeds from the cracked stones give the impression that whatever lies within is just as bad. The sound of your boots will echo as you walk
through here so worry not if you think someone is behind you. It's just your echo catching up.
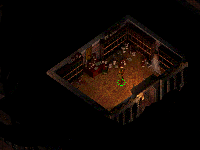
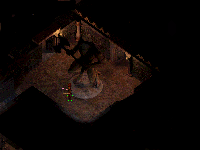
| Spellhold - Level 1 - Crazy Chambers |
|
|
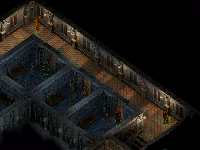
Crazy Chambers
|
|
|
Your tour will continue along this hallway where you will come face to face with the other occupants of Spellhold. Introductions
will take place as you are filled in on the serious problems some of these residents seem to have.
Dili is an interesting sort, being able to change form as she wishes and even had the chance to form into Irenicus but he didn't
seem to like that very much. Wanen, Naljier Skal, Aphril and Tiax are just as interesting and you should talk to each and every one of them before you continue on
your way.
It is also these very residents of Spellhold that will help you later on in your journey.
| Spellhold - Level 1 - Dradeel's Room |
|
|
Dradeel's Room
|
|
|
Before your reach your final destination in this little tour you will pass by the room where Dradeel resides, a crazy old man who doesn't seem
to know what's going on anymore. Speak with him and learn what you can through his mumblings and laughs and move on to the last room in your tour where you will find
who you've come looking for.
|
Waiting Room
|
|
|
'tis here you shall end your tour and also come face to face with Imoen who can be
found here in the Waiting Room. A series of events will unfold as you speak with her and it is very important that you watch,
listen and learn what is to become of you as well as Imoen.
A cloud of gas shall suddenly explode around the party as each and every one of you are put to sleep, as well as
Imoen leaving your very fate to Irenicus himself. Upon your awakening, you will find yourself inside a tube, which
is connected to a group of Shadow Thieves and it would seem, you are to be part of an experiment that Irenicus is interested in performing on you.
One by one shall the Shadow Thieves become consumed until the last does fall, your turn arrives and you too shall slump to the ground as darkness
comes over you. Before this, if you were listening well, you will learn that Imoen is also a Child of Bhaal and it is
with the next dream more questions shall riddle your mind.
|
Dream Sequence
|
|
|
You will awake in Candlekeep except it is not what you remember it to be, dotted in the middle of nowhere,
bland and empty, lost in the very void it rests in. While here, you will want to make sure you find Bhaal himself who can be found to the
north west end of Candlekeep and who will follow you no matter where you are. Attempting to destroy his form will do you no good as it will
take both you and Imoen to get yourself out of this hellish nightmare and back into your body which is lying in the
very tube within Spellhold.
Lead Bhaal into Candlekeep, answering the Demon's question which he will ask of you and make your
sacrifice,
"This path is to the core... the depths of your soul. Only through sacrifice can you achieve such insight!"
You will have to make a choice on which attribute you wish to drop by 1 and this is permanent. Once you've
selected, move through the door so you can search and find Imoen.
|
Inside Candlekeep
|
|
|
Once inside, you'll want to lead Bhaal around the building until you meet face to face with Imoen so both of you
can do what you can to defeat Bhaal. Doing this will get you out of your dream sequence and also show Irenicus you are much more powerful than he originally thought and will
trigger a series of events that will eventually get you out of your cage and into the Asylum.
You will also end up losing all your Bhaal powers that you have received during the course of your adventure through Baldur's Gate and Baldur's Gate 2
and will be introduced to the Slayer form which will start to weave its way through your very blood.
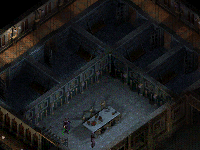
| Spellhold - Level 2 - Holding Cages |
|
|
Holding Cages
|
|
|
It is in this very room that you will learn about yourself, Imoen, Irenicus as well as
Bodhi for you will be placed here before you are set free into the Asylum below Spellhold. It is also here that you will have your
dream sequence, which follows the events that will happen when you first meet Imoen in the Waiting Room.
If it's your first visit here, you will go through the dream sequence and then be placed into the Asylum below, left to fend for
yourself by Bodhi as you work to explore and battle your way out to freedom. Don't worry though, for you will return here once you find your way out.
The second time, as mentioned above, once you've made your way out of the Asylum will introduce you to the power of Irenicus as you will
face him in battle for the very first time. You will not be able to do so with just the party you have and you will have to return to the Waiting Room where
you found Imoen and it is here you will come across those you met during your tour of Spellhold when you have Lonk the Sane free
them.
The battle you may very well find tough if you've come to Spellhold at a low level because Irenicus really
enjoys using Abi Dalzim's Horrid Wilting which can do some serious damage to the entire party as well as those who will be joining you
for the battle.
|
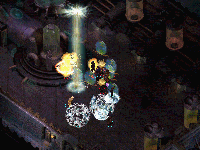
Battle with Irenicus
|
|
|
Concentrating the majority of your attacks on Irenicus is very wise for the more damage you begin to give him,
the quicker he will leave the battle but don't think it will be that easy. Irenicus will do everything in his power to drop you and as many
others who dare to stand in his way. Be ready for duplicated members of your party as well as those who have come to join the battle with you
against Irenicus to come forth and cause even more havoc for you. A summoned creature or more will be very helpful in distracting Irenicus
and it would also be wise to spread out your entire party so not everyone is hit by Irenicus and his radius spells.
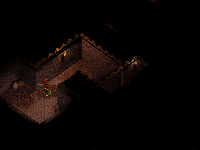
| Spellhold - Level 2 - Storage Rooms |
|
|
Storage Rooms
|
|
|
Storage Rooms litter this level and exploring them would best suit the party for there are some
helpful items that the party could very well use in the future.
| Spellhold - Level 3 - Room of Riddles |
|
|
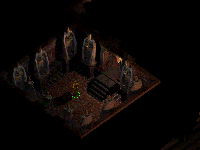
Room of Riddles
|
|
|
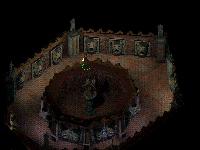
Long shadows will greet you as you enter this square and small room which is littered
with 11 stone statues and a strange wooden box in the very centre of the room. It is a silent and strange sight to behold and
at first, you may very well be on the defensive wondering what will come forth from the hands, eyes or mouths of the statues.
You can relax though as this is no trap to worry yourself over but in fact is a very good challenge to anyone who enjoys a good
riddle or two.
Each statue will give you a riddle and you are to use the items found in the wooden box
to figure out what item goes with the particular statue. Doing so and doing this 11 times will give you some very nice items
that will appear in the box once everything is completed.
Standing at the entrance to the room and starting on the left side, from the first statue
to the last in counter clockwise fashion are each statue's riddle and item that represents it.
Statue One
At night I come without being fetched
At day I am gone without being stolen
Item: Star Medallion
Statue Two
No beginning. No end. I am a symbol of the world's cycles
Item: Golden Circlet
Statue Three
Two brothers we are, great burdens we bear, all day we are bitterly pressed;
Yet this I will say - We are full all the day, and empty when we go to rest.
Item: Worn out Boots
Statue Four
Here, in this place, you swallow me
Yet, were I more, I could swallow you.
Item: Jar of Water
Statue Five
I have seen the mountains rise. I have seen the fall of Netheril
You shall die but still shall I march on.
Item: Sundial
Statue Six
To those within the dungeon I am joy.
To those fully beneath my gaze, I can be hell.
Item: Sun Medallion
Statue Seven
I will save your life yet you can die by me.
I will settle disputes yet not with words.
Item: Sword Medallion
Statue Eight
Name me and so shall you break me.
Item: The Gagged Man
Statue Nine
Always do I tell the truth, yet cannot speak.
Look to me and see what really is.
Item: Mirror
Statue Ten
I have two heads but one body.
The more I stand still the faster I run.
Item: Hourglass
Statue Eleven
Try to defeat me but try in vain.
When I win I end your pain.
Item: Grinning Skull
If you have done everything and gotten each riddle correct by placing the right item
to each statue, you will find some very nice items inside the wooden chest in the middle of the room as well as a very
nice experience reward for solving the puzzle.
One of the items is the SAPPHIRE
STONE which you will need to get for the Portal
Room.
| Spellhold - Level 3 - Goblin Storage Room |
|
|
Goblin Storage Room
|
|
|
Worry not as you come forth to this room for there is nothing to fear here. In fact, it might even
lower your guard when you spot the charging Goblin coming your way and laugh at such a little threat to you and the party. For such a place,
you'd think it would be stocked with stronger and more foul beasts.
Now this room is important to explore because it holds the RUBY STONE that
you will need to use in the Portal Room so do make sure you pick it up. Without it you will not be able to activate
the first sequence of the portal.
As well, there are some items that may prove helpful to members of the party so search the room
well and be on your way. There are more interesting things found within that you'll want to get to.
|
Portal Room
|
|
|
Prepare yourself for a battle as you come towards this room because in here you will come
face to face with Ruhk, an Air Mephit, Ice Mephit and a Smoke Mephit who will do their best to keep you from gaining entrance.
Battle well and battle hard to bring them down.
Now the portal here in this room can only be activated if you have found any of the three
stones required. Those stones are the following:
Using the stones in order on the Portal will have the following effects:
The RUBY STONE will call forth a Pit Fiend which you
will have to battle to be able to use the portal again.
The OPAL STONE will bring out a Greater Werewolf so battle
hard so you can use the last stone on the portal once the battle is over.
Finally, the SAPPHIRE STONE will bring a puff of smoke and a
Djinn along with it to face you and the party.
By killing all three foul beasts, you will be rewarded with a nice suit of Plate Mail Armor.
|
Storage Room
|
|
|
A Clay Golem makes this room his home and you will have to show him that you mean business when you
enter the Storage Room and bring him to the cobbled floor. The storage room is littered with items that will help
you and the party as well as the OPAL STONE needed for the
Portal Room to activate the second sequence to the portal found there.
Search the room for the items listed below and be on your way.
| Spellhold - Level 3 - Faces of Riddles Room |
|
|
Faces of Riddles Room
|
|
|
A strange place is this, with faces situated all around on the walls inside and out and it
is with each face that you will be teleported and asked a riddle which you will have to answer or suffer the consequences.
As for each riddle asked, I do not think it matters which face you move before, just as long
as you answer the 12 riddles asked of you. These are the riddles along with the answers needed to get you back outside so you
can be asked another:
Face One
"I can have no color, though there may be darkness within. I have no weight and hold nothing, and if
placed in a container it becomes lighter."
Answer: Hole
Face Two
"Of all your possessions, I am the hardest to guard. If you have me, you will want to share me. If you share me,
you no longer have me."
Answer: Secret
Face Three
"Alive as you but without breath, as cold in my life as in my death; never a thirst though. I always drink
dressed in a mail but never a cling."
Answer: Fish
Face Four
"I am free for the taking through all of your life, though given but once at birth. I am less than nothing in weight, but will fell the
strongest of you if held."
Answer: Breath
Face Five
"I have holes throughout, from back to front and top to bottom to core. More nothing than something within, and yet I still hold water."
Answer: A Sponge
Face Six
"They flow and leap, but only as you pass. Dress yourself in darkest black,
and they are darker still. Always they flee in the light, though without
the sun there would be none."
Answer: Shadows
Face Seven
"They come to witness the night without being called, a sailor's guide and a poet's tears. They are lost to
sight each day without the hand of a thief."
Answer: Stars
Face Eight
"The more that there is, the less that you see. Squint all you wish when surrounded by me."
Answer: Darkness
Face Nine
"The life I lead is mere hours or less, I serve all my time by being consumed. I am quickest when thin, slowest
when fat, and wind is the bane of the gift that I bring."
Answer: A Candle
Face Ten
"The man who invented it, doesn't want it for himself. The man who bought it, doesn't need it for himself. The man
who needs it, doesn't know when he needs it."
Answer: A Coffin
Face Eleven
"A spirited jig it dances bright, banishing all but darkest night. Give it food and it will live, give it water and it will die."
Answer: Fire
Face Twelve
"Lighter than what I am made of, more of me is hidden than is seen, I am the bane of the mariner, a tooth within
the sea. Speak my name."
Answer: Ice
Completion of all 12 riddles will reward you with a nice Ring of Regeneration as well
as some experience points.
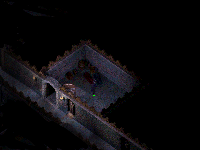
| Spellhold - Level 3 - The Face of Dace Room |
|
|
The Face of Dace Room
|
|
|
One will have to battle hard to gain entry into this room for it is littered with a pile of
Umber Hulks and Minotaurs who will cause any prepared party lots of troubles. The gaze of the Umber Hulks will hit one after the
other while they rust forward with the Minotaurs close behind, ready to rip the entire party from head to toe.
Battle hard and well for you will need to clear this area out eventually so best you do it
now. The large face is that of Dace who has trapped himself and your party because he has hid the hand needed to open the face
to the stairs located behind it.
Finding Dace will be your main objective if you wish to get past the face and use the stairs
to slowly get yourself out of Spellhold.
Once you find the HAND OF DACE
return to this room and use it on the face which will reveal the secret passage beyond.
Search the area for the scrolls hidden here.
| Spellhold - Level 4 - Tomb of Summons Room |
|
|
Tomb of Summons Room
|
|
|
As you make your way into this room you will notice that a tomb is resting on top of a pedestal
which if you decide to flip through will notice that it summons a creature every time. Now the creatures will raise in difficulty as
you flip through the tomb until there are no more creatures left for you to battle.
The order of the foul beasts that will come forth to do battle with the party will be the following:
Kobold Captain
Sword Spider
Umber Hulk
Mind Flayer
Beholder
Once you have taken down the Beholder then and only then shall you be rewarded.
| Spellhold - Level 4 - Wandering Horror Room |
|
|
Wandering Horror Room
|
|
|
A typical room is this area, stocked with boxes, barrels and a few wooden tables but also a good number of
Wandering Horrors which you will have to put up with to get past this area. Battle well and battle hard to bring these foul beasts down
to the dirt and search the area. There are plenty of items that will help the party as well as two very good wizard spells.
|
Tomb
|
|
|
The very stench of undead will waft towards your nostrils as you slowly make your way down the hallway
to this small location that is littered with foul and very deadly undead. When you're faced with a Greater Mummy, a few Bone Golems and Skeleton Warriors
do not think that things are going to quickly go your way.
A prepared party should be on their toes when this large force comes lingering your way so do be on call for when they
start to animate and move towards you! The items they guard are important to any party who wishes to expand their power and strength while in these shadowed
halls.
|
The Library
|
|
|
Situated across from the Tomb is The Library which houses many dusty
books and forgotten tales of old that one could sit down and read for many, many years. It is also the same place where you will encounter the apparition of
Dace Sontan so don't be frightened when you first view him.
You will want to find Dace Sontan, who is just down the hall in his chamber and kill him so you can get
THE HAND OF DACE which you will need to use in The Face of Dace Room so you can
gain access to the other levels of Spellhold.
Search the room as there are some powerful scrolls hidden between the pages of the books found here as well as some magical items that
may help you in your cause.
| Spellhold - Level 4 - Dace Sontan's Chamber |
|
|

Dace Sontan's Chamber
|
|
|
It is in this room that you will come face to face with Dace Sontan, the very being that you need to kill if you
wish to get THE HAND OF DACE so you can access the other levels found
in Spellhold.
The chamber itself is spectacular, the pillars reaching skyward to a very well made and hand crafted ceiling
which causes your very footsteps to echo all around you. Now to finally kill Dace Sontan you will need a stake to run through his heart and at first, you
may realize that you don't have any. Don't worry too much for you can find one on this very level, situated in the Kobold Chamber. If you
have to go here to get your stake, I suggest you do so before you begin your battle with Dace Sontan and if you're already holding one, battle away and finish
him off.
Once you have finally finished off Dace Sontan, do remember to grab THE HAND OF DACE
for you will need it later in your exploration of Spellhold.
|
Caged Room
|
|
|
This is a deadly trap just waiting for you to walk into and lock your party or one member
with a slew of Umber Hulks who are really itching for a fight and some food. You should be very careful if you plan on removing
the Umber Hulks when they appear, especially if any of your weaker characters are the ones to get trapped in the room.
Cages will block the exits to the room, trapping any inside and leaving them to deal with all the
Umber Hulks who will rush forward and once the Umber Hulks have been removed will the cages vanish.
There is nothing of interest in this room, except for the stairs that lead up to Level 3.
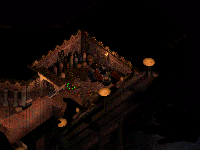
| Spellhold - Level 4 - Kobold Chamber |
|
|
Kobold Chamber
|
|
|
Hidden in the very earth and found by searching the walls of the Tomb of Summons Room you will come across
this place where Kobolds make their home around a giant Kurtulmak Crystal Shard. It hums and glows with great power and it is this that the Kobolds are so attracted
to and will defend it with everything they've got so be ready for a battle!
Quasits, Kobold Guardians, Imps,
Kobold Commandos and a Kobold Witch Doctor will be scattered through the
ranks of Kobolds shooting fire arrows at every member of the party they
spot. After the battle, search the area and make sure you grab a piece
of the KURTULMAK'S
CRYSTAL SHARD for you will need this later on in your adventure.
Also found here is a wooden stake which you may very well need to put
Dace Sontan to rest once and for all.
|
Yuan-Ti Room
|
|
|
You will quickly be greeted by an angry mob of Yuan-Ti along with a Yuan-Ti Mage as you make your way into
this room which as four doors against the far wall that you will need to pay attention to in the near future. Weave your magic and swing your weapons
at the foul beasts as they linger towards you and put them to the dirt!
Now each door has a picture on it, that being a Djinni, a Troll, an Umber Hulk and a Mind Flayer but you will not be able
to open these passages until you find the picture that goes along with those found on the walls.
The locations of these pictures are at the following places:
Behind each picture is the creature that represents it and you will have to battle each one if you use any of the
paintings to open the doors. The trouble is worth your while for there are two very nice swords one can acquire here.
Be wary if you make your way up the corridor from this room for it is littered with Werewolves who will rush to attack
any who make their way into the passage.
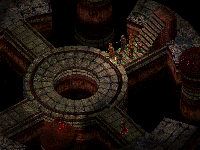
| Spellhold - Level 5 - Minotaur Massacre |
|
|
Minotaur Massacre
|
|
|
The sound of beasts drinking from the pool of water here will be broken as you step forth into the room and the Minotaurs will
turn to face you with their horns turned towards you. Their snarls will be enough to tell you that you're in for a battle so do your best in bringing these foul
beasts down for a final rest!
The pool is of interest if you take your time exploring the bottom of it with your hands for there are some items
hidden at the bottom that will help you while you're in Spellhold. Take special interest in the 2 MITHRIL TOKENS
as these can later be used in the Golem Goodies Room. Also found here is the MIND FLAYER PAINTING which is needed to
open the pictured door back in the Yuan-Ti Room and a very important item, the MINOTAUR HORN which is used to place
on the minotaur statue found at Bodhi's Encounter to gain access to the stairs leaving Spellhold.
Do make sure you take the time to also search the statues in this room for they also hold items that are important to you for this level. Those items would be
the remaining paintings needed for the Yuan-Ti Room and another 2 MITHRIL TOKENS as well as some
items that the party can make use of.
| Spellhold - Level 5 - Golem Goodies Room |
|
|
Golem Goodies Room
|
|
|
Stone Golems will quickly rush towards your front lines as you lumber forward into this room as they prepare to defend
against intruders from gaining access into the room beyond. Battle well and take them down, which you shouldn't have any trouble with after exploring Athkatla
and its surrounding areas.
It is the circular room beyond that one should take a large interest in and also one that I missed the first time I came through
here. It was only by doing a final check that I realized, in all the dark shadows in the room, that there was a passage leading to the circular room. So don't miss
it like I did for if you do and you leave Spellhold you'll never get to use all those tokens you've been finding all over the place!
|
Golem Goodies Room
|
|
|
Finally, it is this circular room that you will find a use for those tokens I spoke of. Now the more tokens you have may be considered
a good thing, the less the bad but really, it is the middle ground that interests most people when they come into this room. Here is a list of items you will receive by using
the tokens on the machine:
| TOKENS |
ITEM |
| 5 Tokens |
Boots of Grounding |
| 10 Tokens |
Boots of the North |
| 15 Tokens |
Boots of Speed |
| 20 Tokens |
Jester's Chain +4 |
In most cases, 15 Tokens will do the trick as the Boots of Speed are an excellent addition to any front line fighter's
attacks and defenses.
| Spellhold - Level 5 - Bodhi's Encounter |
|
|
Bodhi's Encounter
|
|
|
Prepare yourself for this battle because it is here you will meet up with Bodhi and she isn't going to be very pleased to see you
running around, especially near the exit to this foul place. The Gauths and Minotaurs will add another level of strategy that you will have to deal with during this
battle as they come down the hallway and if you do things right, you should be on your way out of this hellish place once and for all!
Now the Minotaur Statue needs two MINOTAUR HORNS to open the doors
that will be your exit and finding them will be your job. The first horn can be found in the Minotaur Room while the second can be found in The Cubby Room. Using
these two horns on the Minotaur Statue will open the doors.
Search the area, including the hallway to the left of the room for some items of interest.
| Spellhold - Level 5 - The Cubby Room |
|
|
The Cubby Room
|
|
|
Another group of Minotaurs make this room their home and they will not be very pleased at being disturbed by your party so be ready to
weave your magic and swing your weapons. There are some very useful items in here, especially one for a promising mage and one can also find one of the MINOTAUR HORNS
needed to open the door in the room where Bodhi's Encounter will take place. Also found in the mix are 2 MITHRIL TOKENS as well as other
items of interest.
| Spellhold - Level 5 - The Four Statues |
|
|
The Four Statues
|
|
|
Four statues, two on left wall and two on the right make this room a very interesting place
to explore due to the fact each statue offers something the other does not. Most importantly are the Haste and Heal statues that
can not only help a dying member, but also speed them up to attack and flee even quicker. The other two statues aren't as friendly,
one will make your character slow while the last will shoot forth a lightning bolt that will cause them some severe damage.
So remember this place if you need a helping hand because it can be a life saver for more than
one member of the party as well as keep those who would normally cast healing spells full of memorized spells for when you'll need them
the most!
| Spellhold - Level 5 - Secret Chamber |
|
|
Secret Chamber
|
|
|
To gain entrance to the Secret Chamber one will have to pull the lever from the room
right across the hallway, which will slide open the wall and give you access to the foul beasts within as well as some very useful items for the
party.
|
Secret Chamber
|
|
|
Once the lever is pulled, be ready for battle because from the very room will come a few Trolls, Werewolves and even a
Spirit Troll or two just to keep you at bay and your hands off the treasure they have been guarding. It's not a troublesome battle, but a battle nevertheless
and you should always be ready for anything.
Search the chamber and move on.
| Spellhold - Level 5 - The Trapped Chest |
|
|

The Trapped Chest
|
|
|
The Clay Golems standing in this room at first may cause you to be more on the defensive than usual but as you step onto the cobbled floor
you'll realize they haven't been activated yet! The fine saying of "You can look, but don't touch" has a very strong meaning here when it comes to the locked chest
in the middle of the room. Leave it alone and you can walk out untouched. Open it and you're in for a hair raising experience.
The door you came through will be locked and shall remain so during the duration of this battle against the Clay Golems, who will come to life
if you put your grubby hands on the chest. Until you remove the Clay Golem threat, the door will not swing open, by force, picking it or casting Knock so you'd best be ready for
battle if you want what's inside.
|
The Tests
|
|
|
Once you have placed both MINOTAUR HORNS on the Minotaur Statue to open the doors leading
out of this hellish place, you will then walk through the Tests of Madness, of Sanity and Clarity.
Your first arrival will place you in a battle with a Spore Colony or two and once you've removed this threat will your true
tests begin. These tests will be a series of riddles which you will have to answer and below you will find the order in which you will receive them along with the
answer to each one.
FIRST TEST
"'twas in the wood that I got it, so I sat down to seek it. I could not find it no matter how hard I looked, and so I took it home with me.
What is it?"
|
The Tests
|
|
|
Answer: A Splinter
SECOND TEST
You will find yourself in a room which has 4 apparitions in it after you've answered the
first question correctly. You will want to take note of the table in the middle of the room for searching it, you will find a
Cloak of Reflection. Do this before you answer the next riddle.
"It is better than the best of things and worse than the worst of things. You love it more than life. You fear it more than death.
The rich have need of it, the poor have it in endless supply."
Answer: Nothing or something
THIRD TEST
"It runs as it will but never does it walk. There is a mouth to see, but never does it talk. A bed it surely owns, but never
does it sleep. Possesses it a head, but not a one that weeps."
Answer: A River
|
The Tests
|
|
|
FOURTH TEST
"I make you weak at the worst of all times, but in the end I keep you safe.
You'll sweat in my presence even as you grow cold. I dwell the weak, rally
the brave, but without me, who could tell the difference."
Answer: Fear
FIFTH TEST
"It brings back the lost as though never gone, shines laughter or tears, with light long since shone. A moment to make, a lifetime to
shed, valued when, but lost when you're dead."
Answer: Memory
Finally, after answering the fifth and final riddle you will be at the last step of leaving the foul dungeons
below Spellhold and be on your way to returning to its upper levels. First though, you will have to deal with a few Spectral Trolls and Trolls
who are mulling around an altar praying to their beloved God.
|
The Altar
|
|
|
Clean the floor up with their blood is what I say! Bash their skulls in, rip out their teeth and hang
their claws around your neck! While you're at it, do grab hold of the GIANT TROLL'S HEAD
which you'll want to take to the altar and use. Place the GIANT TROLL'S HEAD into the altar which
you will receive in return a nice magical club for bashing more Trolls and foul beasts who dare step in your way!
This is it brave warrior. You have made your way out of the dungeons of Spellhold and can now resume your journey in hunting
for Jon Irenicus!