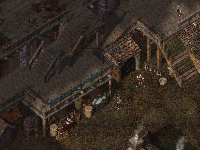
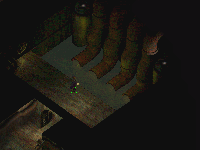
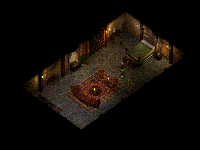
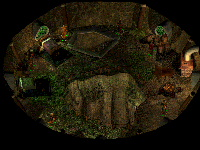
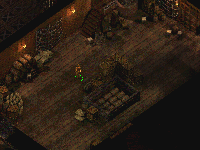
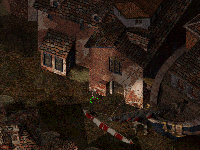
Simply take a walk here from any other district within Athkatla.
"Ah, 'tis my home, the district I have lived in since I was a child. Born on the streets I was, which is why
I know so much about Athkatla and it's a good thing you let me be your guide" Torn Vien says.
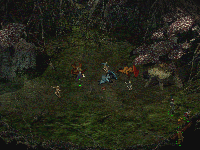
"You will find many shady characters in the Slums District my friend, those you may think you can trust will be
the ones who will turn their blade on you the first chance they get, so tread lightly and be on your guard regardless of who you are speaking
with.
Folks say the Slums District smells of poverty, slavery and theft which I cannot deny but between all the killings,
sales of slaves and theft of goods the Slums District is a great source of underground information and with the right guide, like myself, you will
find the Slums District has more good to offer you than bad.
We'll start by exploring this street and I'll take you to all the notable places found here" says Torn Vien as he dashes ahead.
| The Slums District - Shops |
|
"There ain't much to choose from, but if you wait around long enough for the sun to begin to settle in the west, some of my good
pals will come out for the night. Their goods may not be as wide in variety as say those in the The Slums District, but those goods you do come
across will be very useful indeed!"
Item Prices:
-
These are based on a party with a Reputation of (10) and may vary for each individual.
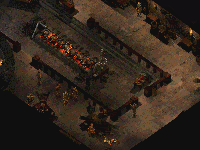
| The Slums District - Shops - Nightly Goods |
|
|
Nightly Goods
|
|
|
The Nightly Goods may not be the best deal in Athkatla in terms of items being sold, but for an Assassin it is a worth while wait for the
sun to dip over the western horizon for this storekeep has an excellent supply of poisoned throwing daggers, as well as other smaller items for sale.
These shady items, obviously stolen and brought through the black market are worth a look for other members of the party too.
| ITEMS OF INTEREST |
COST |
| Poisoned Throwing Daggers [40] |
2gp |
| Sling +2 |
1,102gp |
| Heavy Crossbow +1 |
4,410gp |
| Arrows of Fire [40] |
882gp |
| Studded Leather Armor +2 |
6,615gp |
| Potion of Healing [11] |
110gp |
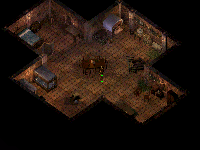
| The Slums District - Shops - Bernard's Gifts |
|
|
Bernard's Gifts
|
|
|
Bernard can be found within The Copper Coronet at the back end of the tavern, minding his own business and
doing his best to run his own shop of goods that you can purchase items from. There is a wide variety of merchandise that you'll find
yourself going over and what he has for sale is worth the look.
Bernard's most worth while investments for the party would be the Long Sword known as "The Blade of Roses" +3 and
the Battle Axe "Azuredge" +3, excellent weapons to equip those in your party with early on in the game. Saving gold for them though would be
your own set back.
| ITEMS OF INTEREST |
COST |
| Small Shield +1 |
1,850gp |
| Dagger +1 |
225gp |
| Long Sword +1 |
1,062gp |
| Short Sword +1 |
680gp |
| Long Sword "Blade of Roses" +3 |
5,950gp |
| Mayler's Arm +2 |
2,975gp |
| The Sleeper +2 |
2,975gp |
| Light Crossbow of Speed |
5,100gp |
| Sling of the Seeking +2 |
1,530gp |
| Battle Axe "Azuredge" +3 |
2,975gp |
| Sword of Flame +1 |
4,307gp |
| Potion of Heroism |
680gp |
| Potion of Healing |
63gp |
| Potion of Regeneration |
865gp |
| Potion of Infravision |
85gp |
| Potion of Strength |
297gp |
| Protection from Normal Missiles Scroll |
1,297gp |
| Grease Spell [Wizard] |
85gp |
| Armor Spell [Wizard] |
85gp |
| Burning Hands Spell [Wizard] |
85gp |
| Charm Person Spell [Wizard] |
85gp |
| Color Spray Spell [Wizard] |
85gp |
| Blindness Spell [Wizard] |
85gp |
| Chill Touch Spell [Wizard] |
85gp |
| Chromatic Orb Spell [Wizard] |
85gp |
| Larloch's Minor Drain Spell [Wizard] |
85gp |
| Blur Spell [Wizard] |
170gp |
| Detect Evil Spell [Wizard] |
170gp |
| Strength Spell [Wizard] |
170gp |
| Web Spell [Wizard] |
170gp |
| Agannazar's Scorcher Spell [Wizard] |
170gp |
| Ghoul Touch Spell [Wizard] |
170gp |
| Vocalize Spell [Wizard] |
225gp |
| Slow Spell [Wizard] |
225gp |
| Skull Trap Spell [Wizard] |
225gp |
| Vampiric Touch Spell [Wizard] |
225gp |
| Dire Charm Spell [Wizard] |
225gp |
| Ghost Armor Spell [Wizard] |
225gp |
| Incendiary Cloud Spell [Wizard] |
4,250gp |
| Summon Fiend |
4,250gp |
| Simulacrum Spell [Wizard] |
4,250gp |
| Summon Efreet Spell [Wizard] |
2,550gp |
| Spell Sequencer Spell [Wizard] |
2,550gp |
| Prismatic Spray Spell [Wizard] |
2,550gp |
| Spell Turning Spell [Wizard] |
2,550gp |
| Cacofiend Spell [Wizard] |
2,550gp |
| Chain Lightning Spell [Wizard] |
1,700gp |
| Restoration Spell [Wizard] |
637gp |
| The Slums District - Shops - Arledrians Black Market Goods |
|
|
Arledrians Black Market Goods
|
|
|
Hidden on the second floor of Gaelan Bayle's Home is where Areledrian and his black market goods can
be found and purchased if you have the coin to spare. There are a few items here worth taking note of, so take a look and decide which
one best suits your current party.
Worry not if you do not have the coin to purchase anything yet for you can always return.
Word.
.
.
I'm trying to space this out with dots and I didn't realize the graphic was so bloody big! Gawd damn it already!
| ITEMS OF INTEREST |
COST |
| Arrows +2 [40] |
532gp |
| Arrows of Piercing [40] |
2,660gp |
| Acid Arrows [40] |
1,064gp |
| Bolt of Biting [40] |
3,990gp |
| Bolt of Lightning [40] |
1,596gp |
| Bullet +2 [40] |
798gp |
| Amulet of Protection +1 |
3,990gp |
| Wand of Frost |
851gp |
| Oil of Speed |
665gp |
| Potion of Agility |
399gp |
| Antidote |
133gp |
| Potion of Absorption |
798gp |
| Potion of Extra Healing |
598gp |
| Potion of Perception |
465gp |
| Potion of Master Thievery |
532gp |
| Potion of Fire Strength |
1,330gp |
| Protection from Electricity Scroll |
997gp |
| Improved Invisibility Spell [Wizard] |
665gp |
| Non Detection Spell [Wizard] |
399gp |
| Chain Mail +1 |
2,128gp |
| Splint Mail +1 |
2,660gp |
| Medium Shield +1 |
1,995gp |
| Quarterstaff +1 |
695gp |
| Short Sword +1 |
1,064gp |
| Scimitar +1 |
1,330gp |
| Katana +1 |
1,330gp |
| Two Handed Sword +1 |
1,197gp |
| Spear +1 |
1,330gp |
| Flail +1 |
2,660gp |
| Mace +1 |
1,995gp |
| Morning Star +1 |
2,394gp |
| Heavy Crossbow +1 |
3,990gp |
| Light Crossbow +1 |
3,325gp |
| Composite Long Bow +1 |
3,325gp |
| Long Bow +1 |
2,128gp |
| Short Bow +1 |
465gp |
| Sling +1 |
133gp |
| Battle Axe +1 |
1,995gp |
| Dagger +1 |
399gp |
| Halberd +1 |
2,660gp |
| Dart +1 [10] |
399gp |
| Poisoned Throwing Dagger |
1gp |
| Restoration Scroll |
997gp |
| Gem Bag |
266gp |
| Glasses of Identification |
2,660gp |
| Traveler's Robe |
798gp |
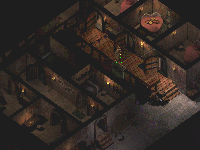
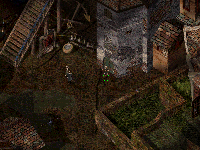
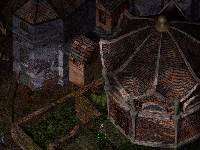
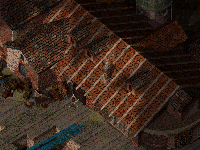
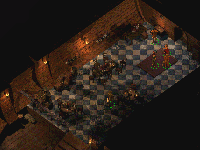
| The Slums District - Taverns - The Copper Coronet |
|
|
Outside of The Copper Coronet
|
|
|
A bustling, smoke filled tavern will greet the entire party as they step
through either the front door or the door that leads to the back end of The Copper Coronet and the smell
of roasting meat over the pit fires will hit your noses welcoming you inside. Laughter and loud discussions
also make the atmosphere here and you'll want to find yourself a table to sit at so you can explore and meet
those who can also be found in here.
Companions and close friendships can be made while you are here, that being
Anomen, Korgan and Nalia
who each would be happy to join your current party and take you on a journey for adventure, fortune and fame. Now
each companion will take you in a different direction, each of their own quests enjoyable and worth looking in to,
so if you only have room for one of them, don't worry because you can always return later on and speak to them
when you're good and ready.
|
Front end of The Copper Coronet
|
|
|
A few things that might take your interest while you're enjoying your ale and mead would be the fighting pit
found within the common room and not that of what the slavers battle in for their very lives, which I will get to shortly. Now what Jaheira
warned you of, if you have her in your party, is very true as darker characters make this their hangout so be prepared for any trouble. If you're not
careful with your own tongue, you may very well find yourself in the common room fighting pit with Amalas, who will challenge you to a duel and Surly will be more
than happy to set this up, making bets and collecting his coin from the patrons who bet for and against you. This battle of course, is not something you should concern
yourself and is a great confident booster for those who go in to face Amalas, just go easy on their friends when you walk past with a bragging smile.
If you happen to have Mazzy in your party, you will be insulted by Gorf in front of The Copper Coronet
but she ignores him. That is, until he attacks someone in the street which makes Mazzy go crazy on him and challenges Gorf a duel in these very pits. Very well, off
they shall go! In the pit, Mazzy looks very cute in her red flannel underwear and a short sword while Gorf is looking her down with a smile of evil. Smite this foul
evil and be on your way.
Thanks to Erran for this info!
|

Back end of The Copper Coronet
|
|
|
Of course, once you've dipped your blade through Amalas and have your own blood boiling, perhaps taking a relaxing time with a lovely female
or male would suit your fancy, which can be given to you upstairs in the privacy rooms if one so wishes. Garoll, who can be found sitting around one of the tables
at the back end of The Copper Coronet, will be more than happy to discuss the entertainment one can find for a mere 5gp, directing you to Lehtinan who runs the establishment.
Lehtinan, once you've gone over to speak with him about the shady shady things that go down within The Copper Coronet, will give
you personal permission to explore the privacy rooms up above, or enjoy the slaver fighting pits, where nobles and other customers go to watch foul beasts
battle slaves against their own will. Exploring your own personal desires, be it sexual pleasure or a blood bath of dying slavers is your choice, either one or
the other or perhaps both.
|
Privacy rooms of The Copper Coronet
|
|
|
So you're looking for a little night cap
are you? Well, you've definitely come to the right place, climbing the
wooden stairs to these warm and welcoming privacy rooms, where a trick
or two can be turned into your personal favour and enjoyment. Speak with
Madame Min, she can be found standing near the privacy rooms which beds
are shaped in the form of hearts. Now how romantic can that be? Madame
Min will offer Jenthan if you are playing a female character and Cominda
if you are playing a male character, the cost being 50gp for the evening
with either of those offered to you.
|
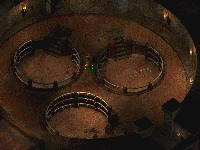
Slaver Pits of The Copper Coronet
|
|
|
The Slaver Fighter Pits on the other hand
aren't as personal, or at least not for you, as slaves are brought out
into one of three pits to face the caged beasts that are let out into
the same pit. Here you will watch and either be disgusted or enjoy the
blood bath that will follow as unequipped slavers will run around calling
for help while they are ripped to pieces. Watching this may interest you
to find out exactly where the slavers are being kept for if you are warm
of heart, setting them free will not only get you some experience, but
also start a chain of events that will stop these barbaric battles and
open your eyes to the underground network of slave trading within Athkatla.
Now I'm not sure about you, but no one
deserves to be made a slave, be it a good aligned character or an evil
aligned person for all one wants is their own freedom, which basically
puts all slaves on the same level and exploring the deeper parts of The
Copper Coronet with your party would benefit everyone.
|
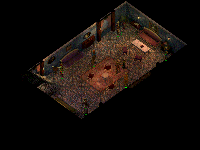
The Forbidden Hallway
|
|
|
Getting to The Slaver Pens can be done by simply taking a stroll down The Forbidden Hallway, which none of the guards
who will be encountered in the The Slaver Pens won't be too happy to see you so you will have to battle your way through them once you arrive there. Now while you're
walking down the hallway, it is best you keep your eye on the left hand wall, for it is here two secret doors reside, one to a more lavished, pillow filled room
where two nobles can be found. The second is a little more interesting than the first, for it leads to the sewers found underneath The Copper Coronet and exploring these
after you've finished up with The Copper Coronet would be something to make a mental note of.
|
The Slaver Pens
|
|
|
You will be immediately questioned and
then eventually attacked by the slaver guards who work back here to keep
people like you, those who enjoy to sniff around where they are not welcomed,
out of here. Draw your blade and keep your eye on any guards who are letting
arrows fly in your direction because they could prove to be deadly at
such an early point of your adventure. It would be best, once you have
fouled the slaver guards, to speak with Hendak, a slave found in one of
the cells who will ask of you to free the slaves, but to do that you will
need to locate and of course slay, the beastmaster who is holding the
BEASTMASTER
KEY which will unlock each cell. You'll want to make your way
around and through the Slaver Pits to where the beastmaster keeps all
his pets and meet him.
|
The Beastmaster Cells
|
|
|
You will most definitely want to give
yourself enough room to fall back once you have met the beastmaster because
all those locked cells you currently see will soon be opened when the
beastmaster attacks the party, knowing his duty, he isn't about to just
hand over the BEASTMASTER
KEY like a good man would. No, he's going to attack you with
everything he has and that includes all the beasts he has collected during
this time within The Copper Coronet which includes
a Grizzly Bear, a Mutated Gibberling, a Panther, a Black Bear, a Leopard
and a Minotaur along with The Beastmaster and his pet cat Tabitha. This
could prove to be a difficult fight if you find yourself in the middle
of these cages, surrounded with no route of escape, could soon find yourself
a slave too or even worse, dead at the laughing beastmaster's bloody boots.
Battle hard for the slaves that are being held against their will, get the BEASTMASTER KEY and
free the slaves, most importantly Hendak, who you will learn is the real owner of The Copper Coronet and he is just furious that his establishment has
been turned into an entertainment joint for slaves to be butchered and slain for gold. Follow Hendak, who will make his way through The Copper Coronet and help
the revolting slaves battle the guards who will dot the place, giving them a route to escape and enjoy the show Hendak puts on for you, as his blades rip through
Lehtinan as he takes control of The Copper Coronet once again.
Speak with Hendak once the battle is over, so he may thank you for freeing him and the rest of the slaves, but he will also speak of
a place where other younger slaves are being kept, children held against their will away from their families. Hendak believes this place can be gotten to by visiting
the dry docked boat just across the way, on the east side of The Slums District, but also mumbles that the sewers could lead to this location as well. Those sewers
are the very sewers you found the entrance to on your way to freeing the captured slaves, so once you've rested, healed and memorized any needed spells, I think it's
about time you ready your blade and help free these children Hendak spoke of.
Before heading out and on to other matters you may have at hand, show Hendak your support and purchase some ale from his selection as the
prices are very reasonable and ale after such a task always goes down nice and easy.
| DRINKS |
COST |
ROOMS |
COST |
| Amnish Ale |
1gp |
Peasant |
1gp |
| Bitter Black Ale |
8gp |
Merchant |
6gp |
| Golden Sands |
4gp |
|
|
| Shadow Dark Ale |
1gp |
|
|
| Suz Ale |
7gp |
|
|
|
 |
|
|
| The Slums District - The Copper Coronet | Tavern Statistics... |
- NPC Nalia who will join your party
- NPC Anomen who will join your party
- NPC Korgan who will join your party
- Lehtinan [Notable Information Learned]
- Madam Nin
- Priss
- Rumar
- Virah
- 2 Peasants
- Zaviera
- Yarin
- Llynis
- Copper Coronet Guards
- Bouncers
- 2 Tavern Patrons
- 4 Noblemen
- 2 Ruffians
- Amalas
- Surly
- Boy
- Tiana
- Garoll
- Tavern Drunk
- 2 Commoners
- Unger Hilldark
- Salvanas
- Bernard
- Frankie
- Announcer
- Sleeping Dwarf
- Amalas [1,800xp]
- Copper Coronet Guards [14xp]
- Lehtinan [48,750xp] * Upon Quest completion
- Grizzly Bear [1,150xp]
- Mutated Gibberling [14xp]
- Tabitha [650xp]
- Panther [420xp]
- Black Bear [200xp]
- Leopard [270xp]
- Minotaur [3,000xp]
- BeastMaster [2,000xp]
- Gorf [5,000xp]
- 2x Potion of Extra Healing
- Potion of Invisibility
- Potion of Agility
- Potion of Insight
- Gloves of Pick Pocketing
- Bastard Sword +1, +3 vs Shapeshifters
- Short Bow "Tuigan" +1
- Melf's Acid Arrow Spell [Wizard]
- Charm Person Spell [Wizard]
- Grease Spell [Wizard]
- Death Fog Spell [Wizard]
- Summon Nishruu Spell [Wizard]
- Identify Spell [Wizard]
- Stone to Flesh Scroll
- Protection from Electricity Scroll
- BEASTMASTER KEY
LITTLE BEAR
Quest from Hendak to get the BEASTMASTER KEY
Quest from Hendak to free the slaves from the Slavers Stockade House
Quest from Lord Jierdan to journey to Windspear Hills
Quest from Nalia to help with De'Arnise Hold
Quest from Korgan to help recover the BOOK OF KAZA from the Graveyard District
Quest from Anomen to help with the Noble Order of the Radiant Heart
3 exits/2 floors
|
|
|
|
|
|
|
|
|
Found underneath The Copper Coronet, these small twisting passages of sewers will not only lead you through
human waste and rat infested tunnels, but also to the younger slaves that Hendak spoke of. Your journey while down here will consist of
facing Hobgoblins, Kobolds and other single creatures that make the sewers their home.
|
Exploring the sewers
|
|
|
Besides getting your boots covered in filth, a more interesting exploration will tickle your fancy for beneath
the city streets there lays an old, forgotten and hidden item, a two-handed sword to be exact which is very well worth your time and effort
in finding. Its comical nature when it's being held makes for good laughs but also is an excellent weapon when held in the hands of someone
who is very proficient with a two-handed sword.
While you are exploring the sewers and making your way to free the younger slaves, take the time to figure out the
puzzle that will unlock the secret of the two-handed sword and get it in your grasp and I will get to each part of the puzzle in a moment and help
you attain this weapon but first, the sewers themselves.
|
Checking around the corners
|
|
|
Traps also riddle the sewers here and
you will want to walk carefully and keep an eye out for anything out of
the ordinary that could be a trigger for the sewers are protected well
from people like you snooping around. Now I didn't have a thief when I
was down here and although I survived the perils I came across, having
a thief would have made things so much easier on myself. Eventually, I
had to return to The Copper Coronet and pick up
Yoshimo just so he could disarm a few traps
that I couldn't get past without taking a lot of damage.
The areas found in the sewers are small and quick to pass through, one of the reasons I have not gone into full detail
in the rooms descriptions and item notes, rather all will be found at the end of this section placed all together. Most people mention that the sewers is
the place to come for the "talking sword" rather than it is the route you can take to help free the younger slaves because we all know a sword that can
talk is much more important than freeing children! Well, you'd think gamers would think like this, but alas, many don't give a damn so on that note, let
me point you in the direction to attaining this awesome weapon.
|

Otyugh's Sewage Room
|
|
|
Lurking your way into this smelly, slime infested
circular room will introduce you to a very large and hungry Otyugh whose
tentacles will lash out towards the party in hopes of wrapping around one
or more members to take a bite on. Of course, you're going to slice through
his long tentacles and put your blade through its stomach to end its hunger
once and for all! Also keep a sharp eye out for the Mustard Jelly, in fact
there are two of them who will slowly slide towards you. Once the Otyugh
and both Mustard Jelly's have been slain, do search this place for you will
come across an OLD
SHIVERING HAND, one of the four items required to solve the puzzle
later on in your explorations.
|
The Lover's Ring
|
|
|
Next in your journey and after battling through
some Hobgoblins to get here, will you come across this room where a skeleton
of a human hangs on one of the walls. Water drips onto the skull and around
its now empty eye sockets giving the illusion that the skeleton is actually
crying. Search the skeleton slowly as not to disturb it and grab THE
LOVER'S RING, another one of the four items required to solve
the puzzle for the two-handed sword which will only ultimately help you
in saving the younger slaves, the main reason as to why you are down here,
or at least I hope you are.
|
Kobold Defense
|
|
|
This passage finally comes to a dead end but
one that is occupied by a good number of Kobolds, a Kobold Commando and
a Kobold Shaman, all will attack the party in full force, their fire arrows
soaring through the tunnels to their targets. Weave your hands to cast your
spells, draw your blade and let loose on your bows and take them all down,
which you definitely want to do for you'll want to get your hands on THE
SHAMAN'S STAFF, one of the four items that you can find which
will only help you when you come face to face with the puzzle.
|
Quallo and his blood brother
|
|
|
The last in searching for the items needed for the puzzle can be found in this room, but watch how you get here for going down
one passage will get you assaulted by many Hobgoblins while the other a very foul and deadly trap that can harm the entire party if one is not careful where they
step.
Quallo will greet you here, a slim man who has made this room and the sewers his home, his blood brother and friend turned into a
Carrion Crawler long ago and Quallo has not been the same since. The last and final item for solving the puzzle can be found here and it also took me a while to figure
out exactly where it was located and what I had to do to get my hands on it. It is a great brain teaser, for it was something that I never thought of until I retraced
my steps a second time. Think well, for I shall not spoil it for anyone due to the fact it was such a great devilish location for the last item needed. Good luck in
your search for THE BLOOD that is needed.
|
A strange puzzle...
|
|
|
This oddly looking room, which looks like four waterslides next to each other, perhaps making you wonder
when someone will come flying out in their bathing suits. Alright, maybe not that odd, but odd enough that there is something more to
each pipe. Engraved on each one is a short riddle and with each riddle there is an item to go along with each answer and placing these items
in the correct order will reward you with "Lilarcor" the Two-handed Sword +3, one awesome weapon!
Not only is the damage 3d6 normally, but also supports a +3 THAC0 and will connect to any foul beast that needs
a +3 or better weapon to deal damage. Thought that was it? Well, this sword is intelligent, meaning you will soon find that it speaks and you
can have a conversation with it and in the hands of Minsc, who is proficient with Two-handed Swords, this is a match made in heaven! Minsc
sits around and talks to a hamster and loves to fight. "Lilarcor" loves to slice and dice. Unless your own character is proficient with two-handed swords,
I suggest no other but Minsc use this ever deadly weapon.
The list below tells you where each item for each pipe can be found and what they are:
OLD SHIVERING HAND is used on the 3rd pipe and is 1st in the order.
THE LOVER'S RING is used on the 1st pipe and is 2nd in the order.
THE BLOOD is used on the 2nd pipe and is 3rd in the order.
THE
SHAMAN'S STAFF is used on the 4th pipe and is 4th in the order.
Not placing these items in the proper
order will have some dire consequences, so don't slip up!
|
Myconid Mystery?!
|
|
|
I always wondered where a place like this can be found in Athkatla without being disturbed as it
was. Am I the only one who feels this area is out of place, with its Myconids, bushes, trees and green grass? This location is
gotten to by heading up the flight of stairs just a short ways away from where the hanging skeleton and THE LOVER'S RING
was found. Bothering to climb these stairs is only worth the experience gained from slaying the Myconids that will be found here, otherwise your best bet would
be to continue exploring the sewers.
The other set of stairs found here will lead you to the Slaver Stockade House.
|
|
|
|
| The Slums District - The Sewers | Area Statistics... |
- Quallo [Notable Information Learned]
- Hobgoblin Captain [420xp]
- Hobgoblin Elite [34xp]
- Hobgoblin Shaman [94xp]
- Hobgoblin Warrior [34xp/each]
- Hobgoblin Archers [34xp/each]
- Mustard Jelly [2,000xp/each]
- Kobolds [6xp/each]
- Kobold Commando [34xp]
- Kobold Shaman [150xp]
- Carrion Crawler [974xp]
- Otyugh [5,000xp]
- Myconid [420xp/each]
- 20 Arrows +1
- Potion of Agility
- 4x Potion of Healing
- 4 Fire Arrows *
- Two-Handed Sword "Lilarcor" +3
- OLD SHIVERING HAND
THE LOVER'S RING
THE BLOOD
THE
SHAMAN'S STAFF
Quest to solve the puzzle for the Two-Handed Sword "Lilarcor" +3
* Arrows of Fire vary depending on how many the Kobolds shot at the party *
3 exits
|
|
|
|
|
|
|
|
|
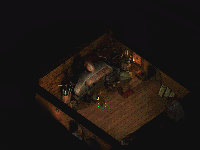
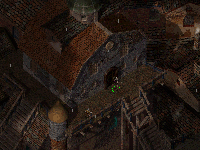
| The Slums District - Houses - Gaelan Bayle's Home |
|
|
Outside of Gaelan Bayle's House
|
|
|
|
|
First floor of Gaelan Bayle's Home
|
|
|
|
'tis here you will eventually make your way to when you come to The Slums District as an individual by the name
of Gaelan Bayle will introduce himself to the party, knowing some information of where Imoen is being held. His offer
of course comes from The Shadow Thieves and for 20,000gp the location of your companion can be learned. Now this may seem like a very steep price, even I
had my eyes pop out at the thought of trying to save so much gold, but soon enough you'll realize that Baldur's Gate 2: Shadows of Amn is much like your
sick Dungeon Master's Monty Haul game and getting this amount won't take long at all. I'm not trying to take away your own enjoyment of the game, simply
making a point from a Dungeon Master's point of view.
Anyhow, the choice of course is yours and Gaelan Bayle will even point you in the direction of where to find some work so you
can start saving this large amount while his nephew Brus will also give you a helping hand with information as well as show you the way to The Copper Coronet.
|
Second floor of Gaelan Bayle's Home
|
|
|
Above, you will meet Arledrian who also works for The Shadow Thieves and as a sign of their loyalty
in helping you find Imoen, their offer to look through their goods should be taken up on. Arledrian
sells some good equipment which can help you start off and get your adventure moving and for a full list of his items, refer to the
Shops portion of The Slums District. Be careful too, for sticky fingers may get you a little burnt so remember, items
you don't hold aren't yours so be ready to pay the price if you think otherwise.
Grub no like eye spy games! Grub bash you head in!
| The Slums District - Houses - The Jansen Home |
|
|
Outside The Jansen Home
|
|
|
|
|
First floor of the Jansen Home
|
|
|
|
Could those be turnips you smell the closer you get to this building where Kaylie Jansen can be found
standing around? In fact, they are as the entire Jansen family has a business in selling turnips and they'll stop at nothing to describe
them and show you how useful they are in any situation.
Inside, the smell will become stronger as
patches of turnips can be found growing everywhere, the entire rooms covered
in green plants and grass, a Druid's delight no doubt. Unfortunately, if
you're looking for Jan Jansen he can't be
found here as he is busy pushing his turnip sales in The
Government District but feel free to look around and get to know the
family.
|
Basement of The Jansen Home
|
|
|
|
|
Top floor of the Jansen Home
|
|
|
|
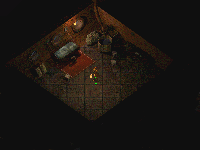
| The Slums District - Houses - Borinall's House |
|
|
Outside Borinall's House
|
|
|
|
|
Inside Borinall's House
|
|
|
|
The door to this house is locked and will have to be picked by a good lock picking thief or with
a knock spell cast by a wizard and once inside, you'll come to find that the occupants of this home are nowhere to be found
at the moment. Searching the house is your choice.
The only time the occupant, Borinall will be home is if you are looking for the DAWN RING
and he will be here with some of his mugger scum. During your conversation, do not tell him you are a Priest of Talos if you are not one for the God will strike you down with a lightning bolt before the battle
begins. Simply take back the DAWN RING by force and return to The Temple of Lathander
for your reward.
| The Slums District - Houses - Slavers Stockade House |
|
|
Outside the Slaver Stockade House
|
|
|
The dry docked ship found on the east side of The Slums District is the place where many slaves are
moved in and out of The Slums District to their owners or new locations for trade. Gaining entry of course will have to be done
by trudging through the muck in the sewers, found beneath The Copper Coronet which will lead you to one of the back rooms of this
dry docked ship.
The Slaver Guard who makes his stand at the door will bar your entry if you attempt to enter
through the front door, which is also locked. I do suggest you make your way through the sewers under The Copper Coronet due to the
experience you will gain going through the slim covered passages.
|
Captain Haegan's Quarters
|
|
|
It is Captain Haegan's Quarters that lead to the sewers found beneath The Copper Coronet and also where you will make your
way up to if you are coming from the sewers and he won't be very happy to see you after you set free Hendak and had his partner Lehtinan killed. For your
meddling, prepare to go to battle with Captain Haegan and his men as well as those loyal to him from the Temple of Cyric!
Stagger your troops around the area to keep from being pelted by the Slaver Guards who will launch their arrows towards your
general direction and also make sure you get to the priest of Cyric as soon as you can in hopes to spoil his spells. A few held and charmed members of the
party won't do you much good and things can quickly turn into their favour, so act quickly!
Once these pests have been taken care of, search the room and also keep an eye out for any wooden boards that seem to be an inch
or so higher than the rest of the ground, you don't want to walk yourself into a trap only to be killed after the battle.
With your own confidence raised and Captain Haegan disposed of, move on to explore the rest of the building and help free the
younger slaves that can be found within by using HAEGAN'S KEY that can be
found on his corpse once he has been taken care of.
|
The Troll Pit
|
|
|
With HAEGAN'S KEY in your grasp, you will be able to now
unlock the Slaver Cells as well as the Troll Pit, which is holding two very nasty and hungry Trolls, who were just about to feast on the young
girl hiding in the corner and because of you, this girl may have another chance at life, that is if the Trolls don't eat you first! Launch everything you have at them until they drop
and remember, as their bodies spasm on the wooden floor, finish them off with either fire or acid so they don't come back to attack you while you're helping the young girl.
Frightened and alone this girl is, so find it in your heart to part with 100gp so to get her on her way to safety and her tale of the brave warriors who
freed her from her cage will gain the party a reputation point as well as experience, which is fully covered under the Quests portion of The Slums District.
|
Slaver Cells
|
|
|
|
|
Slaver Cells
|
|
|
|
Now on your way forward, don't forget to unlock the slave cells, where the younger children slaves are being held
and HAEGAN'S KEY will do the job nicely here to set them
free and then be on your way to the storage room but be ready for there are a few battles you will be fighting once you get there.
|
Back Storage Room
|
|
|
Watch your step as you walk in here as there is a very nasty trap that could get you into some serious
trouble if the Yuan-Ti from the Cabin Room is alerted or the Slaver Guards and Slaver Wizards in the Eating Room as the trap spans out
the entrance from the hallway you'll be coming from.
Now, if you're quick enough you can make
it out of the room just as the trap is sprung and timing this action with
say, the Yuan-Ti or the Slaver Guards and Wizards on your tail, you could
seriously do some damage to them instead. I used this tactic to take care
of the Slaver Wizards, who were only going to annoy my party if they were
able to cast their spells. So, rather than disarm the trap right away,
I rubbed an Oil of Speed on my Half-Orc Barbarian Grub, ran into the room,
made fun of them and darted back out. Immediately I was attacked and they
got up from the tables they were sitting at and engaged their chase.
Just as they came through the door into the storage room, I darted over the trap and back down the hallway towards
the slaver cells, triggering the trap and having it spray them all. Those that fail their saving throw should be dropped to sleep or blinded by
the color spray trap and those that make their save only ran into my front line of fighters and own spell casters. Those who are sleeping, are
easily killed and are no threat to you, while those who saved and are blinded receive a -4 to their own attack rolls, making hitting you even
tougher and their own dexterity bonuses don't apply as they can't see you to dodge your blade.
|
The Eating Room
|
|
|
|
|
Cabin Room
|
|
|
|
How you decide to deal with the threats around this area is up to you, but I found
things a little easier on my party by using the trap to my own advantage rather than looking at it as a threat
to them.
|
Food Cabin
|
|
|
Remember to always be looking for traps that could be your downfall after any battle and before, especially
when you think the last place a trap would be is near the place you'd sit down for a meal or perhaps where you'd
store items on a shelf or two.
Sylvus Moonbow greets all those who take the time to find these little fill in notes through the Baldur's Gate 2: Shadows of Amn Online Solution
|
|
|
|
| The Slums District - Slaver's Stockade House | House Statistics... |
- Slaver Guards [420xp/each]
- Priest of Cyric [1,400xp]
- Captain Haegan [580xp]
- Trolls [1,400xp/each]
- Yuan-Ti [1,500xp]
- Slaver Wizard [480/each]
- Completion of Hendak's Quest
- 20 Fire Arrows
- 9 Arrows +1 *
- 4 Darts +1
- 1 Acid Arrow
- 3 Potions of Extra Healing
- 3 Potions of IceDust
- 1 Potion of Healing
- Potion of Frost Giant Strength
- Oil of Speed
- Composite Long Bow +1
- Studded Leather +2
- Cloak of Protection +1
- Wand of Fear
- Shield Spell [Wizard]
- Shocking Grasp Spell [Wizard]
- Sleep Spell [Wizard]
- Chill Touch Spell [Wizard]
- Lightning Bolt Spell [Wizard]
- Protection from Evil Scroll
- HAEGAN'S KEY
* Arrows +1 may vary depending at how many were shot at the party *
|
|
|
|
|
|
|
|
|
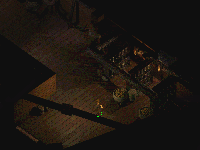
| The Slums District - Houses - Derelict Home |
|
|
Outside of Derelict Home
|
|
|
|
|
Inside of Derelict Home
|
|
|
|
An empty house normally if you come across this house early on in your adventure but eventually, it is here you
will come if you are looking for Baron Ployer, someone you will meet later on in your adventure and if you haven't come across him yet, I suggest you
keep from reading on as it could very well spoil your own enjoyment of the game. I have darkened the text below and if you wish to read on, simply
highlight it with your mouse and the text will appear.
>
Ployer will come to this house after he has
poisoned Jaheira and be hiding ž in hopes that you and the party don't
find him but if you followed some of the advice of those after she was cursed,
you will have met Terrece, a mage who had helped Ployer unfold his schemes.
Now Terrece doesn't particularly care for Ployer and will openly say this,
which could work to your advantage if you have paid Terrece and his men
to kill Ployer for you. This is the route I took but will also cost you
2,000gp.
How you go about removing Ployer is up
to you. If you didn't pay off Terrece and his men, you will have to face
them with Ployer in this house and if you have paid them off, they will
immediately kill Ployer once they appear keeping to the arrangement you
made for the 2,000gp cost.
<
Searching the room will reveal nothing but a rolled up parchment, a note to the occupant who would normally live here.
| The Slums District - Temples - The Temple of Ilmater |
|
|
Outside of The Temple of Ilmater
|
|
|
|
|
Inside the Temple of Ilmater
|
|
|
|
One will be able to find healing, prayers
and assistance inside this building, which has become a temple dedicated
to Ilmater. It is watched over by the Priest of Ilmater and two beggars who do their work cleaning the small area and
learning about Ilmater herself.
The services are fair and you can get whatever you need here from the Priest himself.
| AVAILABLE SERVICES |
COST |
| Cure Light Wounds |
50gp |
| Cure Serious Wounds |
150gp |
| Cure Critical Wounds |
200gp |
| Heal |
750gp |
| Dispel Magic |
200gp |
| Remove Curse |
200gp |
| Slow Poison |
150gp |
| Raise Dead |
800gp |
| Resurrection |
1200gp |
| Greater Restoration |
750gp |
| The Slums District - The People |
|
This is a full list of all People found within The Slums District.
- Nalia [NPC and De'Arnise Hold Quest]
- Korgan [NPC and Book of Kaza Quest]
- Anomen [NPC and Noble Order of the Radiant Heart Quest]
- Lehtinan [Notable Information Learned]
- Quallo [Notable Information Learned]
- Kaylie Jansen [Notable Information Learned]
- Gaelan Bayle [Notable Information Learned]
- Historian [Notable Information Learned]
- Hendak [Free the Slavers Quest]
- Lord Jierdan [Windspear Hills Quest]
- Ployer [Quest Completion]
- Areldrian
- Tat
- Tot
- Ma Jansen
- Uncle Gerhardt
- Captain Haegan
- Shopkeeper
- Bernard
- Madam Min
- Priss
- Rumar
- Virah
- 14 Peasants
- Zaviera
- Yarin
- Llynis
- Copper Coronet Guards
- Bouncers
- 2 Tavern Patrons
- 4 Noblemen
- 2 Ruffians
- Amalas
- Surly
- 4 Boys
- Tiana
- Garoll
- Tavern Drunk
- 8 Commoners
- Unger Hilldark
- Salvanas
- Bernard
- Frankie
- Announcer
- Sleeping Dwarf
- Amalas
- Cohrvale
- Slaves
- Town Crier
- Bregg
- Amnish Soldiers
- Girl
- 2 Halfling Women
- Waylane
- Tirthold
- Homeless Woman
- 2 Halfling Men
| The Slums District - All Quests |
|
This is a full list of all Quests found within The Slums District.
| SAVE 20,000GP FOR GAELAN BAYLE |
This quest is given to you immediately as you enter The
Slums District for the very first time by a fellow named Gaelan Bayle
who works for the underground organization known as The Shadow Thieves,
who will help you locate your companion Imoen.
Now there is no limit on how long you can take to save up this large amount,
but do know that other guilds may give you an offer that would be hard to
turn down, this from the rival guild known as The Vamps, so keep an eye
out for their messengers.
Saving up 20,000gp for Gaelan Bayle will advance you to Chapter 3 and ally yourself with the Shadow Thieves Guild.
| HELP FREE HENDAK AND THE SLAVES |
Hendak can be found in one of the slaver cells at the back end of The Copper Coronet and it is he who asks you to help release them by killing
the Beastmaster and retrieving the BEASTMASTER KEY
from his slain corpse. Using this key will free Hendak and return The Copper Coronet to its rightful owner as Hendak will seek out Lehtinan and
run his sword through the man.
Freeing Hendak will give the party 7,500xp and an additional 48,750xp when Hendak kills Lehtinan and takes control of The Copper Coronet once again.
| HELP FREE THE YOUNGER SLAVES FROM THE SLAVER STOCKADE BUILDING |
A job well done at setting free Hendak and the slaves found inside of The Copper Coronet and because of this, Hendak will ask one more thing of you and that is to help
free the children found in the Slaver Stockade Building, who can be reached by the sewers underneath The Copper Coronet. Battling hard through the sewers to the Slaver
Stockade Building, one must clear it out and make sure everyone gets out alive.
Saving all the slaves from the Slaver Stockade Building will give the party 2,500xp per slave, an additional 3,500xp for a young girl slave, a reputation bonus of +1 if you give 100gp to one
of the saved girl slaves, plus another reputation bonus of +1 when you return to Hendak, who will also give you a Bastard Sword +1, +3 vs Shapeshifters.
This is a very worth while journey early on in your adventure.
| KILLING PLOYER AND REMOVING THE CURSE ON JAHEIRA |
Although this quest isn't specific to The Slums District
as it overlaps more than one, it is the final stage of the quest that you
will receive if you happen to come across it in The Docks District, a curse
placed on Jaheira. Ployer can be found hiding
out in the Derelict Home and it is there that you will have to go to finish
him off.
Removing the curse will earn you 21,250xp points and an additional 19,750xp if you had Terrece and his men kill Ployer for you.
| FINDING WELLYN'S LITTLE BEAR |
An overlapping district quest will have you return to The
Slums District once you receive this quest from Wellyn who is found
in The Graveyard District. Wellyn tells you that a man by the name of Llynis,
found in The Copper Coronet has his LITTLE
BEAR and that without it his soul cannot rest.
Getting the LITTLE BEAR from Llynis will let you put Wellyn to rest
once you return to The Graveyard District.
| LORD JIERDAN'S QUEST TO THE WINDSPEAR HILLS |
Seems like Lord Jierdan's homeland is in some trouble and he is looking for some brave warriors like yourselves to give him a hand and solving the
problems that have befallen Windspear Hills. Lord Jierdan can be found standing around at the back end of The Copper Coronet, shouting aloud of a job
he has if anyone is interested.
Accepting this quest will place Windspear Hills on your map.
| THE PUZZLE WITHIN THE SEWERS |
Finding all four parts needed to solve the puzzle in the sewers underneath
The Copper Coronet will get you one step closer
to getting your hands on "Lilarcor", the Two-Handed Sword +3, an intelligent
sword that is able to converse with those who wield it. The item locations
are noted below.
OLD SHIVERING HAND can be found here.
THE LOVER'S RING can be found here.
THE
SHAMAN'S STAFF can be found here.
THE BLOOD can be found here.
Solving this puzzle will earn the party "Lilarcor", the Two-Handed Sword +3.
| NALIA'S QUEST TO DE'ARNISE HOLD |
Found with The Copper Coronet, Nalia will come to the party in search of aid, her home, De'Arnise Hold has been invaded by a large number of
Trolls and Yuan-Ti and she needs your help. Nalia will be more than happy to travel with the party back to the hold and is a worth while addition to the group if you
need a mage or thief.
Accepting Nalia's quest will place De'Arnise Hold on your map.
| KORGAN'S QUEST FOR THE BOOK OF KAZA |
Korgan, a grumpy old dwarf for hire, would be more than eager to join your party if you'd help him locate the BOOK OF KAZA, said to
be within a tomb found in The Graveyard District. This quest will eventually bring you back full circle to The Slums District, where you'll battle those who have it, found on the roof of The Copper Coronet.
Completion of this quest will earn the party 6,234xp which is the total of Shagbag and his men. You will also recover the BOOK OF KAZA.
You will be meeting up with Travin here, who can be found by the north east district exit standing near the buildings and only during the night
so don't come looking for him when the sun is up. This quest is given to you by Dawnbringer Sain of The Temple of Lathander
and Travin is your contact to learn of where the DAWN RING has been taken.
You will learn by either forcing him to tell you the location or by paying 400gp that the DAWN RING
can be found in Borinall's House who you will have to kill along with his mugger scum to retreive it.
Return to The Temple of Lathander for your reward.
Unger Hilldark isn't exactly what he makes himself out to be, who can be found at the back of The Copper Coronet sipping
away on his dwarven ale. In fact, he is a dealer of ILLITHIUM but
most recently, his shipment was stolen by Neb, a scoundrel found in the Bridge District.
Unger Hilldark will direct you to his home, where you will end the hunt for the ILLITHIUM needed
to complete the task for The Temple of Helm
Make your way to Neb's house and get the ILLITHIUM that you need.
| The Slums District - All Items |
|
This is a full list of all Magical
Items found within The Slums District their locations can be found
by viewing the rooms separately through the solution as they are also covered
in the Room Statistics.
NOTE: Store bought items are in this list.
- Sling +2
- Arrows of Fire [40]
- Studded Leather Armor +2
- Small Shield +1
- Dagger +1
- Long Sword +1
- Short Sword +1
- Long Sword "Blade of Roses" +3
- Mayler's Arm +2
- The Sleeper +2
- Light Crossbow of Speed
- Sling of the Seeking +2
- Battle Axe "Azuredge" +3
- Sword of Flame +1
- Potion of Heroism
- Potion of Healing
- Potion of Regeneration
- Potion of Infravision
- Potion of Strength
- Arrows +2 [40]
- Arrows of Piercing [40]
- Acid Arrows [40]
- Bolt of Biting [40]
- Bolt of Lightning [40]
- Bullet +2 [40]
- Amulet of Protection +1
- Wand of Frost
- Oil of Speed
- Potion of Agility
- Antidote
- Potion of Absorption
- Potion of Extra Healing
- Potion of Perception
- Potion of Master Thievery
- Potion of Fire Strength
- Protection from Electricity Scroll
- Chain Mail +1
- Splint Mail +1
- Medium Shield +1
- Quarterstaff +1
- Short Sword +1
- Scimitar +1
- Katana +1
- Two Handed Sword +1
- Spear +1
- Flail +1
- Mace +1
- Morning Star +1
- Heavy Crossbow +1
- Light Crossbow +1
- Composite Long Bow +1
- Long Bow +1
- Short Bow +1
- Sling +1
- Battle Axe +1
- Dagger +1
- Halberd +1
- Dart +1 [10]
- Poisoned Throwing Dagger
- Restoration Scroll
- Gem Bag
- Glasses of Identification
- Traveler's Robe
- Incendiary Cloud Spell [Wizard]
- Summon Fiend Spell [Wizard]
- Simulacrum Spell [Wizard]
- Summon Efreet Spell [Wizard]
- Spell Sequencer Spell [Wizard]
- Prismatic Spray Spell [Wizard]
- Spell Turning Spell [Wizard]
- Cacofiend Spell [Wizard]
- Chain Lightning Spell [Wizard]
- Restoration Spell [Wizard]
- Grease Spell [Wizard]
- Armor Spell [Wizard]
- Burning Hands Spell [Wizard]
- Charm Person Spell [Wizard]
- Color Spray Spell [Wizard]
- Blindness Spell [Wizard]
- Chill Touch Spell [Wizard]
- Chromatic Orb Spell [Wizard]
- Larloch's Minor Drain Spell [Wizard]
- Blur Spell [Wizard]
- Detect Evil Spell [Wizard]
- Strength Spell [Wizard]
- Web Spell [Wizard]
- Agannazar's Scorcher Spell [Wizard]
- Ghoul Touch Spell [Wizard]
- Vocalize Spell [Wizard]
- Slow Spell [Wizard]
- Skull Trap Spell [Wizard]
- Vampiric Touch Spell [Wizard]
- Dire Charm Spell [Wizard]
- Ghost Armor Spell [Wizard]
- Improved Invisibility Spell [Wizard]
- Non Detection Spell [Wizard]
- Melf's Acid Arrow Spell [Wizard]
- Charm Person Spell [Wizard]
- Grease Spell [Wizard]
- Death Fog Spell [Wizard]
- Summon Nishruu Spell [Wizard]
- Identify Spell [Wizard]
- Color Spray Spell [Wizard]
- Shield Spell [Wizard]
- Shocking Grasp Spell [Wizard]
- Sleep Spell [Wizard]
- Chill Touch Spell [Wizard]
- Lightning Bolt Spell [Wizard]
- Protection from Evil Scroll
- Stone to Flesh Scroll
- Protection from Electricity Scroll
- Protection from Normal Missiles Scroll
- 2x Potion of Extra Healing
- Potion of Invisibility
- Potion of Agility
- Potion of Insight
- Gloves of Pick Pocketing
- Bastard Sword +1, +3 vs Shapeshifters
- Short Bow "Tuigan" +1
- 20 Arrows +1
- Potion of Agility
- 4x Potion of Healing
- 4 Fire Arrows
- Two-Handed Sword "Lilarcor" +3
- Potion of Freedom
- Elixir of Health
- Antidote
- Potion of Extra Healing
- War Hammer +1
- 20 Fire Arrows
- 9 Arrows +1
- 4 Darts +1
- 1 Acid Arrow
- 3 Potions of Extra Healing
- 3 Potions of IceDust
- 1 Potion of Healing
- Potion of Frost Giant Strength
- Oil of Speed
- Composite Long Bow +1
- Studded Leather +2
- Cloak of Protection +1
- Wand of Fear
| The Slums District - All Monsters |
|
This is a full list of all Monsters
found within the rooms on all levels of The Slums District,
their locations can be found by viewing the rooms separately through the
solution as they are also covered in the Room Statistics.
- Some Thugs
- Some Hobgoblins
- Some Slaver Guards
- Some Kobolds
- 1x Carrion Crawler
- 2x Slaver Wizards
- 2x Trolls
|
|
|
|
|
While passing through The Slums District, I have gone through many members
and different mixes of characters, some leaving behind within The Copper Coronet,
while some were just passing through while others have never seen the city, choosing
to leave them outside of Athkatla where I found them.
It is here I met up with a good friend of mine
Nalia who joined
my party along with Korgan
during my very first visit to The Copper Coronet.
Anomen on the other
hand ran into Minsc
and the two of them broke out into an argument
having Anomen tuck
tail and run his Noble Order of the Radiant Heart
tard out the back door crying all the way. Good
riddance to that arrogant man who thinks everything
revolves around the Noble Order of the Radiant
Heart. If he only knew.
Yoshimo has come to make The Copper Coronet his home as I have only had one
use for him since my escape from Irenicus' Dungeon and that was to help me disarm some traps found within
the sewers beneath The Copper Coronet. Otherwise, he's been drinking his sorrows away by the bar.
My stay within The Slums District has also been memorable, as I met a nice wench up in the rooms above and ... *censored*
Grub also got into a pit fight within the common room but ended up waxing his opponent, spitting in his face
too and saying "I own you, human!"
The rest of The Slums District adds even more flavour as I ran across slavers, beggars and general trouble and is
always an interesting district to return to time and again.
| 01 |
Grub |
Barbarian |
Half Orc |
| 02 |
Valygar |
[Stalker] |
Human |
| 03 |
Minsc |
Ranger |
Human |
| 04 |
Jaheira |
Fighter/Druid |
Half Elf |
| 05 |
Korgan |
[Berserker] |
Dwarf |
| 06 |
Aerie |
Cleric/Mage |
Avariel |
|
|
|
|
|
|
|
|
|