Your swords will meet others as the sound of metal will be your greeting to the Windspear Hills
as the party is attacked by a group of Ogres mixed with an Ogre Mage, Gnoll Elites and a baby Wyvern. Crackling magic lit up the area around me as I battled
these foul beasts and as I, you too will learn that these foul beasts were not beasts at all! It seems like they were in fact knights of the most Noble Order
of The Radiant Heart and surely they will seek your death once word spreads that you killed their own knights.
|
Search the rocks for the hidden treasure!
|
|
|
Garren Windspear will be the one to pass on this information to you and I suggest you take up his offer on staying at his cabin,
where one can rest and be free from harm as he sends word back to the Noble Order of the Radiant Heart of this confusion and see if he can set things straight.
Head to his cabin and enjoy what he has to offer.
You will also find yourself roaming around
the Windspear Hills and you will come across
many Orcs, Orc Archers, Ankhegs, Mutated Gibberlings, and Werewolves.
Keep your blade drawn and your spells at the ready in case you come across
any or all of these foul beasts!
| Windspear Hills - Houses - Garren Windspear's House |
|
|

Outside of Garren Windspear's Home
|
|
|
|
|
Inside of Garren Windspear's Home
|
|
|
|
Situated near rising rocks and boulders, Garren
Windspear's Cabin can be found here, nestled close to a large tree whose
branches hang above the roof giving it another protected canopy above your
heads. Its wooden porch has not seen much use as no chairs or tables rest there
although signs of it being used before are clearly visible. A solid, wooden
door is slightly ajar and it creeks on rusted hinges as the breeze blows
through its opening. Entering would be your best bet, if you wish to speak
with Garren Windspear and meet his daughter Iltha.
Inside the cabin is warm and smells of
fresh bread which you spot sitting on a wooden table in the middle of
the room, the coals from the fire pit still glowing from use. Barrels
line the walls, as do boxes and shelves stacked with many jars while a
bedroom lies just beyond.
Garren Windspear and his daughter Iltha
can be found within and Garred Windspear will greet you as you come through
the door and ease your mind that word was sent to the Order of the Radiant
Heart explaining what is happening and that it would be in your best interest
to look further into these matters in case charges were laid. At this
point Plath Rededge and some Bandits will appear and Iltha will be whisked
away to the depths of Firkraag's Dungeon and Garren Windspear will need
your help, if you wish to give it.
After the battle, speak again with Garren Windspear and learn where the location of Firkraag's Dungeon may lay
and go on this quest, you won't regret it.
|
 |
|
|
| Windspear Hills - Garren Windspear's House | House Statistics... |
- Garren Windspear [Notable Information Learned]
- Iltha
- Quest from Garren Windspear to help find his daughter Iltha
- Orc Bandits [150xp/each]
- Plath Rededge [3,500xp]
- No items found
|
|
|
|
|
|
|
|
|
|
Dryad's Grove
|
|
|
If you recall the Dryads from Irenicus'
Dungeon and happened to get the ACORNS
they wanted you to return to the Windspear Hills
where Vaelasa can be found, this is where you'll have to go. If you don't
have the ACORNS
and missed to acquire them, you're out of luck here my friend.
Having the ACORNS and handing them over to Vaelasa will free
the three Dryad's found in Irenicus' Dungeon, their trees will now grow again within the Dryad's Grove as well as free Ulene, Elyme and Cania.
|
Outside of Firkraag's Dungeon
|
|
|
|
|
The Entrance
|
|
|
|
Looming serpent statues coil towards the sky, their heads positioned in a downward glance,
their own eyes watching you as you approach as if ready to strike when you're not looking. Ancient and hand carved blocks with
runic designs make the base of where these serpent statues rest and the cobble stone floor shows no sign of age. It was if you
were standing on the day of its completion.
The wind creates music as it twirls into the large opening, whistling between holes in the rock
face and rustling the leaves above, the cave entrance large and wide open as if you were walking into the mouth of some giant
beast.
Walking forward, you will be greeted by
a pack of Hobgoblins who will pelt you with arrows, spells and metal,
led by a large Hobgoblin Captain who barks his harsh orders towards the
party. Quickly deal with these pests and let's begin to explore the inner
depths of Firkraag's Dungeon.
|
|
|
|
| Windspear Hills - The Entrance | Area Statistics... |
- Chieftain Digdag [420xp]
- Hobgoblin Shaman [420xp]
- Hobgoblin Wizard [120xp]
- Hobgoblin Archer [34xp/each]
- Hobgoblin Elite [94xp/each]
- Hobgoblin Captain [34xp]
- 18 Arrows +1 *
- 2x Healing Potions
- Protection from Normal Weapons Spell [Wizard]
- Cure Serious Wounds Scroll
- 2 exits
- * Arrows +1 vary depending on how many the Hobgoblin Archers shot at the party *
|
|
|
|
|
|
|
|
|
|
The Cavern
|
|
|
The echoes of your footsteps return to you as
they bounce off the side of this very large and vast cavern, stalagmites
and stalactites rest unmoving in this forest of rock. The sound of water
dripping into pools of water can be heard, coming from somewhere within
the cavern and the very faint sound of deep breathing can also be made out
if one stops to listen.
Also found within this large cavern are more Hobgoblins, who will do their best to foil your
plans, breaking the tranquil sounds of the cavern with their own high pitched screams of terror! Much like the first batch
you encountered at The Entrance, they should prove no match for the strength of your own group. Clean your
blades and move on to explore the other areas of interest found within this large cavern.
|
The Pit
|
|
|
The sound of deep breathing will get louder
as you approach this pit but before you will be able to explore and look
into the darkness below, you will have to take care of the Ogrillons who
make their home here. There are not too many of them and should be fairly
easy for your party to chop into tiny pieces or large ones depending on
how you like to slice and dice.
The Pit itself is large, dark and very deep and this can be tested by dropping a stone down
into the darkness and listening to it bounce off the walls and end in a strange, deep low rumbled grunt. Something is down there, but
getting to it will be difficult from this location. You will have to find another way down, so continue your exploration.
| Windspear Hills - Level One - Vampire Mist Lair |
|
|
Vampire Mist Lair
|
|
|
It begins to get damper as you make your way
towards this open arched, smaller cavern and the sound of water dripping
into pools below can clearly be made out here and as your own light shines
into this place, you are greeted by quick moving wisps of mist. Their yellow
eyes and mist-like claws target you immediately so a quick defensive stance
would be best here as they move towards you. If you have anyone able to
cast Negative Plane Protection, I suggest you have them weave the spell
on to your front line fighters for these foul creatures of the night can
and will suck your levels dry if you let them!
Battle hard and battle quick for once
they start to go invisible, this battle will become harder as they are
able to strike at you with their claws and level drain you. Be prepared
and it would be best to have three or four Negative Plane Protections
at the ready because this will not be the last you see of undead with
the ability to drain in here.
Search the pool afterwards, you may find something worth your while.
| Windspear Hills - Level One - Kamikaze Kobold Area |
|
|
Kamikaze Kobolds Area
|
|
|
Casting Protection from Fire would benefit one party member, who can turn the tables and become
your own Kamikaze to take out the Kamikaze Kobolds that are being ordered around by Ruhk the Transmuter, who is guarding the
door that will take you deeper into Firkraag's Dungeon. Now with this little bit of information, you can cast protections on
to one member of the party, Protection from Fire, Fire Resistance to name two of the more popular ones that will work and simply
walk them towards the Kobolds, who will explode into a ball of fire around you. It is best to keep other members of the party
far away when this happens and once the Kobolds have exploded, it is your entire party that gets to take on Ruhk the Transmuter
without worry of Kamikaze Kobolds running around exploding everywhere.
Ruhk isn't much to worry about, or at least I found and the only real damage he will do to you and
your party is if you are not prepared for his Kamikaze Kobolds and they deal a lot of fire damage to the entire party at once.
Simply having the entire party surround Ruhk and hack at him will have his body lying on the cavern floor in no time. Search
his body and take whatever you find of interest and open the door. It's to the lower levels we go to next!
|
Welcoming Room
|
|
|
A warm welcome will greet you as you make your way down the stairs as Orcish Archers will be waiting
to make the party into one giant pin cushion. Arrow after arrow will be launched in your direction from the very walls they can
be found behind. Get back there as quickly as possible to engage them in close combat because you'll be nothing more than dead
ducks if you stay in your place!
Now for myself at this point, I was in trouble because I had no thief in my party as Nalia was arrested
and I also had no Knock spells memorized for Aerie but luckily, Minsc was able to deal damage to them because of his two-handed sword,
which was able to extend through the openings in the walls and connect with the Orc Archers. This took a while and also caused me a
few headaches, but I managed well enough until they were all dead.
Search the area and be on your way.
|
|
|
|
| Windspear Hills - Welcoming Room | Room Statistics... |
- Orc Archers [1,000xp/each]
- 70 Fire Arrows *
- * Arrows vary depending on how many the Orc Archers shot at the party *
- 2 exits
|
|
|
|
|
|
|
|
|
|
Empty Room
|
|
|
This empty room can easily be a life saver if you're having trouble with the Orc Archers from
the Welcoming Room or any other foul beasts that you may come across while exploring Firkraag's Dungeon Level Two.
I used this area many times to fall back and retreat from the hoards of undead found in the Vampire Lair as their
numbers when I encountered them were just too many to deal with all at once and don't worry, you'll be meeting them soon enough! I also slept in here, it was empty
to begin with and I figured if the foul beasts knew it was empty, they wouldn't think twice about exploring it for brave warriors like myself!
|
The Hallway
|
|
|
Prepare to grit your teeth as you come through
the door into The Hallway for it is here that two
Stone Golems make their patrols, protecting the passages beyond from further
intrusion by a party searching for fortune and fame. If you've fought Stone
Golems before on previous adventures, these should be no problem for you
and if this is your first time, then make sure you have some magical weapons
to do damage to these creatures, bashing ones will do more damage than those
that slash or pierce.
This hallway has doors that will lead you deeper into the dungeon and I suggest you explore each one fully
to make sure you don't miss anything.
|
Derg's Room
|
|
|
The door opens into an unkempt room which
houses two orcs, Derg and Flaylan who would be best to talk with for the
information they have to give could prove useful to you and your party down
the road during your exploration. If you opt to kill them, that of course
is your choice as well, except you won't learn what they have to tell you.
Wisps of smoke curl around your feet as Sylvus Moonbow arrives to bid you a safe journey into the depths
of Firkraag's Dungeon!
| Windspear Hills - Level Two - Troll Cooking Room |
|
|
Troll Cooking Room
|
|
|
Is that the sweet smell of Elven Blood being made into a lovely soup? You'll have to get a lot closer to
the grill that the Troll will want you on if you wish to see exactly what he's cooking. Of course, I'm sure you don't want to join the Elves
and become part of the soup, so best you draw your blade and take care of this foul beast, and of course, his pals who will burst through
the closed door across the room.
A Hobgoblin Shaman, Hobgoblin Elite and
Hobgoblin Archers will make this battle a little more than you may have
originally thought it was going to be. The single Troll to take care of
now becomes a little more as arrows fly and magic is casted at the party.
Hobgoblins are Hobgoblins so removing this threat should be quick and
painful, on their part of course.
Once the battle is over, search the room
and move on. I did take interest in the Orcish Cookbook, but have found
no use for this, which I'd like to know if there is something to do with
this book.
A reader sent in a note about the Orcish Cookbook, saying
that by reading it, it gives some hints as to what type of creatures you will be facing
while exploring the depths of this dungeon.
Thanks to Baz for sending in this little nibble of information!
|
|
|
|
| Windspear Hills - Troll Cooking Room | Room Statistics... |
- Troll [1,400xp]
- Hobgoblin Shaman [420xp]
- Hobgoblin Elite [94xp/each]
- Hobgoblin Archers [34xp/each]
- 40 Bolts of Lightning
- 40 Arrows of Fire
- 13 Arrows +1 *
- 2x Potion of Healing
- Magic Missile Spell [Wizard]
- * Arrows vary depending on how many the Hobgoblin Archers shot at the party *
- 2 exits
|
|
|
|
|
|
|
|
|
|
Otyugh Room
|
|
|
A sick stench will greet you as you make your way into this circular room which is occupied by a single
Otyugh, much like the one you fought and slew in Irenicus' Dungeon some time ago. As it lumbers towards you
slowly, draw your blade, weave your magic and let loose your arrows and slay this poor creature, which has no chance in giving you any
trouble. It's weak, slow and out numbered.
Searching the room will reveal nothing, so you may as well just move on.
| Windspear Hills - Level Two - Hobgoblin Ambush |
|
|
Hobgoblin Ambush
|
|
|
You'll be seeing a lot of this hallway if you have to fall back from some of the foul beasts you will
encounter soon enough but for now, you'll have to take care of the Hobgoblin threat that is found here. Hobgoblin Archers, Hobgoblin Elite,
along side of a Hobgoblin Shaman and Hobgoblin Wizard will give you some slice and dice variety as you cleave your way through their ranks
and clear this threat out!
The doors on either side are closed, one leads to The Maze while the other leads directly
to the Vampire Lair.
|
|
|
|
| Windspear Hills - Hobgoblin Ambush | Area Statistics... |
- Hobgoblin Shaman [420xp]
- Hobgoblin Elite [94xp/each]
- Hobgoblin Archers [34xp/each]
- 35 Arrows +1 *
- Charm Person Spell [Wizard]
- Protection from Petrification Scroll
- * Arrows vary depending on how many the Hobgoblin Archers shot at the party *
- 2 exits
|
|
|
|
|
|
|
|
|
|
Vampire Lair
|
|
|
Darkness and evil line the walls of this room
and I suggest one be ready for a foul and deadly fight against the foes
you will face from this very room. Negative Plane Protection will be your
saviour as your front line fighters move in to do some heavy battle and
possibly attain some heavy losses without it. A wide variety of Vampires,
Mummies and Ghasts will greet you with undead smiles and moans, the Vampires
being the first on the scene because of their speed and mixed with the Ghasts'
ability to paralyze with their touch and the Mummies' rotting touch, you
could find yourself and the rest of those who are in your party, undead
yourself!
Remember, fire does extra damage to a Mummy based on their cloth, wrapped exterior so if you happen to have an archer in your ranks,
equip them with the fire arrows you can pick up from Welcoming Room and the Troll Cooking Room and create a walking torch
with these foul beasts!
Also, there is no shame if you have to fall back and cut their numbers up so you can deal with them on your own terms, and using
the rooms you've just come from for more room to battle is a great way to use your surroundings to your own advantage! Do your best without having any casualties
and let's be on our way.
Don't forget to search the room and look out for any possible traps lying about.
|
Shadow Crypt
|
|
|
This Crypt you are about to open is filled with Shadows, Wraiths and Greater Wraiths that have been
hungry for many, many years and fresh blood and flesh is exactly what they crave and if you open this door without casting Negative Plane
Protection on your front line fighters, you'll learn first hand exactly how hungry these beasts of darkness are as they drain level after
level as well as your strength.
Don't take any chances and remember, just because you can't see them right away doesn't mean there aren't more waiting
for you in the shadows as there are a good number of undead in this crypt so walk carefully!
|
The Maze
|
|
|
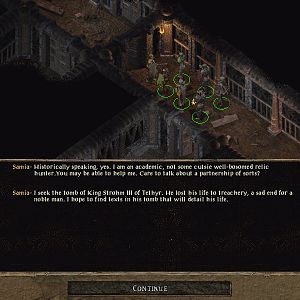
Samia will greet you as you open the door here, speaking of The Maze that lies
beyond and somewhere within the twisting and confusing passages lies a text detailing King Strohm's life, which is what she is exactly
looking for. Of course, helping her is up to you, but for what it's worth, a little extra dirt on your hands, some bloody swords and
experience never hurt any brave warrior, so take her up on it and dive into The Maze. Samia will hand over SAMIA'S KEY, which will
unlock the first door that will lead into The Maze.
Now The Maze itself
consists of many doors, some fake and some real, which will most definitely
keep you on your toes and I really enjoyed this because it added so much
more to its difficulty, because if you look at the map, you'll notice
yourself it's not much of a maze to begin with. That's why I'm not going
to go into detail telling you which doors you should open first because
that will take away the enjoyment of these shadowed rooms and corridors
beyond.
|
Lost in the Maze
|
|
|
Every door I was skeptical at opening because during my journey here I was without a thief, although I'm
not even sure one would have helped me in the situation I found myself in, as door after door greeted me and I could not tell one from the
other as my eyes darted around the rooms.
Eventually, I realized that by looking closely at each door, I could see the light of torches flickering from
the other side, telling me exactly which doors to open for if you open the incorrect one, nasty things can surely happen to you so be careful!
|

Lost in the Maze
|
|
|
Now you will cross many strange things while
you're in this maze and not only will the many doors give you trouble if
you don't know what to look for, so will the Gate Keepers who protect and
watch over six separate parts of the BURIAL
MASK which one will need to penetrate the deepest part of this
maze and that is King Strohm's Chamber where the very
items that Samia was looking for can be found.
Now without the completed BURIAL
MASK, the remaining Guardian that blocks your passage will
be undetectable to you or even magic and its invisible attacks will tear
through each and every member of your party one by one, so do keep an
eye out for these parts so you may complete the BURIAL
MASK and get into King Strohm's Chamber.
|
Valygar! Heads up!
|
|
|
Now other than the Gate Keepers who are
each guarding a piece of the BURIAL
MASK, you will also encounter a round eyeball creature who
has eye stalks coming out of its circular body and you will have to battle
hard if you plan to get past this foul creature and take it down as quickly
as possible before any harm comes to you. Your other threat is the Guardian
but once you have found all six parts of the BURIAL
MASK, the Guardian will be able to be seen and then and only
then will you be able to beat this magical beast down and be safely on
your way and into King Strohm's Chamber.
Once you've managed to make your way into the chamber, you may notice something is a little strange as this book that Samia wanted you to find for her is not in King Strohm's Chamber and rather
is a Dragon Scale Shield +2 and a Dragon Slayer Sword, which as soon as you take for yourself will introduce you to the true nature of this Samia. Prepare yourself for one great battle, because she lies in wait with her companions just outside of
the door and getting out for yourself won't happen since there are no exits in King Strohm's Chamber.
|
Flank! Flank!
|
|
|
This battle for me was so much fun because
I had my Half-Orc Barbarian Grub enter King Strohm's
Chamber alone to find out exactly what was inside of this tomb and
when I saw what I saw, you're damn right I was going to fight my way out
of that jam as it was five on one, a battle I won't ever forget because
of how things turned out! Now the rest of my party was waiting outside
of the room, but two corridors south, away from any harm in case something
happened, I knew Grub could take whatever was thrown at him, but I was
not ready for this at all! Immediately Minsc,
Valygar, Korgan
and Jaheira raced to get behind Samia and
her own gathering. Grub was already going after the closest member of
her party to engage and do as much damage before I got dealt a death blow.
The tactic was working well as some of Samia's party members headed down
to intercept my own party members and that battle began inside of another
room.
Now this is where I changed things up a bit because Kaol, the Mage of Samia's party was unleashing spell after spell while I was going toe to toe with Samia herself, that backstabbing bitch was going to feel what it was like
to be gutted by a crazy insane Half-Orc Barbarian! Korgan quickly slammed the door as Kaol's spell fell on Grub my own Half-Orc Barbarian character and the next thing I knew, I was Dire Charmed! With Kaol and now Grub after
my party, it was the best thing Korgan could do to save the other party members. I wasn't dead yet and Kaol wasn't about to go after me now that I was on his side and I thought I had it all figured out. With the door closed, Kaol could do no more harm and I could
finish the rest of the party until Grub and the Dire Charm spell ended.
Now that was my idea, but Kaol had other ideas because what I didn't realize is that Kaol could simply walk around the maze and come from behind, and he did just that. While I was concentrating the rest of the party's attacks on
Chak, Akae and Legdoril, Aerie was standing in the hallway, protecting the back end of the battle that I was winning already.
Things changed in a heart beat and the battle suddenly paused, I scratched my head as to what was going on, I didn't hit the spacebar and when I look at the screen, I see a notice that Aerie has spotted an enemy. I quickly move the mouse
to her location and who do I see? Kaol weaving his hands already attacking Aerie as he had just flanked my party after I had just flanked his! Beautiful! Aerie and Kaol now started to have a magic duel, back and forth until I was able to squeeze another member from
my own party away from the current battle they were involved in and dash to attack Kaol. Aerie though, stood her ground and was well protected due to her defensive spells she had at the ready and once they were up, the offensive battle began as Aerie assisted Valygar who quickly
showed up on the scene.
|
A sneak attack!
|
|
|
Shortly after, Grub returned to his normal state and I rushed him through the closed door to join what was the end of
the battle, Korgan, Minsc and Jaheira had done a great job finishing
off Chak, Akae and Legdoril while Aerie and Valygar brought down Kaol. Samia was taken care of
by Grub just before I was Dire Charmed myself.
Over all, this was one of the better battles and surprises that I had encountered in a while and hats off to the backstab to the party
by Samia because I had no idea at all. Make sure you've searched everything and everyone you came across in The Maze then be on your way. You are
finished with this place.
If you are looking to take on Samia on a different level, simply give her the key back and tell her that you no longer need it. This will
cause the events and the battle to happen outside of The Maze and perhaps make things a little easier on the party during this battle.
Thanks to Chris for pointing this out!
| Windspear Hills - Level Two - Guardian's Gates |
|
|
Guardian's Gates
|
|
|
This hallway is protected by an invisible
Guardian, who cannot be detected by normal means and who will
continue to attack you and do some severe damage to the party if you remain
here. The Guardian is fightable but you'll have to be able to see him to
be able to do so and that will require some exploring on your part through
the entire maze to locate all six parts to the BURIAL
MASK, which once completed, will give you the ability to see
The Guardian that guards this hallway.
Now if you want to pass up the experience you receive from killing the Gate Keepers and putting the BURIAL
MASK together, you can do so by casting True Sight or using an item that does the same. This method will also reveal The Guardian to the party and you'll be able to see him as if you had completed the mask
and were wearing it too.
Once this threat is removed, you may continue onward into King Strohm's Chamber.
The locations of all six parts of the BURIAL MASK can be learned by reading the Burial Mask Chambers information
provided below.
| Windspear Hills - Level Two - Burial Mask Chambers |
|
|
Burial Mask Chambers
|
|
|
Throughout your exploration of The Maze and its twisting passages and hidden secrets, you will
eventually run into a Gate Keeper, entombed in its crypt and also guarding a part of the BURIAL MASK, which you
will need to get your hands on if you wish to complete it and get into King Strohm's Chamber that is being guarded by The Guardian. Now every part you will be looking for can all
be found within The Maze so if you're searching for the last part or two, you will have to do a little more searching within these passages to find them.
|
Burial Mask Chambers
|
|
|
I have marked them out for you, the exact
location of where you can find each part of the BURIAL
MASK both in screen shots as you can see here as well as on
Firkraag's Dungeon Level Two Enlarged Map, so check that for references
as well if you're wandering about looking for one or all of them. The
Gate Keepers who guard each piece are not very difficult at all and I
found removing them fairly easy and trouble free, so hopefully you have
an easy time with them as well.
|
Burial Mask Chambers
|
|
|
You need not worry about having to put
all of the six parts of the BURIAL
MASK together for once you attain all six pieces, the BURIAL
MASK will be completed and can be found in your inventory.
This item should be then worn on the face of one of your party members,
which will allow them to see The Guardian who waits for you at the Guardian's
Gates.
Sylvus Moonbow was last seen resting here. If you have any information about his whereabouts, please contact Sorcerer at www.sorcerers.net
| Windspear Hills - Level Two - King Strohm's Chamber |
|
|
King Strohm's Chamber
|
|
|
This chamber is the deepest found within The Maze and is where King Strohm lies and is also
where Samia needed you to go for her and gain the items she requested found within. Oddly enough, the books she had asked you to find are not located
here and rather than bound pages, a shield and a sword can be found here instead. Not a bad exchange, but you will have to fight your way out of this
room if you happen to take these items from King Strohm's Chamber.
Samia has other plans, using you and the members of your party to help find all six parts of the BURIAL MASK
and gain entry into the last chamber in The Maze. She will turn on you here so be ready, the details of this battle can be read as well as viewed
here.
|
Werewolf Way
|
|
|
Snarls, barks and howls will echo down this hallway as the party opens the door as Werewolves bound down
the stone floor, their fur covered in matted, dried blood and their teeth long and sharp. Yellow eyes lock on yours and they'll show no
fear as they advance, so draw your weapon, weave your spells and launch those arrows to bring these foul beasts to the ground!
Once you've taken care of them, secure the hallway because you may want to use it to fall back into for there
is a large wave of beasts who will come from The Lost Well room.
|
The Lost Well
|
|
|
Hold your ground here for the door will be rushed by a large pack of Orogs and Stone Golems and if one isn't
careful, they may find themselves surrounded with no escape so be ready! Two strategies that I found useful was holding the rush off at the door
with my two most powerful front line fighters which was Grub and Minsc who battled hard and when both needed
to fall back, I knew that Korgan and Valygar could take their place while Jaheira
healed the first line of fighters. I used the hallway to my advantage as well, falling back into it so I could get better range with spell attacks as well as arrows if I
needed to switch it up a bit.
Before I knew it, I had a slew of dead Orogs lying all around as well as Stone Golems who had joined them, leaving The Lost Well
for me to explore safely and without worry, which I suggest you do the same. The well itself can be used, pulling up a bucket of water but that won't be all. It seems an Air Elemental
has also come up for the trip and once you've gotten the bucket up to the top, the Air Elemental will unleash itself on any who are near by. Battle hard to finish off this threat and search
the area and take anything of interest.
|
Forgotten Room
|
|
|
Silence is the only thing you'll find here as this room is bare and unoccupied by any foul beasts
or items of magical power. A single closed, wooden door exits this room along with the opening you have come through to get here.
Stairs lead downward on the other side of the door and will take you to Tazok's Room so prepare yourself and the
party for a pretty good duel.
Sorcerer loves goats! I prefer cats. -ed.
|

Tazok's Room
|
|
|
Down the stairs one will go to reach this
room, which holds Iltha, Garren Windspear's daughter, inside of a caged
cell but to get her out, you'll have to take care of the occupants in the
room. Orcs, an Orc Chieftain and Tazok will move from their seats, drawing
their weapons to stop you from entering the room but show them that they
stand no chance against you and your party by ripping their bodies in two!
Search the room afterwards and make sure you pick up the SEWER KEY which you should store for a while for this
very key is used for a door found within the sewers under the Temple District in Athkatla.
Now Iltha cannot be freed right away for you will need FIRKRAAG'S PRISON KEY, which can be found on Conster who
is a level deeper in Firkraag's Lair.
Once you have met Conster down in the lower depths, it is here he shall return to do battle with you, so be ready when you climb back up the stairs
and knock his block off to get FIRKRAAG'S PRISON KEY and free Garren Windspear's daughter Iltha.
|
Cavern
|
|
|
You'll spot the Captain, Gerg and a Troll
speaking here of the matters at hand and all three of them will get into
an argument and then initiate battle, the Captain obviously dropping the
two disloyal members of rank and Gerg and the Troll will soon hit the dirt.
I found it odd how after this battle, the Captain remained blue and nothing
could be done about it in terms of dialog options to turn him red against
the party, but I didn't really think too much of it and continued to let
him stand there.
Foul beasts feel Sylvus Moonbow's wrath!
|
Battling Hard!
|
|
|
What I found more interesting was the secret door found in the very rocks of the cavern, which lead to another smaller cavern
with two Stone Golems and an Adamantite Golem, the latter of the foul beasts the hardest to bring down. Now I had come across many messages already which
spoke of this Adamantite Golem and just how tough he was, so when I spotted him, I quickly darted off to save my game as I had done a lot of work clearing out
the areas to get where I was and wasn't about to lose all that time and effort.
.
|
Jaheira casts Cure Light Wounds
|
|
|
I quickly went through all my spells and prepared them, slept and began casting. This is how I defeated
the Adamantite Golem and if you have your own BATTLE TIPS! to add, feel free to send me a note, but please do not send
me notes that you attacked with a Sling +3 or any ranged weapon and stood outside of the doorway where the Adamantite Golem could not pass
through because it was too big for I want tales of brave warriors, not cowards. Unless the Adamantite Golem has the ability to strike
at the party members, I don't want to read it. I'm getting tired of people boasting about killing a Dragon with the Cloudkill/Fog of
War exploit and these only fuel to my own annoyance. Certainly you understand and do realize that these foul beasts are killable by normal
means or else they wouldn't be in the game in the first place.
Protection from Evil, Greater Malison, Protection from Normal Weapons, Bless, Doom, Chant,
Slow Poison, Defensive Harmony and Protection from Evil 10' Radius.
Now out of the spells above, Protection
from Evil, Protection from Normal Weapons, Slow Poison were all casted
on Grub, my Half-Orc Barbarian. I had heard the Adamantite Golem had a
Poison attack and wanted to be ready just in case this was true, but not
once was I hit with any poison attack during the battle. The rest of the
spells were targeted on Grub, but are radius effect spells so the other
members of the party were able to benefit from them as well. I drank a
Potion of Fire Giant Strength and rubbed an Oil of Speed all over me then
ended off with a Potion of Armor which lowers your AC base to 0.
My tactic now? Attack! Grub went straight for the Adamantite Golem while Minsc and Valygar took
care of each Stone Golem on their own and Korgan flanked the Adamantite Golem. Jaheira stood behind Grub and was ready with healing
spells, but in all honesty, she only had to cast it once and that was at the start of the battle where I wasn't too sure what to expect. I never had to heal again nor quaff any of my healing
potions as the Adamantite Golem rarely connected to me. Once the Stone Golems were done, it was just Minsc and Grub who were dealing damage to the Adamantite
Golem, Grub using the Flail of Ages +3 and Minsc using the talking Two-handed Sword +3.
|
The Golem's Resting Place
|
|
|
With a few good blows by both party members, the Adamantite Golem didn't have much of a chance and with all
the protective spells glowing around us, and the Doom spell cast on the Adamantite Golem, things were going our way since the start of this
battle. Character levels for this battle fell roughly between tenth and eleventh level with no loses on my first attempt.
Search this area once the Adamantite Golem has been taken down and enjoy the treasure you come across.
| Windspear Hills - Level Two - Werewolf Ambush |
|
|

Werewolf Ambush
|
|
|
A strange greeting will be waiting for you as you open the door into this room, but don't fall for this because it is a trap and
you don't want to get yourself trapped in these rooms surrounded by the very Werewolves that are attempting to trick you. See through their schemes and battle
hard until the last one has been dropped!
Search the room once you've cleaned your blade.
.
|
Office Room
|
|
|
More beasts will ravage the party as they tear through the air with their claws and snap at the air before them, quickly
making their way to your front ranks, these Werewolves not as deadly as the first wave, but deadly enough to cause some damage if you don't defend yourself.
Beds line the walls here, no doubt where they slept and will be sleeping for good after you've shown them the edge of your blade.
Search the room when the battle is done and take anything you find of interest that may help you later on in your travels.
|
Firkraag's Lair
|
|
|
The warmth will slowly make its way to your party, the den of Firkraag the Red Dragon will greet you here with his
close ally Conster, the one who holds FIRKRAAG'S PRISON KEY that you will need to
snag to free Iltha up in Tazok's Room.
Now listen well to Firkraag as he praises
his perfect plan to you as well as mocks you, perhaps enough for you to
draw your blade and attack this foul beast? That of course, is left up
to you and Conster will make his way back to Tazok's
Room where he will await your return. Unfortunately for myself, at
the time of print I have not yet killed Firkraag and I would like to thank
those at www.sorcerers.net for sending me the info as well as the items gained from slaying
Firkraag. I'll get around to him when I'm good and ready, but for the
time being if you have a BATTLE TIP! send
it in as to how you brought Firkraag down. I will not accept Cloudkill/Fog
of War tactics or setting traps around him as I want hard nosed battles
and if you have a screen shot, all the better and of course, you will
get full credit for your tale.
Now if you happen to be evil, you can kill Garren Windspear and take the WINDSPEAR HILLS DEED to
Firkraag. He will hand over the Cloak of the Shield +2 and the party will also receive 42,000xp for doing so.
Thanks to Nick for sending in this juicy information!
|
|
|
|
|
BATTLE TIP! - Sent in by Draco Vlasavius
I left my party by the main door. My Monk has:
19Str w/Girdle and 18Dex and 92 hit points.
The Potions (Fire Giant Strength and Mind Focusing) gave me 22 Strength & 21 Dexterity.
Draw Upon Holy Might Spell gave a +4 to both attributes, leaving me at 25 Strength (+7 to hit +14 to Damage) and 25 Dexterity
(-6 AC).
Equipment on my Monk was:
Ring of Mercy Killing which gives +20% Silent/Hide
Boots of Stealth +20% Silent/+15%Hide
Ring of Protection +1
Ioun Stone pearly white +2/hp min regenerate
Sensate Amulet +5hp, +2Char, Protection from Evil
Gloves of Healing
Cloak of Non Detection
I opted not to have my spell casters give any of the normal protections as
this was my first 'Quivering Palm' attack.
My Monk had just sworn that he would return and seek revenge against
FirKraag for being manipulated and besmirched by him. And to avenge and
right all those whom FirKraag had wronged. FirKraag mockingly laughs as if
he was dealing with a mere mortal. Justice had to be meted out, Goodness
must prevail. I'm a Monk after all.
So I spoke to him..."Lo there do I see your Father, Lo there do I see your
Mother and you Sisters and your Brothers before you. Lo there they do call
to you. They bid you to take there place beside them. And I'm gonna
expedite that journey and you should arrive there in a few seconds! So my
Monk focused his KI Power, stepped back a bit to go into stealth mode and
then attacked. Not only did my MONK deliver a critical hit but an even more
devastating blow was delivered. The Quivering Palm. FirKraag locked in
pain and tried to let out a bellowing roar but he couldn't, he was gagging
on his massive tongue. If the tremendous beast could clutch the
unbelievable pain in his belly he would. But he couldn't. The KI power
effect was traveling through his body, disrupting every part of him. Every
part that had made him powerful, to be feared as well as arrogant and evil
was being disrupted. His eyes still rolling he crashed to the floor and
when his eyes stopped they set upon the 'mere mortal' before him. The 'mere
mortal' with a slight smile on his face.
Enlarge the death of Firkraag as done by Ki Shaka Khan
|
|
|
|
|
|
|
|
|
|
|
|
|
|
BATTLE TIP! - Sent in by Wayne
The characters:
Allana Ironwolf: Elven 9th level Fighter, 10th level Mage, 11th level Thief
Minsc ( and Boo! ): 10th level Ranger
Jaheira: 9th level Fighter,12 th level Druid
Aerie: 9th level Cleric, 11th level Mage
Nalia: 11th level Mage, 4th level Thief
Yoshimo: 11th level Bounty Hunter
Stats for Allana Ironwolf:
Str 18/78 Dex 19 Con 17 Int 16 Wis 9 Char 18
Having already spoken with Firkraag, and recovered Iltha, my party returned to Gavin Windspears cabin. While overjoyed to see his daughter, he spoke of "sleeping uneasily in bed" while the beast ruled nearby. Jaheira reminded me, too, that the leader of the Nymphs had declared there was a evil nearby.
While not wishing to take an ancient red dragon on, my heart spoke that to protect the innocents, we had to challenge one of the mightiest beasts to live on Faerun.
The strategy.
While preferring the "heat of battle" stragety, and thinking on the fly, in this case extra help was needed. Having Firkraag wipe out your character party in one minute flat on repeated occasions ensures a lateral approach.
Firkraag has a wide, wide variety of ways to hurt you and your party. He has very low AC, high magic resistance, low saving throws, and multiple physical attacks. Add his breath weapon, and spell casting, and you can see a multi layered approach is required.
Allana cast Monster Summoning Two, and brought Kisranth, the spider-figurine, to her aid. Jaheira cast Summon Fire Elemental, and then Allana taxed herself and conjured two Air Elementals using memorised spells. This meant, a full character party, three elementals, a phase spider, and two Elite Hobgoblin archers against the Dragon.
Allana Ironwolf, Misc, and Jaheira all were hasted by potions, and drank Potions of Cloud Giant strength. Jaheira bestowed Bless on all character members. There were various degrees of fire protection already in place, between the Dragon shield found earlier and worn by Allana, Nalia's bonded ring, the Dragon helm donned by Jaheira, and Ring of Fire Protection used by Minsc. Yoshimo was equipped with Gauntlets of Archery, the Tuigan bow, and Arrows of Piercing. Minsc wielded Namarra, and Flame Tongue swords, one in each hand. Allanna brandished Dragonslayer, while Jaheira gripped the Staff of Thunder and Lightning tightly.
In the first wave of attacks, I sent in Allanna and Jaheira in. Yoshimo went to the rear of Firkraag. Both Aerie and Nalia were on either side of the room, for reasons explained in a minute. The monsters were flung in from Firkraag's right side. Their purpose was not to damage or injure him, and indeed they couldnt, but more to absorb any breath weapons and some physical attacks. Jaheira I kept back, near the entrance archway, so she could heal any wounded characters, or raise and use her Heal spell as requested.
Firkraags first strategies are to cast StoneSkin on himself (as if he needs it!!) and then to lower any Fire Resistance the characters posess. So, if you have a potion of Fire Resistance, as Allana did, it may be wise to hold onto that until after the initial wave of attacks is over.
The Dragon employs a wing buffet early and again later that knocks the characters nearby off their feet and sends them sprawling to the other side of the room.
Typically, after the first few rounds, it means Minsc and Allana are both lamenting their pain somewhere near Jaheira. At this stage, both Aerie and Nalia cast Lightning Bolts at Firkraag. And hope. Hope it passes his magic resistance, and his saving throws. Perhaps, if you're lucky, one or two will get through.
Once Misc and Allana are back on their feet, you're also hoping Firkraag is laying into the elementals. Perhaps he's even used a breath weapon on them. And the Elementals have removed several layers of Stoneskin from Firkraag.
Our damaged party retreated to the entrance area, and healed those needing it, while Aerie and Nalia continued to cast Lightning bolts, more in hope than expectation. As a note, Yoshimo is basically useless against Firkraag: would recommend Anomen or Keldorn.
While recovering your injured party, also cast any Monster Summoning spells, and again send them back into the fray. By now, between your characters' hits and the summoned Elementals, the Stoneskin should be wearing off. You may be able to thump the dragon with the Dragonslayer and bring him down to his knees!
Keeping Nalia and Aerie to either side of the dragon ensures that a single breath weapon doesnt destroy your major spell weapons, at least not before the Stoneskin wears away.
It took me several hours over two days to kill Firkraag, and as you can see, even when it finally happened my party was on it's knees!! (And the difficulty setting was set to lowest, for this battle only!!).
Doubtless you other adventurers will have other strategies, that will work much better. But at least it gives you something to base your gameplay on
Best of luck!

Enlarge the death of Firkraag as done by Allana Ironwolf
|
|
|
|
|
|
|
|
|
|
|
|
|
| Windspear Hills - Firkraag's Lair | Room Statistics... |
- Firkraag [64,000xp]
- Red Dragon Scales
- Two-handed Sword +5 "Carsomyr"
- Cloak of the Shield +2
- * Thanks to everyone at www.sorcerers.net for the item and experience information!
- 1 exit
|
|
|
|
|
|
|
|
|
| Windspear Hills - The People |
|
This is a full list of all People found within Windspear Hills.
- Garren Windspear [Notable Information Learned]
- Iltha
- Vaelasa
- Samnia
| Windspear Hills - All Quests |
|
This is a full list of all Quests found within Windspear Hills.
| HELP FIND AND RETURN GARREN WINDSPEAR'S DAUGHTER ILTHA |
After your run in with the foul beasts which turn out to be knights from the Noble Order of the Radiant Heart, you will be introduced to Garren Windspear who will tell you
of the penalties of killing such knights and also invite you back to his cabin where he will give you more information about the surrounding area. He will speak of a possible
evil that resides in the Windspear Hills somewhere, perhaps in an old dungeon northeast of his home.
While listening, his very daughter Iltha will be taken away from Garren Windspear as a group of Orc Bandits, Orcs and one named Plath Rededge will suddenly attack! Accepting Garren Windspear's
quest to save his daughter should add to the fuel of exploring the region and to find out exactly who was behind the set up, making you slay knights of the Noble Order of the Radiant Heart.
Finding and freeing Iltha from her prison and having her return to Garren Windspear will earn you 23,750xp.
| RETURNING THE ACORNS TO VAELASA |
Returning the ACORNS to Vaelasa will free the three
Dryads that Irenicus trapped in Irenicus' Dungeon and return them to the Dryad Grove found here.
The ACORNS are located on Ilyich's corpse after the
battle in The Kitchen but if you did not get them while you were there, you're out of luck in completing this
quest.
Returning the ACORNS will earn the party 32,500xp and an
additional 9,750xp when the three Dryads return after their trees are replanted.
| SAMIA'S QUEST FOR KING STROHM'S BOOKS |
Samia wants nothing more than for you to assist her in finding King Strohm's Books detailing his life during his reign and will even give you
the key that will open the door to The Maze. Accepting this quest is well worth the time and effort it will take on
your party, so I highly suggest you take it, plus The Maze is a lot of fun.
Once you have gained entry into King Strohm's Chamber all the fun will begin. You will find a DragonSlayer Long Sword and a Dragon Scale Shield +2
which is exactly what Samia was really looking for and her as well as her companions will do what they can to get those items.
Your experience for this will be 37,000xp which amounts to the full total after slaying Samia, Kaol, Legdoril, Akae and Chak.
| PUTTING THE BURIAL MASK TOGETHER |
Six parts make the BURIAL
MASK and each part can be found within The
Maze while a more in-depth look into the exact resting places can be
read in the Burial Mask Chambers.
Completion of the BURIAL MASK will give the party 24,550xp.
| Windspear Hills - All Items |
|
This is a full list of all Magical
Items found within Windspear Hills. Their locations can be found
by viewing the rooms separately through the solution as they are also covered
in the Room Statistics.
- 81 Arrows +1 *
- 120 Fire Arrows
- 40 Arrows of Ice
- 100 Bolts of Lightning
- 40 Bullets +2
- 40 Arrows of Piercing
- 80 Darts of Wounding
- 6x Healing Potions
- 2x Potions of Extra Healing
- 1 Oil of Speed
- Potion of Insulation
- Plate Mail +1
- Large Shield +2
- Battle Axe +2
- Medium Shield +1
- Wand of Fear
- Dragon Slayer Long Sword
- Dragon Scale Shield +2
- Dragon Helm
- Delver's Plate +2
- Full Plate +1
- Two-Handed Sword +2
- Two-Handed Sword +5 "Carsomyr"
- Red Dragon Scales [for armor]
- Cloak of the Shield +2
- Composite Long Bow "Heartseeker" +3
- Horn of Blasting
- Hold Undead Spell [Wizard]
- Domination Spell [Wizard]
- Chaos Spell [Wizard]
- Teleport Field Spell [Wizard]
- Minor Sequencer Spell [Wizard]
- Wizard Eye Spell [Wizard]
- Stone to Flesh Spell [Wizard]
- Charm Person Spell [Wizard]
- Polymorph Other Spell [Wizard]
- Flesh to Stone Spell [Wizard]
- Protection from Normal Missiles Spell [Wizard]
- Magic Missile Spell [Wizard]
- Protection from Normal Weapons Spell [Wizard]
- Grease Spell [Wizard]
- Cure Serious Wounds Scroll
- Protection from Petrification Scroll
- * Arrows +1 vary depending on how many were shot at the party *
| Windspear Hills - All Monsters |
|
This is a full list of all Monsters
found within the rooms on all levels of Windspear Hills, their
locations can be found by viewing the rooms separately through the solution
as they are also covered in the Room Statistics.
- Lots of Orcs
- Lots of Orc Archers
- Lots of Werewolves
- Lots of Hobgoblins
- A few Vampires
- A few Shadows
- A few Stone Golems
- A few Orc Bandits
- A few Ankhegs
- A few Mutated Gibberlings
- A few Ogrillons
- A few Kamikaze Kobolds
- Some Mist Vampires
- Some Mummies
- Some Ghasts
- Some Wights
- Some Gate Keepers
- Some Orogs
- Some Wolfweres
- 1x Air Elemental
- 1x Tazok
- 1x Adamantite Golem
- 1x Guardian
- 1x Director
- 1x Greater Wight
- 1x Plath Rededge
- 1x Ruhk the Transmuter
- 1x Troll
- 1x Otyugh
- 1x Samia
- 1x Chak
- 1x Akae
- 1x Legdoril
- 1x Kaol
- 1x Conster
- 1x Firkraag
|
|
|
|
|
Quick and fast paced, you'll find yourself in and out of Windspear Hills and leaving with good memories of this location.
Firkraag's Dungeon alone makes Windspear Hills what it is, the long shadows, the ancient and forgotten crypts alongside of
a twisting and winding maze with trapped doors and dead ends. Not once did I feel that the adventure was dragging during
my stay here, but I do suggest to have gained a few levels from your escape of Irenicus' Dungeon for
the Vampires, Wights and Ghasts can prove to be too much for a lower level party, even I had some trouble at first. Negative
Plane Protection will help you greatly while you're exploring the Windspear Hills so keep that handy.
As for the whole story about the Noble Order of the Radiant Heart
coming after me because I killed their knights,
bah to them. If a group of knights doesn't understand
the effect of magic and illusions then they aren't
worth my time and are simply hiding behind such
a name for the sake of rank and prestige. How
was I to know that those Ogres, Gnoll Elites and
Ogre Mages were illusions and really knights?
They certainly didn't fight like knights, that's
for sure!
Where is the anti-paladin when you need one because that's what I want to play. Wouldn't it be nice to clean The Temple District
of all those Radiant Heart tards once and for all? I can't wait to meet them, Grub hates Paladins and Knights!
|
|
|
|
|
|
|
|
|
|
|
|
|
|
A full party joined me on this adventure for
I had finally returned to pick up Jaheira
who was waiting for me back at the Harpers Headquarters
in the Docks District
and having her back for the journey to Windspear
Hills was great because she is a very useful
member to have in the party. Once equipped properly,
she can hold her own in close combat and still
get off her spells when needed, although I was
still missing the power that Nalia
offered in her magic casting abilities.
The party was fighter heavy as I like them to be, but as stated earlier having a second mage was exactly what I needed to round my group off, or at least to how I
like my party to be. My own character, Grub, along with Minsc, Korgan and Valygar was my front line of defense, followed by Jaheira who
I've molded to join those up front with Aerie holding up the back throwing spells.
My next journey is to Trademeet where I will complete the last of the areas outside of Athkatla, then return to the city and concentrate
on each district and of course, getting my second mage back, Nalia. Which fighter will take the boot? Will it be Minsc, Korgan or Valygar?
That all depends on how they impress me.
My party, after the completion of Windspear Hills was the following:
| 01 |
Grub |
Barbarian |
Half Orc |
| 02 |
Minsc |
Ranger |
Human |
| 03 |
Korgan |
[Berserker] |
Dwarf |
| 04 |
Valygar |
[Stalker] |
Human |
| 05 |
Jaheira |
Fighter/Druid |
Half Elf |
| 06 |
Aerie |
Cleric/Mage |
Avariel |
|
|
|
|
|
|
|
|
|