Baldur's Gate 2 Online Walkthrough by Montresor


CREATING A CHARACTER  |  GENERAL TIPS AND TRICKS  |  NPCs  |  ITEM LISTS  |   SHOPS   
Shadows of Amn: Chapter 1  |  Chapter 2  |  Chapter 3  |  Chapter 4  |  Chapter 5  |  Chapter 6  |  Chapter 7  
Throne of Bhaal  |  Watcher's Keep  
About the Walkthrough  |  Organization of the Walkthrough  |  About the Maps  |  About the Author  |  Where to Begin
Disable all ads!

Overview of Chapter 1  |  Quests in Chapter 1 
Areas in Chapter 1
Irenicus' Dungeon, Level 1  |  Irenicus' Dungeon, Level 2  |  The Elemental Plane of Air

IRENICUS' DUNGEON, LEVEL 2

This is the second, and last, level of the starting dungeon. Don't worry; it is not as hard or as long as the first level. You are about three quarters of the way to the surface.

  1. This is where you arrive from Dungeon Level 1. You can return to Level 1 if you wish.

    You will immediately be greeted by Yoshimo, a Bounty Hunter who has apparently also been kept imprisoned. He offers some advice on how to proceed on this level and offers to join your party.

    The box at (x=2320, y=2880) contains a Scroll of Hold Person.

  2. Prepare yourself before entering this room.
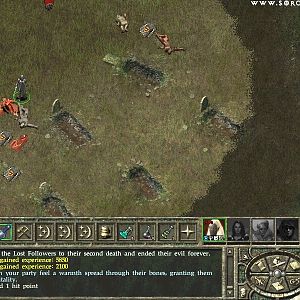
You will be attacked by several Mephits. However you should concentrate on destroying the four portals along the left side of the room - once a portal goes down, the Mephits that came in through the portal will die. Each portal yields 5,000 XP; you get nothing for killing the Mephits.

    Once you have destroyed the Mephits, bring Jaheira close to the table at (x=1400, y=2420). She will discover the dead body of her husband Khalid. After her long tirade and exchanges with the other party members, DON'T mock Khalid or suggest once too often that you should try to raise him, or Jaheira will leave the party permanently!

    The table at (x=1420, y=2530) holds the Wand of Summoning Key and some minor treasure. Hold on to the key.

    The barrel at (x=1350, y=2580) holds minor treasure and three Bolts +1.

    The shelf at (x=780, y=2660) holds minor treasure and a Cursed Scroll of Weakness.

    The table at (x=890, y=2660) holds minor treasure.

    The chest at (x=1040, y=2520) holds 2 Potions of Extra Healing, the Wand of Cloudkill Key, and minor treasure. Hang on to the key!

    The chest at (x=1270, y=2360) holds a few mundane weapons and the Wand of Fire Key. Hang on to it!

  3. Here you will find an escaped clone fighting a thief. Once she wins the battle, she turns on you. Apparently she thinks that *you* are Irenicus! The clone drops a Dagger and the Wand of Missiles Key, which you should hang on to!

    The barrel at (x=180, y=2140) contains a Scroll of Fireball and minor treasure.

    The barrel at (x=740, y=2180) contains some minor treasure.

  4. Here is an Assassin fighting an Ice Mephit. Help him kill the Mephit, and the Assassin then attacks you!

  5. Here is a Smoke Mephit and just behind it a party of six Goblins.

  6. There's a trap in the middle of the bridge here.

  7. As soon as you enter this room, you will see an Assassin attack a couple of Duergar Dwarves and be killed by a Magic Missile trap. Do not walk down the middle of this room, it is full of traps! Instead, send a character with the six keys you should have gathered in the dungeon to the upper right wall and disarm the trap by clicking on the pillar at (x=960, y=890). Then send the party forth to kill the Duergar!

    Continue upwards along the right-hand wall to disarm the traps. Look for the pillars where the cursor turns into two arrows forming a ring. For each trap you disarm, you lose a Key and gain a Wand with one charge left:

    (x=960, y=890) – Wand of Magic Missile. The key is found at 3 on this level.
    (x=1190, y=740) – Wand of Frost. The key can be looted from the Otyugh at 17 on Level 1 of the dungeon.
    (x=1290, y=670) – Wand of Fire. The key is found at 2 on this level.
    (x=1410, y=580) – Wand of Monster Summoning. The key is found at 2 on this level.
    (x=1520, y=500) – Wand of Lightning. The key is found at 19 on Level 1 of the dungeon.
    (x=1635, y=420) – Wand of Cloudkill. The key is found at 2 on this level.

    In the throne at (x=1990, y=350) you can find a Ring of Protection +1.

  8. In this room you will witness a Vampire called Ulvaryl kill three Assassins. If you can manage to kill Ulvaryl before she kills the Assassins, they will "reward" you by attacking. If you don't kill Ulvaryl, she disappears after killing the Assassins.

  9. This room has another Goblin party for you.

  10. Here you will meet a few hostile Duergar Dwarves. None of them drop anything worthwhile.

    The box at (x=3370, y=630) contains mundane weapons and 7 Bolts +1.

    The table at (x=3540, y=840) contains 100 GP, a Dagger, 2 Potions of Extra Healing and a Scroll of Charm Person.

    The locked chest at (x=3590, y=690) contains Splint Mail and some Arrows and Bolts.

    The locked chest just above it at (x=3590, y=680) contains a Maze, 3 Potions of Healing, Chain Mail Armor and a Girdle of Bluntness.

  11. Behind the locked door in this room you will see Frennedan begging you to release him. If you refuse, he will turn into a young boy and ask if you will help him now! Hmmm...

    Make sure to search for traps! The trapped shelf at (x=2500, y=1200) holds 4 Elixirs of Health and a Scroll of Invisibility.

    The trapped chest at (x=2230, y=1340) contains the Key to Frennedan's Room, 5 Potions of Healing and a Scroll of Knock.

    The locked chest at (x=2240, y=1390) contains a Potion of Firebreath and a Scroll of Protection from Electricity.

    Open the door to Frennedan's room for 400 XP. You can either allow him to follow you on your way out or refuse to help him. If you don't help him, he turns into his true form – a Doppelganger – and attacks. If you let him follow you, he will attack either after you rest or when you fight the Assassins at 12. So you may as well get it over with.

    In Frennedan's room, the chest at (x=2820, y=1530) is trapped. It contains an Oil of Speed, a Scroll of Blur, and a Cursed Scroll of Foolishness.

    The table at (x=2700, y=1600) contains 6 Bullets +1 and 2 Potions of Extra Healing.

    The table at (x=2860, y=1500) contains 4 Arrows +1.

    The shelf at (x=2820, y=1420) contains 101 GP and a Scroll of Color Spray.

    The shelf at (x=2850, y=1450) contains a Scroll of Blindness and 4 Bolts +1.

  12. Here you will meet three Assassins. No matter what you tell them, it ends in hostilities. They drop mundane weapons and some minor treasure.

  13. Here is the exit to Waukeen's Promenade where you will start Chapter 2.

    NOTE: Once you leave this area, the entrance collapses and you won't be able to return to Irenicus' Dungeon. So make sure you have done everything you want to do before leaving.


Amazon.com
Amazon.ca
Amazon.co.uk
Sorcerer's Place is a project run entirely by fans and for fans. Maintaining Sorcerer's Place and a stable environment for all our hosted sites requires a substantial amount of our time and funds on a regular basis, so please consider supporting us to keep the site up & running smoothly. Thank you!

Disable all ads!