Baldur's Gate 2 Online Walkthrough by Montresor


CREATING A CHARACTER  |  GENERAL TIPS AND TRICKS  |  NPCs  |  ITEM LISTS  |   SHOPS   
Shadows of Amn: Chapter 1  |  Chapter 2  |  Chapter 3  |  Chapter 4  |  Chapter 5  |  Chapter 6  |  Chapter 7  
Throne of Bhaal  |  Watcher's Keep  
About the Walkthrough  |  Organization of the Walkthrough  |  About the Maps  |  About the Author  |  Where to Begin
Disable all ads!

Overview of Chapter 2  |  Quests in Chapter 2 
Areas in Chapter 2: Athkatla
Waukeen's Promenade  |  The Bridge District  |  The City Gate District  |  The Docks District  |  The Government District  |  The Graveyard District  |  The Slums  |  The Planar Sphere  |  The Temple District  |  The Temple District Sewers  
Areas Outside Athkatla
De'Arnise Keep  |  Trademeet  |  The Druid Grove  |  The Umar Hills  |  The Temple Ruins  |  The Windspear Hills

The Sewers and the Cult of the Unseeing Eye
The Sewers  |  Mekrath's Lair  |  Mind Flayer Area  |  The Cult of the Unseeing Eye  |  The Rift Area  |  The Ghoul Bridge Area  |  The Ghoul Lord's Room  |  The Lair of the Unseeing Eye  

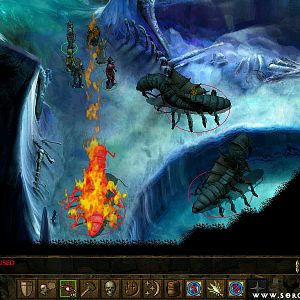
THE LAIR OF THE UNSEEING EYE

You have finally reached the place where the dreaded Unseeing Eye makes its abode. Now you just need to find the second half of the Rift Device before the Unseeing Eye finds you...

  1. This is where you arrive from the Ghoul Bridge Area. Search the node at (x=300, y=1020) for a Scroll of Conjure Lesser Fire Elemental, an Aquamarine Gem, and 40 Bolts +1.

  2. A small container in the wall at (x=790, y=610) contains a Moonstone Gem.

  3. Here you will have to fight a Gauth.

  4. Here you will have to fight a Beholder.

    The central node at (x=2010, y=300) contains a Scroll of Protection from Acid, a Zircon Gem, an Iol Gem, 40 Arrows +1, and the Halberd Dragon's Bane +3.

    There is also a very small container at (x=1800, y=330) with a Potion of Healing and 40 Darts +1.

  5. A small container in the wall at (x=2350, y=1120) contains a Gold Ring, 40 Throwing Axes, and 40 Throwing Daggers.

  6. In here you will have to fight a Gauth. The central node in the room at (x=3060, y=1510) contains 227 GP and the second part of the Rift Device.

    Once you grab the second part of the Rift Device, the two parts automatically unite to form the assembled Rift Device. Make sure to equip it in a Quick Item slot, then cast the necessary protection spells on whichever character goes back to meet The Unseeing Eye at 7. Since The Unseeing Eye is a powerful Beholder, Death Ward, Protection from Petrification, and Free Action should be cast as a minimum.

  7. When you have assembled the Rift Device, this is where you will meet The Unseeing Eye. It is worth 30,000 XP but can also defend itself with some nasty spells and of course Beholder rays. You need to use the Rift Device on it before you can harm it at all – but once you have done this, it goes down surprisingly quickly. The Unseeing Eye drops an Amulet of 5% Magic Resistance.

  8. Here is the exit back to the Cult of the Unseeing Eye area.

  9. Here you will have to fight a couple of Gauths.

  10. Here you will have to fight a Beholder. The central node in this room at (x=1310, y=2260) contains a Scroll of Secret Word, a Bloodstone Gem, an Andar Gem, and 325 GP.

  11. Here is a company of Blind Priests. If you get the jump on them with a few offensive spells, they shouldn't pose much of a problem for you. They only drop mundane items and random treasure.


Amazon.com
Amazon.ca
Amazon.co.uk
Sorcerer's Place is a project run entirely by fans and for fans. Maintaining Sorcerer's Place and a stable environment for all our hosted sites requires a substantial amount of our time and funds on a regular basis, so please consider supporting us to keep the site up & running smoothly. Thank you!

Disable all ads!