Baldur's Gate 2 Online Walkthrough by Montresor
THE UNSEEING EYE
This quest is the Cleric class quest. At the beginning of Chapter 2, if you are a Cleric, Gaelan Bayle suggests that you go look for work in the Temple District. Protagonists of all classes can do the quest; however only Clerics are offered a stronghold in a temple upon completion of the quest.
The first time you enter the Temple District in Athkatla and go to 4 on that map, you will see a priest named Gaal espousing his new faith. In the end, several commoners choose to follow him. As soon as they are gone, you are approached by one of the following three priests:
- If you are not a Cleric, or you are a Cleric of Neutral alignment, you are approached by High Watcher Oisig from the Temple of Helm.
- If you are a Cleric of Good alignment, it is High Mornmaster Arval who asks you to come see him in the Temple of Lathander.
- If you are a Cleric of Evil alignment, you are contacted by Stormherald Nallabir who demands your presence in the Temple of Talos.
") Go to the temple and speak to Oisig, Arval, or Nallabir. Each priest will tell you that the new faith is most definitely false, since nothing points to the emergence of a new god. Promise to examine this new cult for him. They will also tell you that the new faith has its headquarters somewhere in the Sewers under the Temple District.
Go to the temple and speak to Oisig, Arval, or Nallabir. Each priest will tell you that the new faith is most definitely false, since nothing points to the emergence of a new god. Promise to examine this new cult for him. They will also tell you that the new faith has its headquarters somewhere in the Sewers under the Temple District.
- Exit the temple to the Temple District. There are three entrances to the Sewers at the points marked 11 on the map.
- Enter the Sewers. The entrance to the Cult of the Unseeing Eye area is at 15 on the map. If your party is relatively low level, I suggest that you take the long road clockwise along the border. High-level parties may as well clear out the area here and now.
- At 14 you will find Keldorn fighting a Zombie. When done, he warns you about a great evil lurking hereabouts.
Keldorn offers to join your party. Accept if you need a Paladin, and if you don't have Viconia in the party – those two just don't get along. If you don't accept Keldorn, he goes to the Order of the Radiant Heart.
- Go to 15 on the Sewers map and enter the Unseeing Eye area.
- At the entrance, take the narrow path to the south-east.
- Before entering the room at 3, be sure to scan for traps. In this room there are Shadows and Wraiths waiting for you. Also, when you disarm the trap, four Ettercaps appear at 2 and attack.
- Proceed further southwards, killing more Shadows on the way.
- The room at 5 is a trap. When you get near the center of the room, a Cloudkill trap is released, the two doors slam shut, and two Vampiric Mists attack you. You need to use the wheel at the center of the room to open the doors again, while killing the Mists and staying awake in the noxious cloud.
- Proceed to 6 where you will meet Gaal, high priest of the Cult of the Unseeing Eye.
For now, it pays to feign interest in Gaal's cult. Tell him you'd like to know more, but that you're not interested in losing your eyes. Gaal will want you to do him a favor: There is a valuable artifact somewhere below the cult's area. Now, if you could find that for him...
If Viconia is in your party, she will realize from what Gaal tells you that the cult's "god" is a Beholder.
- Agree to find the artifact for him. Gaal gives you Gaal's Key.
- With the key, you can open the door at 11. Do so and enter.
- At 12, make sure to search for and disarm the trap in the floor.
 At 13, you will meet Sassar, a former High Priest of the Cult of the Unseeing Eye. Sassar will warn you about giving the mighty artifact to the Beholder.
- Sasser encourages you to go and find the artifact, not to give it to the Beholder but to use it against the Beholder! Problem is, the artifact is in two parts. One part is in the Rift Area, and the Beholder has the second part. You must find the first part and then steal the second.
Sasser also warns you against opening the sarcophagus in the room. Heed his warning for now, unless you feel prepared to fight a Shade Lich.
- At 16, make sure to search for and disarm the trap in the floor.
- At 19 will be several Shadows and Wraiths.
- At 20 is the entrance to the Rift Area. Go down the stairs to enter it.
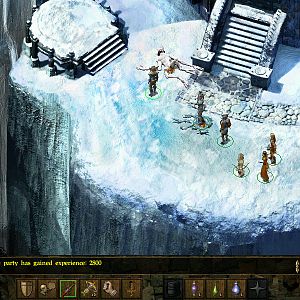
- In the Rift Area, walk a few steps inwards, and you will be attacked by three Huge Spiders.
- At the face at 2, search for traps to find the container in the wall. Empty it of scrolls and gems.
You can also click the "face" for an extra fight with a Wandering Horror and a couple of Spiders.
- Continue eastward. You may run into one or two ambushes on the way. For low-level parties, it will probably be Goblins; at higher levels you may find Yuan-Ti war parties.
- At the stairs at 5, make sure to search for traps. There is one on the first step of the staircase and it is often deadly.
 Go up on the platform at 6 and click the rift in the ground to repair the bridge. You will need to answer three questions.
The answer to the first question is "Life" (number 7).
The answer to the second question is "Time" (number 9).
The answer to the third question is "The Current One" (number 4).
The bridge is repaired, and the party gains 42,250 XP.
- On the other side of the bridge, at 7, awaits a Beholder battle. If the party is low level, there will be a single Gauth. At higher levels you will find three Gauths, or three Beholders and two Gauths.
- Further in, at 8, are several Shadows, Shadow Fiends, and Wraiths. Try to kill the Beholders first before attracting their attention, or things can get seriously out of hand.
- Before stepping on to the bridge at 9, search for traps!
 Outside the temple at 10, speak to the Diseased One. Turns out he and his fellows are followers of a forgotten god and doomed to live, die, and be reborn here forever. Ah well, if only you could help them somehow...
- Enter the temple and you will be attacked by an Emphatic Manifestation. The way to destroy it is to show empathy, by healing it. So, instead of attacking it, cast a healing spell on it! The Manifestation dies.
- And an Avatar of the forgotten god appears near the stairs at 12. He would very much like for himself and his "children" to be able to die. But he has to remain and protect the half of the great device until the end of time.
- However, he will give his half of the device to you so you can combine it with the piece the Unseeing Eye has and destroy it.
The Avatar then gives you the Rift Device Part.
- Exit the temple again. The Diseased One will be most unhappy to see you carry the Rift Device Part away but will resign himself to the fact that nothing ever changes here.
- Return to 1 on the Rift Area map and return to the Unseeing Eye Cult area.
- When you meet Sassar, he lets you in on the second half of the plan: You must speak to a man named Tad and tell him "The Eye is Blind". He will then tell you how to get to the Unseeing Eye's lair.
- Go all the way back to where you met with Gaal and enter the room to the north. Tad will be at 8 on the map. Speak to him and say "The Eye is Blind".
 Tad's master plan is for you to go down into the pit to the left of him, not knowing how you'll ever get back up. Since it's the only plan you have, jump into the pit.
- You find yourself in the Ghoul Bridge area. Continue forward and you should meet a large group of Ghasts and Mummies at 2.
- Further in, at 3 and 4, are more undead waiting.
- Optionally, you can enter the Ghoul Lord's room and clear it out. Be prepared for some tough fights, but the loot is worth the trouble.
- Continue further east over the bridge, clearing out more undead on the way.
- Enter the Lair of the Unseeing Eye.
- Proceed to 6 on the Lair of the Unseeing Eye map. Advance with caution; this is after all a Beholder lair and besides a few Beholders and Gauths scattered around the map there is also a very hostile group of Blind Priests in the center of the lair.
- Before looting the container in the floor, decide which member of your party should face the Unseeing Eye. Protect him or her against the most common Beholder rays (Petrification, Fear, Stun, etc.) and also against Death spells.
 Loot the floor for the second part of the Rift Device. The two halves automatically merge to give you the Rift Device. The party receives 26,250 XP.
- Whoever was selected to face the Unseeing Eye equips the Rift Device in a quick item slot and goes back towards the center of the lair. The Unseeing Eye will be waiting at 7.
- Use the Rift Device on the Unseeing Eye, then attack! The party gains 30,000 XP for killing the abomination. Loot its body for an Amulet of 5% Magic Resistance.
- Optionally, clear out and loot the rest of the area. When done, go to the exit at 8. Take the stairs up to the Unseeing Eye Cult area.
- If you speak to Sassar again, he will warn you that you must not bring the Rift Device back up to the surface. He is right. If you do so, it will kill you.
- Find the entrance to the Rift Area.
- Find your way to the temple again. You may run into some new monster ambushes on the way.
- Speak to the Diseased One at 10 outside the temple. You are transferred inside the temple.
 No matter what you say, the Diseased One speaks the forgotten god's name: Amaunator. The Avatar appears again. He takes the Rift Device and destroys it, and both the Avatar and his diseased followers disappear. The party gains 47,250 XP and the shield Saving Grace +3.
- Go back to the Unseeing Eye Cult area.
- If you're interested in some extra loot (and don't mind an extra fight), seek out Gaal and his guards at 6. They are most unhappy about what you've done to their god, so you will have to fight Gaal, an Elite Guard Captain, and several Elite Guards. Among the loot will be a Heavy Crossbow of Accuracy, Bracers of Defense AC 7, and the Girdle of Fortitude.
- Go to 1 on the area map and leave for the Sewers. In the Sewers, find one of the exits at 1 or 2 to the Temple District.
- In the Temple District, make your way to the temple you were working for. Speak to High Watcher Oisig (Temple of Helm), Mornmaster Arvel (Temple of Lathander), or Stormherald Nallabir (Temple of Talos).
Each party member receives 45,750 XP and the party gains a reputation point.
If you are not a Cleric, you receive 7,000 GP and the mace Ardulia's Fall +1.
If you are a Cleric, you receive 8,000 GP but no mace.
 If you are not a Cleric, this completes the Unseeing Eye quest.
If you are a Cleric, you are now offered a position in the temple and a set of Cleric Stronghold quests. These differ depending on whether you are working for the Temple of Lathander, Helm, or Talos.
| Sorcerer's
Place is a project run entirely by fans and for fans. Maintaining
Sorcerer's Place and a stable environment for all our hosted sites requires a substantial amount of our time and funds on a regular basis, so please consider supporting us to keep the site up & running smoothly. Thank you! |

") Go to the temple and speak to Oisig, Arval, or Nallabir. Each priest will tell you that the new faith is most definitely false, since nothing points to the emergence of a new god. Promise to examine this new cult for him. They will also tell you that the new faith has its headquarters somewhere in the Sewers under the Temple District.
Go to the temple and speak to Oisig, Arval, or Nallabir. Each priest will tell you that the new faith is most definitely false, since nothing points to the emergence of a new god. Promise to examine this new cult for him. They will also tell you that the new faith has its headquarters somewhere in the Sewers under the Temple District. At 13, you will meet Sassar, a former High Priest of the Cult of the Unseeing Eye. Sassar will warn you about giving the mighty artifact to the Beholder.
  Go up on the platform at 6 and click the rift in the ground to repair the bridge. You will need to answer three questions.
 Outside the temple at 10, speak to the Diseased One. Turns out he and his fellows are followers of a forgotten god and doomed to live, die, and be reborn here forever. Ah well, if only you could help them somehow...
 Tad's master plan is for you to go down into the pit to the left of him, not knowing how you'll ever get back up. Since it's the only plan you have, jump into the pit.
 Loot the floor for the second part of the Rift Device. The two halves automatically merge to give you the Rift Device. The party receives 26,250 XP.
  No matter what you say, the Diseased One speaks the forgotten god's name: Amaunator. The Avatar appears again. He takes the Rift Device and destroys it, and both the Avatar and his diseased followers disappear. The party gains 47,250 XP and the shield Saving Grace +3.
 If you are not a Cleric, this completes the Unseeing Eye quest.