Baldur's Gate 2 Online Walkthrough by Montresor


CREATING A CHARACTER  |  GENERAL TIPS AND TRICKS  |  NPCs  |  ITEM LISTS  |   SHOPS   
Shadows of Amn: Chapter 1  |  Chapter 2  |  Chapter 3  |  Chapter 4  |  Chapter 5  |  Chapter 6  |  Chapter 7  
Throne of Bhaal  |  Watcher's Keep  
About the Walkthrough  |  Organization of the Walkthrough  |  About the Maps  |  About the Author  |  Where to Begin
Disable all ads!

Overview of Chapter 4  |  Quests in Chapter 4 
Areas in Chapter 4
Brynnlaw  |  The Asylum  |  The City of Caverns

The Asylum
Outside Area  |  First Floor  |  Irenicus' Laboratory  |  Candlekeep - The Dream  |  The Dungeon, First Level  |  The Dungeon, Second Level  |  The Dungeon, Third Level  |  The Dungeon, the Tests  

THE TESTS

Having survived the Dungeon, you end up in the tests that were originally designed to test the sanity of the inmates. They are now defunct but you still have to go through with them. Which tests you get to take depends on which answers you give the Apparition. The calmer and more reasonable you are, the easier the tests will be, and the better your reward in the end.

There are ten different areas but you will only get to visit half of them. Which half is up to yourself. ;-)
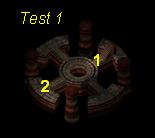
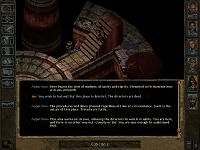
 

Test 1 – Kobolds

  1. Here is where you arrive from Level 3 of the Asylum Dungeon. You will be attacked by several Kobolds, some of which are on top of pillars where you can only attack them with ranged weapons.

    Once you have killed all the Kobolds in this room, an Apparition will appear here. Where you go next depends on whether you give him a reasonable answer or an angry answer. If you accept to proceed with the tests, you go to Test 3. If you refuse to cooperate or threaten the Apparition, you go to Test 2.
    My experiments also indicate that your reward in Test 10 depends on the answer you give here.

  2. These containers can be looted for a bit of gold and a Scroll of Identify.

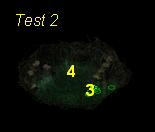
Test 2 – Mephit and Myconid Madness
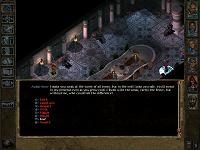
  1. Here is where you arrive if you give an angry or uncooperative answer in Test 1. You will immediately be attacked by a Greater Otyugh, a couple of Myconids, and some Mephits.

  2. Here the Apparition will appear again once all enemies are slain. He asks you a riddle. The correct answer, "A Splinter", gets you to Test 4. An incorrect answer gets you to Test 5.

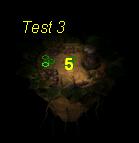
Test 3 – Spore Colony

  1. If you agree to cooperate with the Apparition in Test 1, you will have to fight a Spore Colony and any Myconids it manages to summon. Once done, the Apparition has a riddle for you (the same riddle as for Test 2). The correct answer, "A Splinter", gets you to Test 4. An incorrect answer gets you to Test 5.

Test 4 – The Dining Room

  1. Here is where you arrive if you answer the riddle correctly in Test 2 or Test 3. Loot the table for a Cloak of Reflection and some gold.

  2. The leftmost of the small tables holds minor treasure.

    Once done with the looting, speak to any one of the four people in the room. They will each ask you a riddle.
    The answer to the first riddle is "Nothing." If you answer this riddle wrong, you proceed to Test 7.

    The answer to the second riddle is "A river". If you get this riddle wrong, you proceed to Test 7.

    The answer to the third riddle is "Fear". A wrong answer sends you to Test 6.

    Finally, the answer to the fourth riddle is "Memory". A wrong answer sends you to Test 8.

    If you answer all four riddles correctly, you proceed to Test 9.

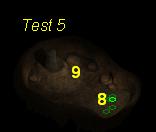
Test 5 – Umber Hulk, Earth Elemental, Mephits
  1. Here is where you arrive if you give a wrong answer to the riddle in Test 2 or Test 3. This time you are attacked by an Umber Hulk, a Lesser Earth Elemental, and a few Mephits.

  2. The containers here hold 10 Bolts of Lightning, 10 Arrows of Ice, and mundane weapons.

    Once the killings are done, the Apparition is back. A pleasant answer ("I wish the room had more life") gets you to Test 6, an angry answer gets you to Test 7.

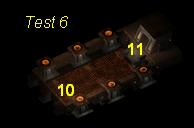
Test 6 – The Room of Fire

  1. Here is where you arrive if you answer the third riddle incorrectly in Test 4 or give a reasonable answer in Test 5. You will be attacked by several fire-based creatures (Magma Mephits, a Salamander, Lesser Fire Elementals).

  2. Here you will meet the Apparition. You proceed to Test 10.

Test 7 – Sahuagin

  1. If you answer the first or second riddle wrong in Test 4 or give an angry reply in Test 5, this is where you have to fight a Sahuagin Baron and two Baronial Guards.
    Once done, the Apparition shows up again and brings you to Test 10.

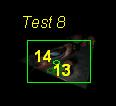
Test 8 – The Machine

  1. Here is where you arrive if you answer the fourth riddle incorrectly in Test 4. The Apparition asks if you are ready to move on. Tell him you are not.

  2. Here is a strange machine. Try to operate it, and you will instead grab a book from the body on the floor. The book contains hints on which order you should operate the levers on the machine.

    If you use a wrong lever, the machine releases a Lightning Bolt.

    The correct order to operate the levers on the machine is: Mithril, Ruby, Emerald, Sandalwood, Jade, Onyx. Operating the levers in the correct order earns you 10,000 XP and a pair of Bracers of Defense AC 5.

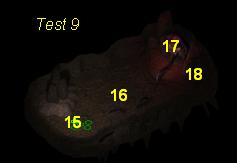
Test 9 – The Troll Room

  1. Here is where you arrive if you answer all four riddles correctly in Test 4.

  2. Here you will have to fight two Trolls and a Spectral Troll. One of them drops a Giant Troll's Head. Pick it up.

  3. Here is an altar. When you approach, the Apparition asks if you are ready to move on. Tell him that you would like to examine the alter first.
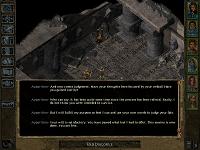
    Place the Giant Troll's Head on the altar, and you will be rewarded with the Bone Club +2, +3 vs. Undead.

  4. When done, speak with the Apparition to move on to Test 10.

Test 10 – The Roof

  1. Here is where you arrive when you are done with the tests. The Apparition judges you, and if you are found to have failed the tests, you have to fight a Mind Flayer and each party member gets 41,250 XP. If you are judged to have passed the tests, each party member receives 51.250 XP.

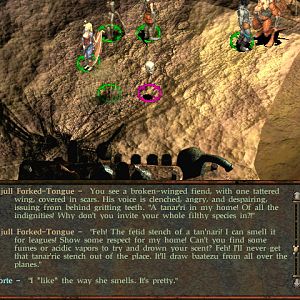
    Whether you pass or fail depends solely on whether you gave a good or bad answer back in Test 1.

  2. A container here holds some minor treasure.

  3. Here are the steps down to Irenicus' Laboratory.


Amazon.com
Amazon.ca
Amazon.co.uk
Sorcerer's Place is a project run entirely by fans and for fans. Maintaining Sorcerer's Place and a stable environment for all our hosted sites requires a substantial amount of our time and funds on a regular basis, so please consider supporting us to keep the site up & running smoothly. Thank you!

Disable all ads!