Baldur's Gate 2 Online Walkthrough by Montresor


CREATING A CHARACTER  |  GENERAL TIPS AND TRICKS  |  NPCs  |  ITEM LISTS  |   SHOPS   
Watcher's Keep: Outside  |  Ritual Level  |  Elemental Level  |  Maze Level  |  The Machine of Lum the Mad  |  The Final Seal  |  The Imprisoned One
Shadows of Amn  |  Throne of Bhaal  
About the Walkthrough  |  Organization of the Walkthrough  |  About the Maps  |  About the Author  |  Where to Begin
Disable all ads!

LEVEL 1 – THE RITUAL

Your objective on this first level is to perform a ritual that will open the portal to the next level.
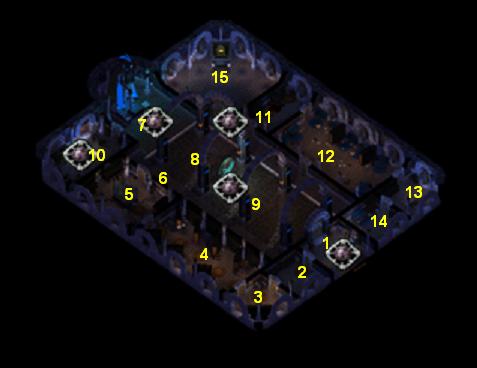
  1. Here is where you arrive. You can exit back out to the Outside Area from here.

  2. Here is the ghost of an archivist who complains of the cold.

    The cupboard at (x=1840, y=1850) contains some books, 362 GP, and random treasure.

    The cupboard at (x=1870, y=1830) contains more books plus some mundane Throwing Daggers and Trowing Axes.

    The cupboard at (x=1910, y=1800) is trapped and contains 4 Potions of Extra Healing, a Wand of Sleep, 250 GP, and random treasure.

    The chest at (x=2050, y=1890) is trapped and contains Paladin's Bracers, 6 Antidotes, 40 Bullets +1, 40 Arrows of Piercing, 40 Bolts +1, and a variety of mundane missile weapons.

  3. In this room will be a Stone Golem.

  4. Here you will have to fight some random monsters.

    The bookshelf at (x=1610, y=1810) contains a piece of Tattered Parchment and a copy of Elminster's Ecologies. The parchment explains part of the ritual you need to perform.

    The bookshelf at (x=1490, y=1710) contains a Handwritten Note. You'll want to save all notes you find; they will be useful on Level 4. (Or you can just read this walkthrough when you get there!;-))

    The bookshelf at (x=1330, y=1600) contains the Golem Manual, some books, and minor treasure. With the right pages, Cespenar can upgrade the Golem Manual to summon better golems.

    The chest at (x=1180, y=1530) contains another piece of Tattered Parchment, 20 Darts +1, and 2,000 GP.

  5. Here is a statue that shows a depiction of The Imprisoned One. However you can't make anything out clearly.
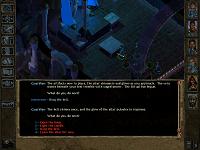
    The cupboard at (x=450, y=1260) contains a Bell and some books. You'll need the bell for the ritual.

    The cupboard at (x=630, y=1130) is trapped and contains the Case of Plenty +1, another copy of Elminster's Ecologies, and some books.

    The chest at (x=770, y=1200) is trapped and contains the Crimson Dart +3, 10 Bullets +3, a Potion of Superior Healing, a book called History of The Imprisoned One, Chain Mail +1, and minor treasure.

  6. When you open this door, you will be attacked by a few Vampiric Wraiths. Beware of level drains.

  7. Here is the altar where you are supposed to perform the ritual. Check out the statue behind the altar to learn that you'll need a Book, a Bell, and a Candle. The Book is already on the altar.

    When you place the three items on the altar, some of the statues at 8 will come to life and attack you.

    When you perform the ritual, the rest of the statues at 9 come to life and attack.

    Read the three pieces of Tattered Parchment you found at 4 and 13 to learn how to perform the Ritual. The correct order is:
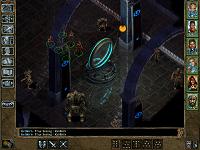
    1. Ring the Bell.
    2. Ring the Bell again.
    3. Light the Candle.
    4. Open the Book.
    5. Ring the Bell again. Each party member gets 25,000 XP and the portal opens.

  8. Here are some statues. When you place the Book, the Bell, and the Candle on the altar at 7, they will come to life and attack you.

    Make sure to loot one of the statues for the bastard sword Foebane +3.

  9. Here is the portal to the Elemental Level. It will not be active until you have performed the ritual at 7.
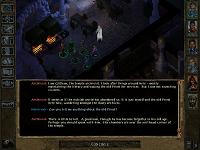
    The statues in this area will come to life and attack you when you perform the ritual. Among the loot will be Usuno's Blade +4, a Dagger +3, a Bastard Sword +2, a Large Shield +2, a Halberd +2, a Long Bow +3, Arrows +3, and Arrows of Fire.

  10. In this room will be a number of Mustard Jellies. A well-placed Firestorm should take care of them. ;-)

    Once you have found the Tinderbox at 11, come back here and click the fireplace at (x=280, y=1090) to light the fire. Each party member receives 4,000 XP and the ghost from 2 who complained about the cold will show up to thank you and also offer you a tip about the Priest at 15 – you should bring him his slippers.

    The chest next to the fireplace at (x=340, y=1050) contains the Candle, 20 Arrows +3, 20 Bolts +3, 20 Bullets +2, and minor treasure.

    The closet at (x=590, y=900) contains some books and a Wand of the Heavens.

    The closet at (x=690, y=970) contains some books, 20 Bullets +2, and minor treasure.

  11. In this room, search for traps.

    The bookcase at (x=1650, y=750) contains some books, a pair of Slippers, and minor treasure. Hang on to the slippers!

    The closet at (x=1840, y=610) is trapped. It contains the Quiver of Plenty +1 and a Handwritten Note with some tips on the ritual.

    The little table at (x=1900, y=600) contains a Scribbled Note and two Potions of Superior Healing.

    The container behind the alter at (x=1980, y=590) is trapped. It contains a Tinderbox and an Ammo Belt.

  12. Before entering this room, prepare a bit. Here will be some random monsters (I have seen both a variety of Shadow-type creatures and a variety of Spiders), and there is a trap near the northern door at (x=2020, y=890).

    The bookshelf at (x=2240, y=930) contains a few books and a Blue Wardstone.

    The bookshelf at (x=2460, y=1070) contains more books and a Potion of Superior Healing.

  13. The bookshelf at (x=2590, y=1290) contains a few books and a scrap of Tattered Parchment. With the two pieces of parchment you found at 4, you should now be able to perform the ritual.

    The closet at (x=2780, y=1230) contains a Green Wardstone, a Potion of Superior Healing, books, a Bloodstone Amulet, and a Small Shield +2.

  14. In this room will be a Spellhaunt.

    The table at (x=2420, y=1500) contains another Handwritten Note.

    The closet at (x=2600, y=1480) contains the Key to the Priest's room, 4 Potions of Extra Healing, and a King's Tears gem.

  15. Here is the Priest's room. Click the lid of the sarcophagus. If you have both the wardstones from 12 and 13, the Guardian Golems won't attack; otherwise you'll have to fight them. Each golem nets you 13,000 XP, so why not? ;-)

    Click the sarcophagus again and the Priest rises from his grave. Give him his slippers which you found at 11, and he'll leave peaceably. Each party member receives 20,000 XP.

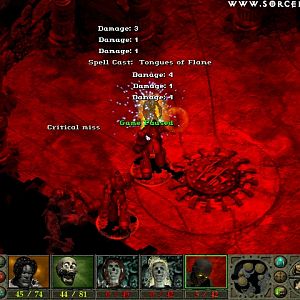
    Click the sarcophagus a third time to learn which page of the Book you need to look at during the ritual. Each party member gets 8,000 XP. Now go back to the altar at 7 and perform the ritual, and you'll be ready for the Elemental Level.

    Search the panel at (x=1040, y=430) for a Handwritten Note.


Amazon.com
Amazon.ca
Amazon.co.uk
Sorcerer's Place is a project run entirely by fans and for fans. Maintaining Sorcerer's Place and a stable environment for all our hosted sites requires a substantial amount of our time and funds on a regular basis, so please consider supporting us to keep the site up & running smoothly. Thank you!

Disable all ads!