Baldur's Gate 2 Online Walkthrough by Montresor


CREATING A CHARACTER  |  GENERAL TIPS AND TRICKS  |  NPCs  |  ITEM LISTS  |   SHOPS   
Watcher's Keep: Outside  |  Ritual Level  |  Elemental Level  |  Maze Level  |  The Machine of Lum the Mad  |  The Final Seal  |  The Imprisoned One
Shadows of Amn  |  Throne of Bhaal  
About the Walkthrough  |  Organization of the Walkthrough  |  About the Maps  |  About the Author  |  Where to Begin
Disable all ads!

The Machine of Lum the Mad
The Machine of Lum the Mad  |  Mind Flayer Area  |  Githyanki Area  |  Saladrex's Lair  |  The Demilich's Room  

THE MACHINE OF LUM THE MAD

As you arrive on this level, you witness several Githyanki and Mind Flayers battling each other in front of a monstrous machine. Inside the machine, a man laughs maniacally at the spectacle before summoning a Demon that scares the Giths and Mind Flayers away. You then approach to speak to him.

The machine is the key to getting to the next level. But first, you will have to break the glass and free the madman.
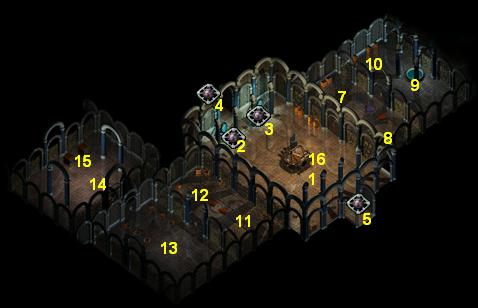
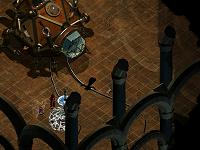
  1. Here is the machine of Lum the Mad. Trapped in it is the self-appointed lord of the level, Carston the Magnificent. When you first arrive, you automatically speak to him. No matter what you say, in the end he will summon four Mind Flayers to attack you, or cast other spells at you.
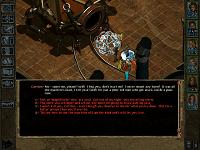
    If you speak to Carston later, before you figure out how to break the glass, he may cast spells at you. So don't waste too much time on him.

    Please see below under 16 for the solution to how to break the glass and open the portal to the Final Seal level.

  2. This portal leads to the Outside Area.

  3. This portal leads down to the Final Seal level. It will be active once you have freed Carston and used the machine of Lum the Mad to activate the portal.

  4. Here are the stairs to the Illithid Encampment.

  5. Here are the stairs to the Githyanki Encampment.

  6. Here are four cabinets with various goodies:

    The one at (x=3420, y=1630) is trapped and contains 40 Arrows of Piercing, a copy of Elminster's Ecologies, and random treasure.

    The one at (x=3350, y=1570) contains 40 Bolts +1, 80 Arrows +1, Full Plate Mail +1, and various mundane weapons. You'll want to pick up some of these weapons for a fight on this level.

    The one at (x=3250, y=1510) contains 40 Bolts +2, 40 Bolts +1, 10 Antidotes, and random treasure.

    The one at (x=3220, y=1460) contains 40 Bolts of Lightning, another copy of Elminster's Ecologies, and random treasure.

  7. As you enter this room, you will be attacked by several Mutated Spiders. Try to have characters who are immune to poison enter first to take the brunt of the attack.

    The container at (x=3510, y=1190) is trapped and contains 20 Bullets +4, 20 Sunstone Bullets +1, and minor treasure.

    The container at (x=3560, y=1150) contains 30 Arrows of Biting and minor treasure.

    While here, you may want to make a note of the three colored markings on the floor. From the upper left, they are: Blue, Purple, Red.

  8. Down here will be an assortment of Trolls. The chest contains 40 Bullets +2, 80 Bullets +1, and a copy of Elminster's Ecologies.

  9. Before entering this room, switch to mundane weapons (you can find a variety of these back at 6). The area is guarded by two Magical Golems which can only be harmed by non-magical weapons.

    Once the Golems are dispatched of, loot the pond for the Blue Oil.

  10. Up here are three containers:

    The one at (x=3830, y=930) contains 30 Arrows of Ice and minor treasure.

    The one at (x=3980, y=840) is trapped and contains a Wand of Magic Missiles, 10 Bullets +4, and minor treasure.

    The one at (x=4050, y=790) contains 40 Bolts of Biting and minor treasure.

  11. Down here is an Orog war party. The cabinet contains 10 Potions of Healing, 5 Potions of Extra Healing, and 5 Potions of Superior Healing.

    Make a note of the color markings on the floor: Red, Red, Purple. It matters.

  12. The four "containers" up here are really Killer Mimics. Once they are dead, loot them for:

    At (x=1950, y=2290): 30 Bolts +3 and minor treasure.

    At (x=2160, y=2120): A Wand of Spell Striking, 4 Potions of Superior Healing, and a Scroll of Protection from Energy.

    At (x=2240, y=2140): 30 Arrows +3, 30 Bolts +3.

    At (x=2380, y=2240): Minor treasure.

  13. In this room will be random monsters.

    Once you have both the Blue Oil (from 9 in this area), the Red Oil (found at 9 in the Illithid Encampment), the Purple Oil (found at 3 in the Githyanki Encampment), and the Flint and Tinder (found at 1 in the Githyanki Encampment), the six braziers must be lit in the same order as the markings on the floor at 7 and 11:

    Upper row, from upper left to lower right: Blue, Purple, Red

    Lower row, from upper left to lower right: Red, Red, Purple.

    Once you do this, each party member receives 10,000, and the door to 14 opens.

  14. Here will be Rock and Garock, two über-hard Minotaurs, along with their pet Frost Salamanders.

    Rock drops the Axe of the Unyielding +3 and a Battle Axe +3. Garock drops a Battle Axe +3 and 2 Potions of Superior Healing.

  15. The leftmost of these two safes is trapped and contains the Crystal Mallet, 20 Arrows +3, 20 Bolts +3, and 20 Bullets +3.

    The rightmost safe contains a Potion of Strength, 5 Bolts +1, the Clay Golem Page, 1,000 GP, and minor treasure.

    With the Crystal Mallet, you can go back to the Machine of Lum the Mad.

  16. Once you have the Crystal Mallet from 15, come back here. Click the glass surrounding Carston and select to hit it six times. The glass shatters, and each party member receives 7,500 XP.

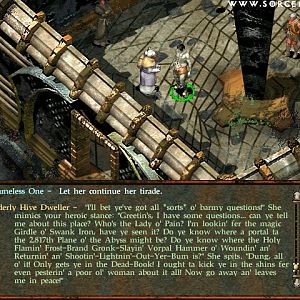
    You can choose to kill Carston for 6,000 XP. Or let him slink off for 10,000 XP. Either way, you'll get Carston's Journal which explains how to escape the level.

    With the Handwritten Notes you have found around the place, you can now use the Machine of Lum the Mad to get some extra bonuses:

    - Short, Medium, Square: User gets +1 to Strength.

    - Long, Red, Circle: User gets +1 to Constitution.

    - Blue, Square, Short: User gets +1 to Dexterity.

    - Long, Circle, Blue: User gets +1 to Intelligence.

    - Circle, Square, Triangle: User gets +1 to Wisdom.

    - Short, Red, Green: User gets +1 to Charisma.

    - Long, Blue, Green: User gets permanent +5% to Magic Resistance.

    - Medium, Green, Triangle: Party gets the Storm Star +3 mace.

    Finally, to open the portal: Triangle, Red, Medium. Each party member receives 25,000 XP and the portal to the Final Seal opens at 3.

    Using any other combinations on the machine will have random consequences, most of which are detrimental.


Amazon.com
Amazon.ca
Amazon.co.uk
Sorcerer's Place is a project run entirely by fans and for fans. Maintaining Sorcerer's Place and a stable environment for all our hosted sites requires a substantial amount of our time and funds on a regular basis, so please consider supporting us to keep the site up & running smoothly. Thank you!

Disable all ads!