-

- Forums
- Chatrooms
- Gallery
- Gameplay Videos
- Upload
- Articles
- Mod Reviews
- Shop SP: Games, Movies, Books

Brecilian Forest | The Camp | Circle Tower | Denerim | The Final Battle | Haven | Landsmeet | Lothering | Orzammar | Ostagar | Redcliffe | Ruined Temple Areas available as Downloadable Content: Honnleath | Return to Ostagar | Warden's Keep |
The Final Battles | The Archdemon |
Final Battles
You're in the final phases of the game. To make it short, you're going to cover familiar territory, places you've been to before, only that they're now overrun with Darkspawn. The key to progress is to wipe out the Darkspawn from each area, in particular their leaders.Redcliffe Village
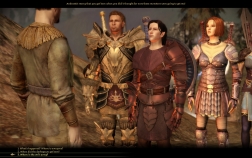 You'll encounter several groups of Darkspawn here, especially at the bridges. They tend to be lower level, and quite easy to kill, especially with area-effect spells. In the middle of the town, near the Chantry and the Blacksmith shop, there will be a very large group of Darkspawn that includes two Ogres and a Genlock Emissary. Once you're done here, its on to the castle.
Courtyard of Redcliffe Castle
Here you'll notice a very large group just beyond the Gate. They won't be going for you, they'll be going for the Guards at the door to the castle. So rush them as fast as you can. If you have any party-friendly spells that interfere with their ability to attack, like Blood Wound, Captivating Song, Waking Nightmare, Sleep, etc., this is the ideal situation for them. Once this group is gone, another large group will appear behind you. Lay back and hit them with area effect or storm spells. Wait until they're all gone, except for the Ogre Alpha that is likely to survive. Now pepper him with spells meant for individual monsters.
Now a soldier of Redcliffe will come, and relate that Riordan has come ahead of you and wants to talk with you inside the castle. Once inside, you'll find yourself at about #13 of the main floor of Redcliffe Castle. Arl Eamon will explain that the main force of the Darkspawn, along with the Archdemon, are headed towards Denerim.
Now make your way to the stairs at #16. In the room of the stairs, you may notice a few of your companions, but also the Dwarven father and son team of Bodahn and Sandal. Sandal continues to offer his services in rune enchantment. Bodahn offers a different inventory of goods this time, often weapons and armor made of Dragonbone, Silverite, or Drakeskin, as well as a lot of potions, salves, and crafting components. A few noteworthy items that he now offers include:
Tome of Physical Technique
Heaven's Wrath (Silverite)
First Enchanter's Cowl
Grandmaster Frost Rune
Master Paralyze Rune
Once you've climbed the stairs, find Riordan in the room at #5 of the upper floor of Redcliffe Castle. He'll explain the situation. Only a Grey Warden can permanently slay the Archdemon with a killing blow. If anyone else does, the Archdemon's spirit will simply take over the body of the nearest Darkspawn and reform. But when a Grey Warden lands the killing blow, the result is that both the Archdemon and the Grey Warden will destroy each other permanently. Riordan volunteers himself for the task, as he is now the eldest living Grey Warden.
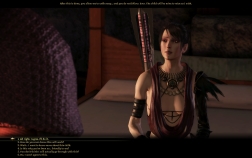 Now head to the room at #4. Morrigan has a proposition for you. She wants you to conceive a child with her. The child will be born with the taint, and can absorb the spirit of the Archdemon without dying. Whether you fall in with this request is up to you, but this is a choice that can have profound ramifications for the particular ending and epilogue that follows completion of the game. If you turn down her quest, she'll leave you permanently, and will be unavailable as a party member for the balance of the game. If your Grey Warden character is female, or if your male character is unwilling, either Alistair or Loghain will do just as well as for Morrigan. If it comes to Alistair or Loghain, Morrigan will want you to speak to either one on her behalf.
Denerim - City Gates
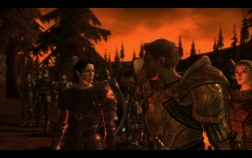 Once you've made your decision, it's on to fight the Darkspawn that will be attacking Denerim. You'll be treated to several cutscenes whereby the forces you've recruited will be on the march to Denerim, as well as a rallying speech before the fighting begins. Once that is finished, you'll have to fight a few waves of Darkspawn attacking the city gates. They will be rather weak though, and often fall after one or two blows.
Once they're all taken care of, speak to Riordan. His plan is to engage the Archdemon at a high point in the city, Fort Drakon. He also hints that the Archdemon will summon its generals to its aid once attacked. You may therefore want to seek out the generals first. Riordan will suggest bringing either Alistair or Loghain, and two other companions with you into the city. Note that despite the recommendation, you can pick any three companions you want to go with you into the city. Make your way to the city gates, and a new map of the city of Denerim will show up, with now only a few areas you can go to.
Denerim - Market District
Same ol' Market District, except it's up in flames. When you first enter, you'll have to defeat several Ogres as well as a few Genlock Emissaries. Towards the southeast portion of the district is the Hurlock General, along with an Ogre or two. Something you may want to try is to lure the General forward, and plant either crowd control or area-effect/storm spells where he once had been, since an Ogre or two will regularly come forward to help out the General. The idea is to either whittle down their hit points and/or slow them down while you take on the General. Hit the General with everything you've got, whether its damage or abilities that reduce his ability to fight. Once he falls, you can loot his body for Corruption and the Axe of Vashoth (Red Steel).
Denerim - Elven Alienage
When you first arrive, you'll find Shianni and a few other Elves in the central part of the Alienage. Needless to say, they'll want your help. Some Darkspawn are about to break through a gate to the north. This actually buys you time to set up crowd-control and storms to take care of the first wave of Darkspawn. After this, rush the Hurlock General, who also happens to be an emissary. Don't worry about the Grunts and so on, take out the General as quickly as you can to minimize his spellcasting. If you've got Mana Cleanse, by all means. The General leaves behind the Malign Staff, the Reinforced Magus Cowl, and the Spiral Band.
Go back and talk to Shianni. She'll give you the Dawn Ring as a reward.
Denerim - Holding the City Gates against another attack
When you've cleared the other districts, make your way to the Palace District. You'll get interrupted though, because the Darkspawn are massing for another attack against the City Gates. This time, four companions besides the ones you chose to travel with you will have to holds the gates against the invasion. This is why there's an incentive to at least find decent equipment for everyone along the way. It will start off with an Ogre Alpha and a lot of Hurlocks. Concentrate on the Ogre first. After this, keep an eye out for the odd Hurlock Emissary that may show up. Go for them first and foremost. Once you go the distance, an arrow will appear over a Messenger. Tell him to send word to Riordan that the gates are safe in order to progress the game.
Denerim - Palace District
Now it's back to your Grey Warden and his chosen companions. You'll be treated to a cutscene whereby Riordan makes a very good attempt at killing the Archdemon, but doesn't quite succeed. The Archdemon is however weakened, and will be waiting for you atop Fort Drakon.
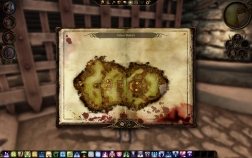 In the meantime, you'll have to make your way through a LOT of Darkspawn in this area. Your destination is to make your way to the gate at the east end of the district. Towards the east gate will be a mix of Ogres, Shrieks, and Darkspawn Archers. Keep in mind that getting off storm spells might be difficult because many of the Archers can use Scattershot. If you're patient enough, you can try the drawing out technique to lead the Darkspawn around the corner a few, or several, at a time. Or alternatively, if you think you have enough healing abilities, and crowd-control abilities that can be used against incoming swarms, you can try rushing the large groups of Darkspawn.
Fort Drakon
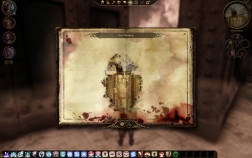 Note that it is possible to take out the foremost groups of archers with offensive spells without bringing the rest of the horde into it. At about the mid-point of the field is a Dragon Thrall that will attack you. This can also be lured back to the front gate without bringing the rest of the forces into it. Once all that is done, now set up Storm or area-effect spells on the remaining forces on the steps to the fortress. Note that there will be at least a couple each of Hurlock Emissaries and Genlock Alphas, so they may need some extra help in the way of missile fire to bring them down.
Fort Drakon - Main Floor
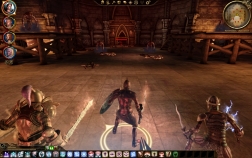 The main floor will be empty at first appearance. Once you step forward, you'll get attacked by several Shades and a Genlock Conjurer. Note that the Genlock Conjurer can use a teleportation effect whereby he trades places with a Shade, so long as a single Shade is still alive. It is therefore imperative to take out the Shades as quickly as you can. If you have Mana Cleanse, it can really come in handy as well since it can severely damage these Shades that use minor spells as well. Otherwise, use Health Poultices if you have to. And work as quickly as you can with carefully aimed offensive spells.
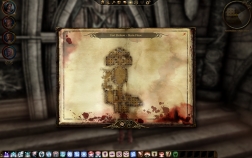 Past the door to the south will be a Hurlok Emissary, a Genlock Shapechanger, and many undead waiting for you. Simply open the door, and pull back. Plant storm spells on the other side of the door, since it will catch your enemies. If you can do the Storm of the Century, even better.
Now make for the southeast corner of this floor. Bodahn's son, Sandal, will be there to meet you. Sandal will now offer quite a few wares that were not previously available. These include a lot of weapons and armors made of either Silverite or Dragonbone. A few notable ones that were not previously available include:
Master Dweomer Rune
Expert Silverite Rune
Warpaint of the Waking Sea
Note also that at this point, Sandal will present your last opportunity to tweek your weapon enchantments before you face the Archdemon. He also provides a great opportunity to load up on high grade Health Poultices and Lyrium Potions.
Fort Drakon - Second Floor
This place will take a fair bit of exploring, but is otherwise quite simple. There are a lot of chests strewn about.
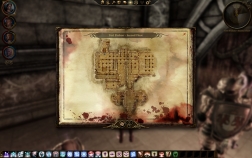 Once you make towards the northeast corner, you'll get ambushed by several Genlock Assassins, including a Genlock Master Assassin. Be ready with party-friendly abilities that are optimally used for when you get surrounded (e.g. Blood Wound, Sleep, Waking Nightmare, Captivating Song, War Cry, etc.).
Past the door leading to the very northeast are a large group of Genlock archers. They are easily taken out by opening the door and spraying the room with area-effect and storm spells.
Your ultimate destination is a large room at the south end. Waiting for you will be a Hurlock Emissary and two Ogres, which by now shouldn't be hard anymore. Explore the side passages, there will be at least a couple of chests that provide much welcomed high-grade Health Poultices and Lyrium Potions before your final battle.
Now its a matter of taking the stairs and beginning your climactic confrontation with the Archdemon.

