|
Icewind
Dale Solution by Sylvus Moonbow
|
PROLOGUE
CHAPTER 1
CHAPTER 2
CHAPTER 3
CHAPTER 4
CHAPTER 5
CHAPTER 6
ITEM LIST
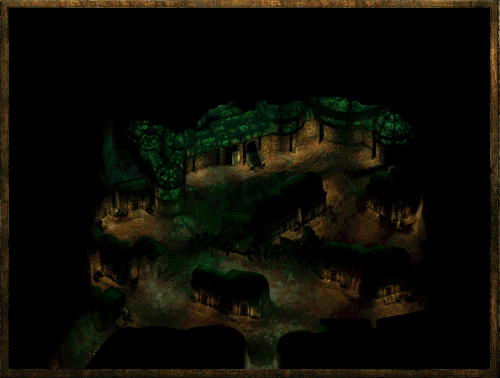
THE LOWER DORN - About Lower Dorn
Greetings brave warrior, 'tis a good
sight for sore eyes to see you have made it thus far in thy journey for
adventure, fortune and fame. Thy wounds look deep, but wounds of a veteran
and one that is very close at completing the journey you embarked on so
many moons ago back in Easthaven. Please, walk with me for a while so
we can reflect on where you've been and how you've gotten to this very
point. Yes, yes. This way. Come along now.
This is the final chapter, you do realize that correct? I hope so, for your sake, because what we are going to face
together will put you through the test of strength, dexterity, wisdom and intelligence. I should not forget about
constitution either for it will be your very will to take a beating that will get you through this foul and evil
place. Charisma you ask? You won't need a smile and a wink of thy eye to get you through this part. I assure thee!
Art thou happy with thy weapons? You will surely need a good blade as well as powerful magics to ease thy journey
into the heart of this final chapter and I hope you are ready. Let us begin...
The Lower Dorn is quite the place and even I was taken back by its vast size and network of tunnels and underground
chambers that had me scratching my head a few times as to what went where and how I got there in the first place.
For you though, all the maps will be easily marked, as they have been in this solution since the start, so without
further delay, let me guide you through the final chapter of Icewind Dale!
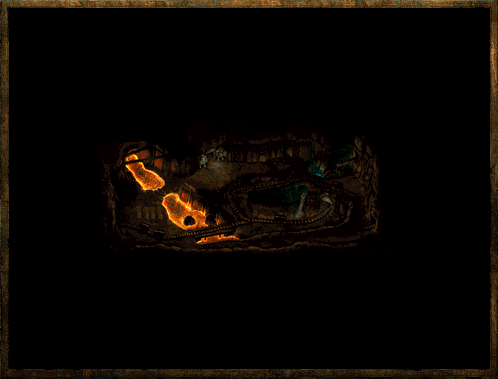
THE LOWER DORN - Into its depths!
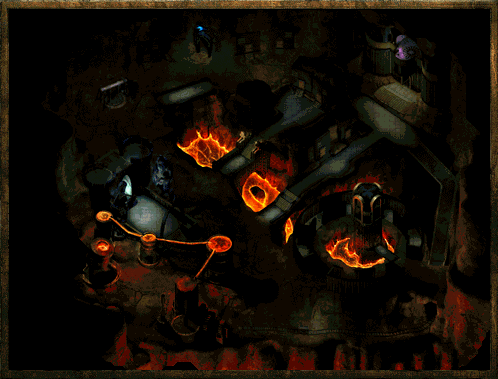
Molten rock will bubble and glow a devils red as you enter this place, blasts of heat will
singe thy hair and burn thy skin if you walk too closely to the large vats that are scattered between rivers of melted metal
and mining tracks.
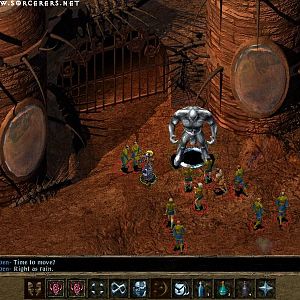
'tis a perfect place for Fire Salamanders to walk along and whip the Gnome slaves into shape or perhaps rip out their tongue
if they step out of line. Ordered around by the Tarnished Sentries, the Fire Salamanders patrol the grounds looking for any
type of trouble and of course, you are like an alarm going off when you step forth to challenge them.
Casting Protection from Fire by your Cleric or multiple ones if you have, will not only help keep the heat from bothering thy
skin, but also keep you protected from the fire blasts from the Fire Salamanders while you battle them up close. They shouldn't
be much of a problem for thy party and if they are, I suggest you look yourself long and hard in the mirror and ask thyself if
you are ready for the challenges that lay ahead.
The Tarnished Sentries will not sit back and watch their patrols go to work on your party and will also join the fray, drawing
their bows and launching a slew of arrows in your general direction but don't let that fool you. Although cowards for using a bow,
they can hold their own up close just as well and deal some fairly deadly blows on weaker members of thy party. Step around them
carefully during thy battles.
As your party continues to stumble across Fire Salamander after Fire
Salamander, eventually you will make your way to the doors of Marketh's
Keep, where a short little male halfling fellow named Seth will greet
you, asking about your business in the Lower Dorn as well as if you have
papers stating your reasons for being here. Unfortunately, I had no such
papers and if there are any that got you past the situation that happens
next, please e-mail me and fill me in.
Seth shook his head as I told him I had no papers and his jaw clenched as he pointed a small, stubby finger at my
general direction. "Attack them!" he shouted and I then realized I had possibly walked right into a trap as thieves
began to appear all around me, their blades glistening in the molten rivers of metal that ran from the giant vats
near by.
Now this was unexpected for myself and my party, which got careless in their approach and I was lucky to still have
my mage standing after the battle as many of the thieves targeted him first and chased him down. If it were not for
the invisibility spell he had memorized, he would have hit the dirt very quickly.
The thieves appeared all along the bridge and to each and every side of my party, which made this battle very dangerous
as my route to escape, if I needed one, was now blocked and using any type of offensive radius spell proved useless.
That was, until I recalled the Protection from Fire cast before to protect me from the fire blasts of the Fire Salamanders.
After all the thieves had gone after my fighters when my mage vanished, it was my mage who returned the surprise to them
as he began to weave his hands and casted two fireballs into the circle of thieves around my desperate party. Fire danced
everywhere and it was only the thieves who took damage as the rest of my party laughed in glee as one by one, the thieves
fell to the licking, hot flames of death.
Seth will vanish and if you follow him, he'll lead you into the Atrium but more on that later.
So if fighting isn't your answer at this point, you can do other things, which our readers have sent me plenty of
information about, thanks given after I fill you in on what I've learned.
While speaking with Seth, if you have a Halfling in your party, you can use the option to tell Seth you're a famous
relative and although Seth will say it's not good enough for him, he'll let you through anyhow.
Upon your return though, if you leave the same way you went in where
Seth was found, be warned that you will be attacked for "causing trouble"
on the inside and the thieves as described above will come out of hiding.
The same will happen if you use the option "In the name of Kinship" so be wary!
Thanks to Bob, Krystalos, Errand, Tryggiv and Panos for sending this input in!
A tactic was sent in by another reader, in case you wish to battle Seth
and take down his band of invisible thieves and an excellent tactic at
removing the threat.
"Take your entire party and put them at the western edge of the bridge
that leads to Seth. Have your Mage put improved invisibility on your BEST
Fighter. Take your remaining two fighters and put them in front of your
Cleric and Thief. Have the mage cast Haste on herself and the fighter. Have
the fighter walk up to Seth ( don't talk to him but rather sneak behind
him), but keep your distance. Have the Mage cast Cloudkill at the foot of
the steps next to Seth (don't hit your Fighter). Take the Mage and make Haste
back behind your remaining two Fighters. When you see the thing that says
'Thief: leaving shadows' have your Cleric cast Invisibility Purge! Suddenly
all the Thieves will be visible to you ( so they can't backstab) and your two
fighters will be able to see them (and have none behind them if you place them
far enough from Seth). Just cleave through the Thieves (who really suck
without stealth, you can even fireball them when they are crowded on the
bridge.) While all this is happening just use the last fighter and slay Seth.
"
High fives to Philip for his tactic at removing this threat.
Seth is one tricky guy to get past, and more information about Seth kept flooding in. Here is more about using a different
dialog option.
"When you first speak to him he will ask you who you are and you will have a chance to respond that you are from the Kraken society. He will then test you and ask you what color a Kraken is [Answer: Purple]. When you answer that he will ask you who you come to work for and the your response should be [Answer: Marketh]. Seth will then ask who Marketh serves and the you'd reply [Answer: Ilmater]. I figured this all out by talking with everyone in Lower Dorn before approaching the palace."
Great job done by Enrico, Dana and Will, Claire, Ferry, Joe, Nicholas, Damien, Arnold, Shrike and Silviu for this information.
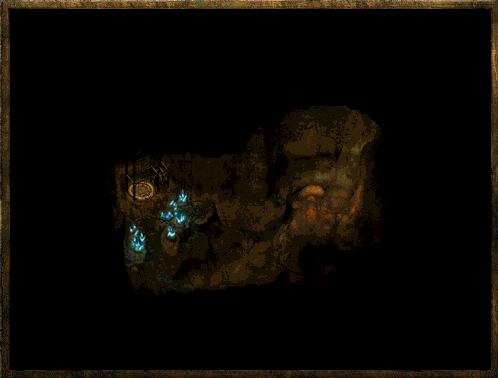
It's not all foul beasts and men coming out of the shadows to lay the beats on you as you'll come across a young
girl by the name of Fengla who sadly happens to have her tongue cut out. She's very helpful, even though she doesn't
say much and will hand over the
WATCH TOWER
KEY which you will obviously need to enter the towering Watch Tower that you found her near.
Fengla was on her way to deliver food to the archers in the Watch Tower but rather than going up once again to get some
action with the male archers, she opts to move into the shadows and vanish, leaving you to the dirty work which should make
you smile as it's your turn to show those male archers it isn't right to fool around with a young little girl!
Now I found this battle to be pretty difficult not because of the archers in general, but because of the limited space
I had to move around. With an archer on the tower floor then more running up along the stairs to the floor above, I had to
kill each one before I was able to get to the other. I'm sure you could knit pick your way around them if you wanted to
but I couldn't be bothered. I honestly had to reload this a few times because my mage kept on getting waxed by the very top
archer who had a damn good shot! Eventually, with a few helpful spells known as Haste, Bless and Prayer, the archers were
mine for the taking.
You can rest on the second floor safely and I did so more than once, otherwise I didn't find much use for the Watch Tower
after this.
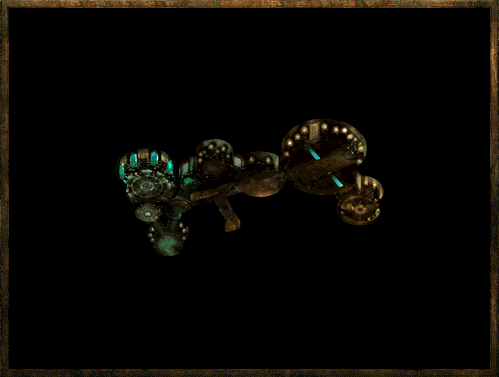
This part of the Lower Dorn has many exits to other parts of the Dorn, those being the Elevator down to the Lower Mines,
the entrance to The Atrium, one leading into the Upper Mines and another that takes you to The Twisting Streets that lay
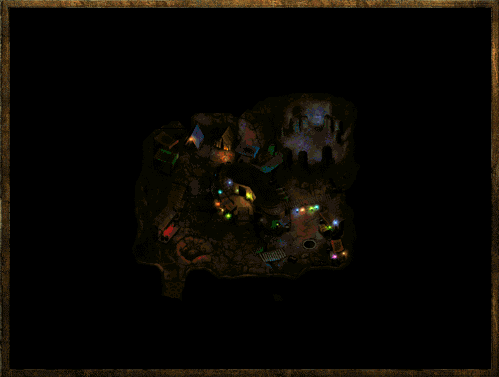
just before Malavon's Keep. Check The Lower Dorn Enlarged Map for more details.
I found no traps here.
THE LOWER DORN - Upper Mines
The sound of pick axes ringing off the rock face deep within the mines tunnels can be
heard as Gnomish Slaves work day in and day out, digging their way through the earth to find new resources for those who
have enslaved them. Do thy best to help any if you can, but keep your mind on the cause for within these very mines
are the
3RD BADGE and
4TH BADGE
which can be found on the Priest Maiden Ilmadia and Brother Harken respectively. Finding them won't be a problem.
Now here is also where you will find Guello, a Ruby Priest that was
captured by Marketh's henchmen Seth and thrown into the mines to work
with the other slaves and fortunately, he still has his tongue and will
be able to speak with you when you find him. Guello will ask a small favour
from you and that is to kill the Salamander King Shikata and his kin who
are watching over the slaves and Guello within the mines. An easy task
for such brave warriors such as yourself yes? Fairly so and I had absolutely
no trouble at all with Shikata or his pals who reside in this area. Once
Shikata and all the other Fire Salamanders are slain, return to speak
with Guello for your reward.
Once you've cleared out this area, move on to the next. There were no traps to be found here.
THE LOWER DORN - Upper Mines:
Maiden Ilmadia's Lair
Priestess Maiden Ilmadia resides here along with her fellow followers of Fire Giants who were sent
by Maiden Ilmadia to keep the Fire Salamanders in line, who also dot these parts of the Upper Mines and who will attack you on sight.
Swing thy blade through their burning scales and drop them to the very dirt and continue on thy way. Just like the Frost Giants back
in Joril's Lair, the Fire Giants in Maiden Ilmadia's Lair will not attack you, at least not just yet. You can speak with one of them
to get directions to Maiden Ilmadia so you can go have a little word with her and of course, to attain the
3RD BADGE
which she holds.
This battle is a major pain in the rear, or at least I found as I continued to get waxed by the wolf pack tactics used by Maiden Ilmadia and
her ever so hot headed Fire Giants who, as you may recall, were friendly to us before, have now turned against us. The wolf pack tactics are
very simplistic and they work well for a party that isn't very well prepared for the battle at hand, which I was not when I first came to speak
with Maiden Ilmadia. First of all, all the Fire Giants that are near by will flock to Maiden Ilmadia to aid her in putting you out of business,
which they do an excellent job as they cross the wooden bridges and come from behind.
The first time around, I was not at all prepared for that due to the fact
all the foul beasts before hand were pretty stupid. If they didn't see
you, they didn't come knocking. I ask myself, where was this great tactic
during the rest of the game? It would have kept everyone from pulling
out each monster one by one during the game and it's disappointing to
play a game where the AI is just so lame. This time though, I give them
full credit for using the surroundings to their advantage. That's when
I had to begin to think out my own plan of attack as well as defensive
positions for this battle.
First of all, cast Haste. Although all your party members will need to rest afterwards, it's one spell that is a great help in times like these.
Second, add Bless and Prayer to your party, two excellent spells that will help you during the battle.
Third, Monster Summoning 1,2,3 and Elemental Summoning are very helpful since before you speak with Maiden Ilmadia, you can place them
at the lip of each bridge. As the Fire Giants come to Maiden Ilmadia's aid, they'll have to battle through your summoned creatures first.
With that done and laid out, I spoke with Maiden Ilmadia and got myself ready for a large scale battle of blood, which I hoped was not
going to be mine!
One member of my party immediately went after Maiden Ilmadia while a second
and third took care of the two Fire Giants that are situated near her
during the dialog and afterwards. The fourth and fifth armed with bows,
launched arrows at the Fire Giants battling on the bridge, one attacking
either side. Last, my mage began weaving like a mad man and I dealt out
everything I could to the bridge on the right side for it is here a very
large slew of Fire Giants come from. Remember, Fire Giants are resistant
to any fire damage, so use cold based attacks if you can to deal a greater
amount of damage.
When the two Fire Giants that were close to Maiden Ilmadia were dropped,
my second and third party members helped finish Maiden Ilmadia off then
immediately went to patrol the bridges and finish off any Fire Giants
that made it through the monsters I had summoned. The two members using
bows continued to launch their arrows into the fray and I had my last
party member, my mage, do some house cleaning and picked up all the items
I could while the battle was taking place. Being inside of the shack,
the remaining Fire Giants simply attacked my fighters rather than going
after my weakest character as many foul beasts like to do.
Gave my blades a good cleaning of their blood and wrapped it up.
Another tactic was sent to me, this one to take care of all the Fire Giants and Maiden Ilmadia in a few area effect shots. Here's how it was done:
"I enter the cavern through the lower of the two entrances on the left side of the cavern. I then send my thief, equipped with Boots of Speed (a potion would work, too) to talk to Ilmadia. When she decides to attack, I run the thief back to my party, still standing near the entrance we used to come in. Interestingly, the fire giant guard will not attack until Ilmadia arrives on the scene, and with the thief's speed you beat her back by a long shot. I waited until she order the giant to attack and then left the cavern. I then re-enter from the upper of the two left side entrances and walk my party close to the first bridge. I had my mage and druid summon elementals on the bridge, and then walked my mage downward onto a small peninsula like outcropping of the terrain. Slowly but surely all the fire giants amassed in the valley below, eventually joined by Ilmadia herself. It was now a simple matter of casting area effect spells on the hapless creatures below, and finishing them off with arrows. Only one or two brave giants tried to flank me by coming over the bridges, and they were held off by the elementals until I could bring the mage around or simply pincushion them with arrows... The massacre complete, I somewhat sheepishly explored the rest of the cavern, picking up the items from her body and her shack, pretending the victory wasn't tainted by taking advantage of an AI flaw."
An AI flaw. Gotta love that one! :) Thanks for this wonderful tactic Matt!
Don't forget to grab the
3RD BADGE which is on Maiden
Ilmadia's corpse for you will be needing this!
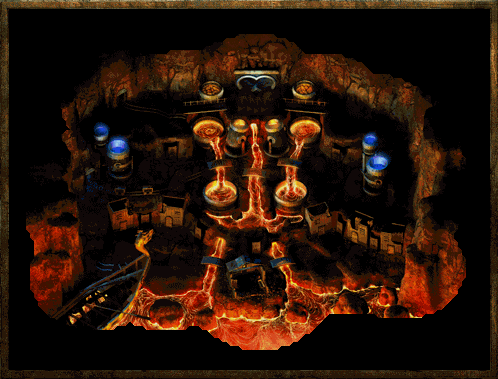
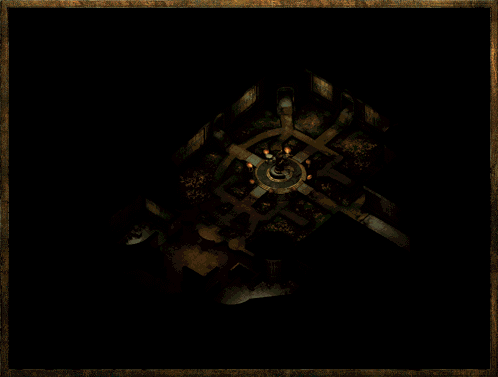
THE LOWER DORN - Upper Mines: The Idol
This is an interesting room and one should also note, the room where all six badges will be used to gain
use of the stairs that lead upward so you'll be coming back here in good time. Since we're here already though, I didn't think it was reasonable
for me to skip this part and save it for the very end and doing this now isn't going to make much of a difference if you saved it for later.
You're here so clean it out!
You will be greeted by Bone Guard Skeletons, Greater Mummies, Zombie Lords
which are scattered through the room and crystal like formations which
surround bodies caught in the stasis within. You'll also be introduced
to a nice looking Idol who will either annoy you or not be an issue altogether.
For myself, the Idol was simply nothing to get worked up about even
after I had come across a good amount of messages regarding the Idol and
how difficult this room was, it wasn't as difficult as people were making
it out to be. Now from what I've heard, the Idol is the source of these
foul undead creatures and continues to bring them back to life and send
them back to fight you over and over again until you kill the Idol. I
never experienced such a thing and the Greater Mummies in the room caused
more of a threat to my party than anything else for the spells they cast
I had no protection from. Symbol of Pain for one which sent wracks of
pain through my characters and another one that left a few of my party
members immobile, leaving them as an open target to the Zombie Lords who
shuffled slowly towards them. Fortunately, I didn't lose anyone as my
mage brought forth Summoned Creatures and Summoned Elementals to help
defend my unmoving party members.
My clerics ran around casting Protection from Fire on everyone who was
immobile because the Greater Mummies just unleashed blast after blast
of fire explosions on the unmoving party members along with Symbol of
Pain gave me a headache while I battled them with my two Clerics and my
Mage. All my fighters were unable to move which only slowed things down.
It's not a fun battle when you have three Greater Mummies blasting you
over and over again which were my main concern and target during the battle.
Remove the Greater Mummies and you remove the majority of the threat.
By the time my fighters were able to move again, I was thankful no one had died and that I was able to slay the three Greater Mummies
which left the Zombie Lords to be dealt with by a very weakened front line of fighters. My mage had used all his spells and my Clerics
had nothing left in terms of healing because they kept the fighters alive when they were unable to move. By now, all that was left
was this silly looking Idol just near the stairs, which I had my fighters take care of quickly, which results in all the crystal stasis
that surround the people in the room to become undone.
It would be even wiser to simply rush the Idol and take it down as quickly as possible. By doing this, all the other undead left in
the room will self-destruct.
Alan and Kim sent this and our thanks to them for it!
Set free are Brother Harken, Sister Incylia, Brother Adson and Brother Perdien which I suggest you speak to each and everyone of them
and learn what has happened as well as what has been going on and how they got there. Learn as much as you can and get the
4TH BADGE from Brother Perdien who will hand it
over to you as he explains the situation of what became of him after he left Easthaven.
Thanks to Damien for the heads up on Brother Perdien handing you the badge rather than Brother Harken as I had noted.
Once you've done all you can, prepare thyself as we head to explore The Lower Dorn - Lower Mines.
THE LOWER DORN - Lower Mines
The Lower Mines are gotten to by going down the elevator from above in The Lower Dorn, which takes you down into a very large
chamber full of crystals and of course, Gnomish Slaves who are working as hard as they can to meet their deadlines. It is here that
you will meet a talkative Gnome named Tarnelm who will greet you as you come off the elevator and of course, he's a little skeptical
of your party, but once you assure him you're not working for anyone and are there to help them, he will ask something of you. That
will be to get some
FOOD for himself and the other working slaves for they have not been fed for some days and are very hungry, telling
you that food can be found in the Palace of Durdel Anatha. As well as the
FOOD, Tarnelm wants you to kill all the Fire Salamanders
above and when you've done both of these, return and speak with him so he can give you more information and another quest to complete.
Seems like there are Umber Hulks in the area searching for the hidden Gnomish
Outpost and Tarnelm fears that sooner or later these search parties will
definitely break through the earth and into the Gnomish Outpost and kill
the remaining Gnomes who have not been made slaves. Tarnelm asks for you
to search the Chamber for these Umber Hulks and take note of the walls
for any cracks where a possible Umber Hulk has been.
If you haven't taken note of the Rhinoceros Beetles and Umber Hulks
in the area, you will want to rid these foul beasts before you start your
search for the burrowing Umber Hulks and the Gnomish Outpost. Deal with
this threat now because you certainly don't want those Rhinoceros Beetles
attacking you when you come across the burrowing Umber Hulks as they burst
out from the very chamber wall.
Now if you're having trouble finding where these Umber Hulks burst out from, check the Lower Dorn - Lower Mines Enlarged Map for more
details as to where you should take your party to find these burrowing Umber Hulks. There are nine Umber Hulks that you will have
to deal with and could cause you some trouble if all your fighters end up getting confused and attack other party members. Regardless,
you will have to defeat them all, so do your best and then return to speak with Tarnelm.
When you're ready, return to where the Umber Hulks burst out and let's go visit this hidden Gnomish Outpost Tarnelm was speaking of.
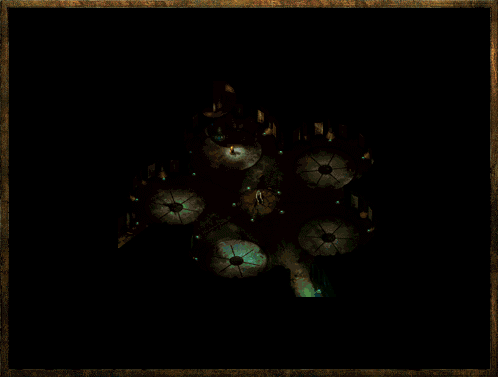
THE LOWER DORN - Gnomish Settlement
The warm glow of hanging, multi-coloured lanterns will set you at ease and relax you as you step forth
into the Gnomish Settlement hidden away from the trouble and foul evil you have crossed in your journey to the Lower Dorn.
The Gnomish Settlement is safe from all prying ears and you can rest within a building a short walk away and rest thy wounds, memorize
thy spells and prepare to continue thy journey. Of course, the Gnomish Settlement holds more than just a nice relaxing place to rest
as there are few people one can speak with while moving through the small settlement.
Most namely is the Dark Elf Nym, a merchant from the Underdark who has
made his way through those twisting passages and traded with those he
has come across and now he stands before you with all his goods. This
is a great place to stack up on goods for you will want as much as possible
when the last battle arrives for running out of arrows will do an archer
no good and plenty of arrows does Nym have. Besides his goods, he has
a very interesting story to tell and one I will not spoil here. What you
do after you've learned the information he has is totally up to you.
Nym also has two quest items that you will want to grab if you took the quest from The Severed Hand and Valestis who was looking for
AN ANIMAL to repopulate his garden at the top
of the tower. Nym has two animals which you should take to Valestis, but don't forget, you also need the
PURE WATER
and
SEEDS, the
SEEDS can
be found in this chapter further down while the
PURE WATER is found
in the Frost Giant's Lair within Wyrm's Tooth if you happened to miss it.
Besides Nym, there are a slew of Gnomes scattered through the settlement, each with a little thing to say to you but the most important Gnome would
be Beorn, who was the Gnome who greeted you when you arrived at the Gnome Settlement. Once you're done looking around and doing what you have to do,
go speak with him in the clearing where the circle of rocks are. He is suspicious of your party though, so he will ask you to go and free Guello, a Ruby
Priest within the Lower Dorn - Upper Mines area. Now if you've already done this, simply close the dialog and speak with Beorn again and if you have not
done this yet, head to the Lower Dorn - Upper Mines, find Guello and return to speak with Beorn.
Situated within the Gnomish Settlement is a Duergar Merchant named Dirty
Llew, who will make you a shield made from the Umber Hulk and is selling
Rhinoceros Beetle Armor. It takes at least 10 game days for the shield
and costs 10,000gp! Many have said this is useless for the amount of time
you wait and the money you pay to get one of these, for it is only a shield
with an AC bonus of +1. The only good thing about this shield is if you
happen to have a Druid in your party who is looking for a sweet shield
to use, this would be it. It is perhaps the only large shield in the game
that a Druid can use. Along with the shield, Dirty Llew is selling Umber
Hulk Armor, which your Druid can wear as well and is AC 2 when worn. The
downside is that it costs roughly 13,000gp.
When you receive the shield, it is also worth to take to Nym, the Dark
Elf Merchant who will enchant it for a cost of 30,000gp and takes another
10 days but gets you a shield with a +3 AC Bonus; +1 vs missiles; 15%
fire resistance.
Thanks out to Jason, Dan, Kim, NickSkull, Darrell, Errand, Phil, Al and
Alan for their insight on Dirty Llew and the help he can give your party
and Druids!
THE LOWER DORN - The Atrium
Don't be fooled by the stunning beauty
of this place. The green grass, the flowers, even the cobble stone walkways
through dancing fire flies best not put thy mind at ease for if it does,
thou shalt be fertilizer! Red Myconids, Fire Salamanders, Bone Guard Skeletons,
Blind Minotaurs will all be part of your battles along side of the Shriekers
that call them forth to do battle with thee! The Red Myconids shan't be
a problem for your skilled veterans, but do know that for every shriek
a Shrieker makes, they call forth a wave of Fire Salamanders, Blind Minotaurs
and Bone Guard Skeletons to do battle with thy party. To remove the Shriekers
is to remove the waves of foul beasts sent to do battle!
In the middle of all of this are Callard and his helper who are carving a beautiful portrait on a stone statue of Marketh and if you speak with them kindly and long enough,
Callard will give you the very portrait they are using to carve onto the stone statue.
You can place the portrait into a quick slot, so perhaps there is more
to this item than we thought? If you come across something that the portrait
is used for or if it has any effect in a quick slot during a battle or
when you're talking/fighting Marketh, send me a shout.
The portrait and what it is used for is for Flozem who is found in Marketh's
Palace, who created the portrait that was given to you. Rather than fighting
him, you can speak with him as he isn't a very devoted guard and you can
mention how good his artistic skills are, which will make him abandon
Lower Dorn to pursue a different career. You'll receive experience and
he will also leave all his items on the ground for you to pick and choose
from. You get more experience by doing this rather than killing him. You
may only receive this option of dialog if you have a Bard, or so I've
been told. Try it anyhow just in case.
Susan sent us in this great addition for more experience. Thanks!
Shouts to Sir Crystos, Jade's Fire and Dodson for the portrait information.
There are plenty of arches that your party can go through and to view them all, check The Lower Dorn - The Atrium Enlarged Map for more details and understanding of where
these arches lead to.
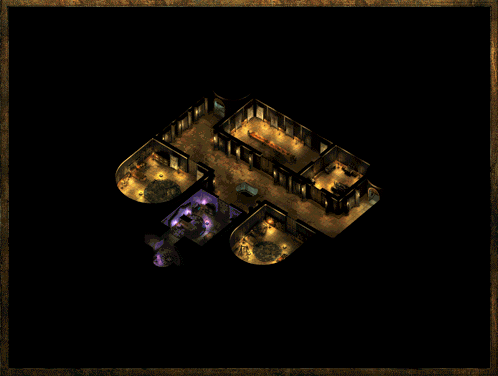
THE LOWER DORN - Marketh's Palace LVL 1
This is also known as the Palace of Durdel Anatha which Marketh has come to call his own and it is here that
Marketh and the 5TH BADGE lay as well as the location
of where you can find the
FOOD that Tarnelm asked you
to get when you went to Lower Dorn - Lower Mines.
First though, you will have to deal with the handful of thieves who are hiding
in shadows through out the Palace as well as take care of those who are
within each room on the bottom floor before you make your way upwards
to face Marketh and retrieve the
5TH
BADGE.
The first floor is very easy and there you will find Fleezum, Flozem,
Ginafae and the Chef who resides in the kitchen and where you can acquire
the
FOOD,
which is a sack of potatoes, for Tarnelm.
You don't have to kill Fleezum at all, for he is the one who drew the
portrait of Marketh and if you confront him about it, he'll eventually
decide to leave Marketh's Palace and pursue a different path of life.
He will leave all his items on the ground for you as well.
Thanks to Susan for that information!
Pick your way through each room and take down the foul thieves within this complex and when thou art ready, head up those stairs like the
champion and brave warrior that thou are and bring Marketh to his knees!
THE LOWER DORN - Marketh's Palace LVL 2
Dotted with hidden thieves, Marketh's
Palace LVL 2 is a simple walk in the park as the only real threat is Marketh
and his companion Seth, who is also hiding in one of the rooms waiting
for the chance to strike. Marketh can be found in a room by himself and
I suggest it best to walk through the complex and clear it out before
you confront Marketh for there is a good chance that when you attack him,
that all the hidden thieves will appear to assist him. This is just speculation
and I'm not sure for I killed all the hiding thieves before I went to
speak with Marketh.
The battle itself against Marketh was pretty straight forward and as
soon as the dialog ended, I had my whack and bash team of four rush up
to engage him, while my Thief shot arrows and my Mage weaved some spells.
Before I knew it, he was dropped and I got nothing in terms of bleeding
wounds or worry during this battle. That surprised me of course because
I was expecting something much more elaborate would have taken place.
Although I took the path of blood and guts, you do not have to kill Marketh and doing this will gain you more experience over killing
him, so if that's what you're looking for, perhaps keeping him alive would be better. Doing this will also make Ginafae unhappy and you
will also be able to free her. To do this, bring the null-magic potion found in Malavon's Stronghold which will break her ties to the
room and set her free.
Thanks to Alan and Travis for pointing this out!
I found Seth in the room next to where I found Marketh and he is sneaking around in the shadows and I would never have found him if I
didn't double check the complex for he was in an odd place. When I first entered the room, I found nothing, but when I returned for
a routine double check, he appeared and attacked me. Taking him down won't be a problem for anyone in the party, just watch out for
the cursed item that will be found on him, although this item could have been random as well. Always identify items before you put
them on.
Now on Marketh's corpse is the
5TH
BADGE which you should obviously pick up and take with you,
the most important item on his body upon his death.
Although Marketh's Keep was relatively small and could have been larger, there is still more on the way and the last badge that you'll
need will be covered next.
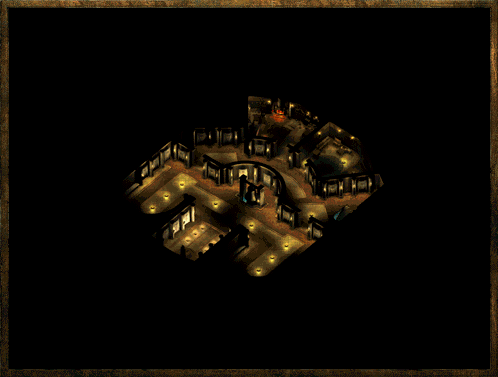
THE LOWER DORN - The Twisting Streets
Old buildings boarded up long ago
along side of debris make this an interesting and enjoyable trek through
what seems to be a deserted underground town. Barrels, turned tables,
chairs, crates, wooden planks make much of the level along with Blind
Minotaurs, Umber Hulks and Petrification Traps so do move about carefully.
Chances are, you're going to breeze through the streets as the Blind Minotaurs
fight rightly so and a few hard hits will bring them down quickly. Umber
Hulks also linger around corners and in dark alleys and the only real
threat they have is confusing your own party into attacking each other
but due to the groupings, you'll only be facing two to three at most.
There are a few Umber Hulks that use a surprise tactic of bursting out
of the surrounding walls but once again, nothing that your party should
have any difficulty removing.
Now because of all the debris littered everywhere, it is a pretty good
place to put items you want hidden from others so I highly suggest you
search all the crates, barrels and other small boxes very well for I found
a good amount of scrolls here for my mage. Another very nice addition
to my party was the Paladin sword Pale Justice and if you have a Paladin
in your party as I did, this is a sword you will want to have and bring
along for the final battle that you are very close to approaching.
This sword looks like an ordinary long sword and can be found on a dead body at a dead end of an alley way, which is the one that is right behind
the place where 2 Umber Hulks blasted out from the earth. It'll seem you can't move behind the building but you can and there you will find the
decaying body as well as Pale Justice. If you're not totally sure of where this is, please check the Lower Dorn - The Twisting Streets Enlarged Map
for more details.
Clear the streets of any trouble and while doing so, do make sure you
search for traps because there is a real nasty one waiting for the rushed.
The traps can be all found on the circular white eye symbols drawn on
the streets. When you feel you've gotten everything and killed everything
you could, it's time to enter Malavon's Keep and get the
6TH
BADGE.
Thanks to Alan for letting us know the exact location of these harmful traps.
THE LOWER DORN - Malavon's Keep
Finally! The last and final badge can be found here on Malavon and of course, gaining it is a great
challenge because of the amount of foul beasts that you will have to slay while you battle Malavon himself! First though, this level is
simply dotted with Gnomish slaves, their tongues cut out as they work quietly by themselves on whatever Malavon has them doing at the time
of your arrival.
Now this battle is a lot of fun and I ran through it twice as I noticed the first time I needed some defensive spells to help me get to an
easy victory but easy it is not, just helpful in the end.
Before you battle Malavon and speak with him, I suggest casting the following spells if you have them at your disposal.
Haste
Hope
Courage
Prayer
Bless
The added saving throw and to hit bonuses you receive from the spells mentioned
above will give your party better odds at making the saving throw against
the Umber Hulks gaze because the last thing you want are all your fighters
being hit by other party members as well as the foul beasts because they're
all confused.
My mage also casted Summon Elemental and Monster Summoning 3 to help deal with the creatures that Malavon brings into the fray and
this gave me more time for my main fighter to rid Malavon's dummy, who is not really Malavon himself as Malavon is waiting in another
room.
Dimension Door, Web, Death Fog, Stinking Cloud, Flesh to Stone, Disintegrate
and other deadly spells are just a handful of those you will encounter
when you meet Malavon and he really loves to use Dimension Door as he
jumps around the battle field casting Web and other area effect spells
which will slow your party down.
Now once you've taken care of Malavon's dummy, they'll be some dialog
explaining what has happened and he'll also comment about the Golems if
you've taken care of them already along with the Summoned Monsters he
brought forth against your party. The real Malavon can now be found and
killed, but do be careful for he wields spells that give a nasty bite!
For myself, I had my mage go against him, one on one since an item I
had found, I believe a robe or perhaps a cloak, if you removed it and
put it back on again, it would continue to add magic resistance percentages
to my mage, so by this time my mage had a magic resistance of 127% I don't
recall what cloak or robe it was but I no longer had it at this point
as I found something better suited for my mage, but I still had the benefits
from previously wearing it.
Anyhow, weave after weave did my mage and Malavon go, until Malavon no longer had any spells left and moved in with his dagger to
attack my mage, which I quickly brought in my Paladin and finished Malavon off once and for all.
Hopefully, this battle goes as good for you as it did for me. Double check everything and don't leave anything unturned for there
are plenty of mage spells and items that can be found within Malavon's area, the most important ones being the
6TH BADGE
and the
SEEDS that Valestis is looking for from The Severed Hand.
You will also find an Anti-magic Potion (Oil of Null Effect) which can be used on Ginafae within Marketh's Keep to free Ginafae.
Susan, Matt and Modjahed, thanks for this heads up tip!
During the battle, you may come across a force field that will not allow you to leave and this will remain so until you slay the real
Malavon so there won't be a chance to rest after you've taken care of those Golems. Slay Malavon and the force field will vanish, allowing
you to finally leave and get on with your adventure.
Heads up to Matt, Mr Waffle, Steve and Fantom2301 for this information about the force field.
So now, if you've followed through this solution of Chapter 6, you now have all six badges and are no doubt dying and more than ready to face the foul evil that
has plagued Kuldahar and the surrounding Icewind Dale area so without further ado, let us get to it!
THE LOWER DORN - Using All 6 Badges
So you have all 6 Badges do you or perhaps you have missed one along the way? Very well, before I continue with
where they are to be used, let me recap where they can be found:
1ST Badge
This is found within
CHAPTER
4 on Krilag the Orog Chieftain.
2ND Badge
This is found within
CHAPTER 5 on Joril the Frost Giant Leader.
3RD Badge
This is found within
CHAPTER 6 on Maiden Ilmadia in The Upper Mines.
4TH Badge
This is found within
CHAPTER 6 on Brother Harken in The Upper Mines.
5TH Badge
This is found within
CHAPTER 6 on Marketh in Marketh's Palace LVL 2.
6TH Badge
This is found within
CHAPTER 6 on Malavon in Malavon's Keep.
Well then, to use them you must return to Lower Dorn - The Upper Mines - The Idol location where you spoke with Brother Harken
and if you need a reminder of where this is, simply check Lower Dorn - The Upper Mines - The Idol for more details.
To use the badges, simply click on the badge markings that rest at the bottom of the spiral staircase until all have been clicked
and activated.
Once you've done this and you're ready to go up the stairs, do so and let us go through the stages that follow by finally meeting up
with Revered Brother Poquelin.
THE LOWER DORN - Revered Brother Poquelin
Finally, you meet him at last and he does
have quite the story to tell you as your party enters the chamber where
he stands behind a small gathering of animals and after the dialog is
completed, a battle will ensue so be prepared for the Revered Brother
Poquelin will begin to cast crackling magic as well as Summon foul beasts
to fight by his side. Unfortunately, this is not the final battle and
is simply a taste of what is to come. Once you've given Revered Brother
Poquelin a certain amount of damage, he will vanish and a movie will follow
explaining what has happened and where he has gone.
With that, we are off to the ending of Icewind Dale for we return to
Easthaven where changes have occurred which I will cover next.
EASTHAVEN - The Return
Welcome back to Easthaven brave warrior, it has been quite a journey has it not? Who would have thought you
would be returning to where you first started but the place does look different does it not? The buildings are now ruined and smashed and a very
thick layer of ice which makes up the Crystal Tower lays about Easthaven. Joining all of this are Cyclops' who tower above thee waiting to smack
thy body into the snow you stand on. The villagers can be found, still alive and to the south, being guarded and once you get past the Cyclops
there, speak with Everand who will share some information with you as to what has happened and how to get into the Crystal Tower.
You may also want to make your way to speak with Jhonen who, if you had bothered
to help back when you first started in Easthaven, will have a sword to
give to you, which you would have acquired from the Sea Elf if you completed
that particular quest back in the Prologue. This sword will help you greatly
during the battle that you will be facing shortly, so make a note to return
and speak with Jhonen if you had in fact helped Jhonen before. The reward
is well worth it.
When you feel you are ready, take your first step into the Crystal Tower and prepare for the battles and events at hand!
EASTHAVEN - The Crystal Tower LVL 1
The entrance to this frozen place, which
used to be the Temple before everything was covered in ice, will only
be revealed to thy party when you speak to the captured townsfolk, and
more importantly, Everard who can be found in the area just south of the
bridge. Upon your entrance, an animated sequence will take over as Everard
walks into the Temple and will enter the dialog to discuss Jerrod's Stone,
which you are to find another possible way to its new location. To do
this, simply climb up the stairs to the next waiting level. Do note, once
you've entered the temple, you will not be able to leave so make sure
you've done everything if there is anything you wanted to do because we
are approaching the final leg of your adventure!
EASTHAVEN - The Crystal Tower LVL 2
An ordinary room, filled with mirrors, beds and of course, ice which is the room that will be and is your
only resting place if you need one.
Before heading onwards, I suggest you cast Protection from Lightning because you'll be experiencing a lot of that on the next level so prepare
thy party and protect them from the damage that will bring everyone to their knees if you do not have this type of protection. A cleric can handle
this spell, so memorize as many as you can.
Other helpful spells are Haste, Courage, Prayer, Hope and Bless, which will not only speed up your attacks for your front line fighters, but also
give you a plus to hit as well as add to each characters saving throws for the duration of the spells. Once you're good to go, head up and prepare
to wax some ass, but do take note, this is not the final battle.
EASTHAVEN - The Crystal Tower LVL 3
The False Pomab awaits thee on this level along with a few of his most trusted foul beasts
known as Crystal Sentries, which are something else to bring down while the False Pomab begins to weave his magics and electrify you
with his bolts of lightning.
This battle, for the first time I came across it was a pain in the ass and I had to reload it and then proceed to protect myself
with Protection from Lightning casted by both my clerics on my entire party, just so I could last long enough to take down each duplicate
image of The False Pomab. The Crystal Sentries I kept battling with five members of my party while my strongest and hasted front line
Paladin, took care of The False Pomab, simply hacking and slashing at any image she came across.
To make things easier on you during this battle, a few readers sent in their own personal comments about this in how to remove the False
Pomabs running around the room.
"The Crystal Sentries always seemed to attack my Mage, so what I did was kept
the Mage in the doorway that I entered. I then kept my other characters
surrounding the Mage and fighting the Sentries. Since all the False Pomabs
seem to like to run around the throne in the middle of the room, I just
casted Cloudkill right around the throne. Cloudkill will wipe out all
the False Pomabs right away, and I even managed to take out the real
one with it also."
Wish I had such an easy time with this one as
Gordie did. Thanks for the input!
Another trick in knowing who the Real Pomab is over the False Pomabs is to
use range weapons until you see that you HIT the Real Pomab in the status
box. As soon as you see this, concentrate your attacks on him and once
he dies, all his False Pomabs will vanish and the threat will be minimal
as you finish off the Crystal Sentries.
Thanks to Silviu, Errand and Phil for this information.
After the battle is complete and you're licking your own wounds, return to the previous tower level and rest up.
DO NOT cast any spells on your party on your way up to the final battle because it'll only get removed once the final and last
battle takes place. You should have the following spells memorized to help you speed things up when you're ready.
Haste
Quicker attacks means quicker damage. This is a serious life saver.
Bless
+1 to all Saving Throws and to attack rolls. Makes it easier to hit and helps against spell attacks on the party.
Protection from Evil
+2 to all Saving Throws, +2 to AC. Best casted on a front line fighter who has haste casted on them.
Luck
+1 to all Saving Throws and attack rolls. Helps the entire party.
Emotion: Courage
+1 to attack rolls, +3 to damage, +5 extra hit points. Helps the entire party.
Emotion: Hope
+2 to all Saving Throws, attack rolls and damage rolls. Helps the entire party.
Cure Light Wounds
Take as many as you can. You'll need them.
Aid
Like the Bless spell, this will also add 1d8 bonus hit points to the party member it is cast on. Excellent for a front line fighter.
Cure Moderate Wounds
Take as many as you can. You'll need them.
Resist Fire/Cold
Blasts of fire will come during this battle and it's best to have some type of resistance as flames explode all around thee!
Prayer
+1 to all within the 60 foot radius while enemies suffer -1 to their own damage rolls, attacks and saving throws.
Protection From Fire
Gives 80% protection against magical fire, which you will will be seeing during this battle.
Cure Serious Wounds
Take as many as you can. You'll need them.
Recitation
+2 to attack and saving throws while enemies receive a -2 to their attacks and saving throws. This does not remove a Prayer spell so
having both working together is a sweet score!
Cure Critical Wounds
Take as many as you can. You'll need them.
Heal
Always helpful and having 1 or 2 for serious measures is best to have.
Invisibility Purge
That foul beast teleports at times and comes back Invisible to attack
you. As soon as that happens, cast this spell to save your party from
this surprise.
Offensive spells are useless during the final battle, so don't bother stocking up on them and think defensive. Your fighters can
handle the blows while your clerics can heal them from behind. Potions are always another nice touch and if you have any that will
raise any of your characters strength above 21 or more, quaff them as the battle starts. It'll make connecting with a weapon easier
as well as deal more damage to blows that strike true! Healing potions should also be in each characters quick slot so they can rely
on themselves rather than having clerics going crazy with healing spells. If you can have your clerics battling along side of your
fighters, do so.
So with this in mind, prepare thyself and let us go brave warrior! It's what you've been waiting for!
Proceed up the ladder which will take you into a very small room with a magical mirror. Simply click on it and have your party
walk towards it, more or less "entering" the mirror which will take you to the last stages of your battle.
EASTHAVEN - The Last Battle
As stated above, hopefully you're well prepared. Enjoy the speech you hear and of course, sit back
and watch what happens as it is very enjoyable to do so. When the time comes though, you'll need all your smarts, strength and
know how to fell this final beast of evil! The two Golems that appear are simple distractions and they'll most likely target your
weakest character within the party, as many beasts have done during thy adventure. During my time, they went after my mage just as
he completed the haste spell and I had them running around while the rest of my party dealt with the real threat. Since my mage was
running around quicker than they were, he was still able to cast after spanning the room, stopping then casted and ran away. Golems
are so stupid as are the programmers who wrote the AI for the Infinity Engine. I spat in your general direction. Get with it already
and smarten up.
Step carefully throughout the room for the traps set are 'Arrows of Dispel Magic' and can spoil your plans in a hurry.
Once you drop the foul beast at the end, that's all she wrote.
I'll see you for the Baldur's Gate 2 Online Solution, which I will be receiving shortly to begin to write up and play.
I'd also like to thank everyone who continues to send me e-mail on quests and little things I've missed because without you
guys keeping an eye out for me, this solution wouldn't be as full as information as it is now!
Sylvus Moonbow - Paul
THE LOWER DORN - The Quests
The main quest within Chapter 6 spans from Chapter 4 and Chapter 5 and that is the quest to find all six badges
which is the key to giving you entrance to the final and last battle that will complete your adventure and give you the
answers as to who and what is behind all of this. The badges that can be found in Chapter 6 will be listed and because it
is an ongoing quest between three chapters, make sure you don't miss any because you'll be pulling your hair out if you
do!
BADGE'S QUEST [story advancement / major quest]
3RD Badge
This is found within
CHAPTER 6 on Maiden Ilmadia in The Upper Mines.
4TH Badge
This is found within
CHAPTER 6 on Brother Harken in The Upper Mines.
5TH Badge
This is found within
CHAPTER 6 on Marketh in Marketh's Palace LVL 2.
6TH Badge
This is found within
CHAPTER 6 on Malavon in Malavon's Keep.
GINAFAE'S QUEST [mini-quest]
As more and more e-mails came through, I realized that you can receive more experience for helping
Ginafae escape and make her happy that you didn't kill Marketh. To do this, you'll have to keep
Marketh alive and also retrieve a potion which can be found in Malavon's Palace. The potion looks
exactly like an Oil of Speed potion and is situated in the room south of the throne room in Malavon's
Palace. This potion can remove any kind of curse or magic ward and this is what Ginafae needs.
Thanks to Silviu and Jean Paul for this added information.
FENGLA'S QUEST [watch tower entry]
Alright, perhaps not a quest for she more than readily gives you the
WATCH TOWER KEY
but it should be noted it is worth while to receive this key because you can rest at the very top of the tower. Although you will
have to take care of the pesky archers within, it's still a good place to base your operations if you do need a place to rest.
GUELLO'S QUEST [mini-quest]
Guello's quest is simple and he needs to gain your trust before he continues on with anything else he has planned to tell you and
that is to slay the Salamander King Shikata as well as his kin who are watching over the slaves and Guello within the Upper Mines.
Do this and return to Guello for your reward and other information.
TARNELM'S QUEST #1 [mini-quest / story advancement]
Tarnelm will ask of you to kill all the Fire Salamanders above the Lower Mines as well as find some
FOOD for himself
and the other slaves who make this area their home. The
FOOD he seeks can be found within Marketh's Palace LVL 1 within
the kitchen. Return this to him, which it will be a Sack of Potatoes and you will be rewarded as well as told of another quest he would like you to complete.
TARNELM'S QUEST #2 [mini-quest / story advancement]
After you have returned from Tarnelm's first quest, a second will be asked of you and this time it is more brute force that you will need rather
than playing fetch all afternoon. The Umber Hulks in the area have been searching for a hidden Gnomish Settlement and Tarnelm fears that they will find it
soon enough. You are to find these Umber Hulks and slay them before they find the Gnomish Settlement. Check the Enlarged Lower Mines Map for a more detailed
location of where you will have to go to meet up with these Umber Hulks and gain access into the Gnomish Settlement.
VALESTIS' QUEST [mini-quest / previous chapter relation]
If you recall from The Severed Hand, Valestis was looking for some particular items to bring back his garden at the top of his tower
and it is here that you will find the last remaining items you will need to bring back to him. These items are found on a Dark Elf Merchant
named Nym within the Gnomish Settlement who will sell you the
ANIMALS you
will need. Return to Valestis once you have all of the items he requested for your reward.
The last of Valestis' quest is that of the
SEEDS he had asked for and those
can be found within Malavon's Keep after you have defeated him, hidden in a far room within the keep.
BEORN'S QUEST [mini-quest / slave quest]
Deep within the Upper Mines resides a Ruby Priest named Guello who Beorn
will ask for you to set free and settle his thoughts and suspicion of you
and your party members. Once you have found Guello and freed him as well
as completed what he asked of you, return and speak with Beorn for your
reward.
PROLOGUE
CHAPTER 1
CHAPTER 2
CHAPTER 3
CHAPTER 4
CHAPTER 5
CHAPTER 6
ITEM LIST
| Sorcerer's
Place is a project run entirely by fans and for fans. Maintaining
Sorcerer's Place and a stable environment for all our hosted sites requires a substantial amount of our time and funds on a regular basis, so please consider supporting us to keep the site up & running smoothly. Thank you! |