-

- Forums
- Chatrooms
- Gallery
- Gameplay Videos
- Upload
- Articles
- Mod Reviews
- Shop SP: Games, Movies, Books

|
Severed Hand | Towers of the Severed Hand |
SEVERED HAND
To the Severed Hand
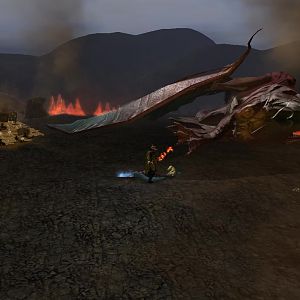
Now I make my way to the Severed Hand, and witness an apparently insane undead creature cast a Fireball at a squirrel and then disappear. I now set up a savegame called 'Severed Hand'.
The thing is, there is a creature here called a Severed Soul that has an item I want. But what the Severed Soul will drop on dying is randomly set when you first enter the Severed Hand. The possibilities are:
What I want is again a process of elimination. I'll find better plate armor or plate armor + item of protection arrangements than what the Shadowed Plate offers. The Robe is nice, but I have a better one in mind for Lanatir. That leaves the Cloak and the Boots, and there's no contest. The Boots offer a +1 bonus to armor class over and above the 15% stealth bonus offered by the Cloak. The Black Thorn will be wearing the Boots.
Now the catch is, the Severed Soul is on the other side of a wall that cuts this level of the Severed Hand clean in half. This means that I would have to go up to Level 3, and then come back down to the other side of Level 1. Doesn't sound easy, does it? Not easy, but not impossible.
So, I enter the 1st level of the Severed Hand and then kill the Shadowed Orcs and Goblins that appear. I then quick-save.
I then have the Black Thorn disarm 3 traps to the south. Genevieve casts Emotion: Courage from her Badge of the Brave, and Derrick casts Haste. I then run up the stairs on the south part of the level. I then run west and through the niche on the west edge, and then east up the stairs. Note that I'm not particularly concerned whether or not a character dies as long as I can check which item the Severed Soul has been set to drop. I then run east again and click on the way down from the bridge. I then run down the stairs that are immediately in view and a little to the northwest. I am now next to the Severed Soul. I have everybody stand still temporarily so that Genevieve, my best warrior, can go straight for the Severed Soul.
She, and whichever other warriors are close enough then kill the Severed Soul to see if it drops the Boots that I want. If it drops something else besides the Boots, I reload the 'Severed Hand' savegame. If it does drop the Boots, I reload the quicksave and go from there. It took me a few tries, and I didn't show all of them. I only included my first and last attempts, with the last one succeeding. I am now set to proceed.
Severed Hand Level 1
Now my standard start of the day preparation include both Emotion: Courage from Genevieve's Badge of the Brave, as well as Protection from Evil 10' Radius from Halagrim. Shadowed Orc Grunts and Goblins will be frequent monsters here, and can often be overwhelmed physically even when they're in significant numbers. Still, I make use of Fireball if I can catch enough of them with the right timing and placement.
The room to the west will have a couple of Shadowed Orc Shamans, as well as a couple of Shadowed Ogres. The container here will have one of the following, which sets upon entering this level for the first time:
Unlike the Severed Soul, I was not particularly hung up on what I got out of this, and just accepted whatever I happened to get.
An overturned table at the north end of the level will have a scroll of Emotion: Hopelessness.
Severed Hand Level 2
More of the same. This time, it's Shadowed Orc Warriors and Shadowed Goblin Warriors, who are a little tougher than the Grunts found below. Remember to prioritize the Shamans, lest they cast Silence 10' Radius or Hold Person.
A table to the north and right has a scroll of Animate Dead, which Lanatir scribes. The junk pile to the north and left will be set with one of the following when you first come to this level:
It didn't matter to me which one I got, so I just took the Sanctified one when I got it.
Use Fireball if you can catch enough of them with it, like with the particularly intense fight towards the west room that involved a lot of Shadowed Goblins and Shadowed Wolves. For particularly intense fights, the Cleric's Defensive Harmony spell can really come in handy. It whips out in a flash, and provides everyone a +4 boost to armor class for six rounds, which can really save you a beating when you're still surrounded en masse. A Shadowed Goblin Trainer leaves behind a Jester's Bag of Holding, which produces a random rather mundane item, and no, I didn't find it all that useful.
A table at the south end will have a couple of potions, as well as a scroll of Emotion: Courage.
Shadowed Orc Chieftain
Now I go next to the ramp at the west edge of the second level, and setup my 'Severed Hand' savegame again. I go up the ramp, and kill the few Shadowed Goblin Warriors that I find there. I then quicksave.
What I do next is go south a little, and then west as far as I can go until I hit a wall. This triggers the appearance of more Shadowed Orc Warriors, including a pair of Shadowed Orc Shamans, a pair of Shadowed Ogres, and the Shadowed Orc Chieftain. The Chieftain will carry one of 3 items, which will set when you first come up to the third level:
As you may have guessed by now, many of these weapons can be dispensed with, since I'll be getting better weapons anyway. Magical rings, cloaks, boots, etc. are rare by comparison, especially when I get one that my characters will be using for the duration of the game. As the 2nd ed. rule set obliges Druids to be True Neutral in alignment, and Cassandra is a frequent participant in melee combat, the Ring of Dwarven Bone is a perfect fit for her. If the Chieftain doesn't drop the ring, I reload the 'Severed Hand' savegame. If I can confirm that the Chieftain will drop the ring, I reload the quicksave and go from there.
After I've reloaded the quicksave, I continue south and start to kill the Shadowed Goblin Warriors. Once of them is obviously leading me on a chase, so I then take the time to switch to missile weapons and take out the Shadowed Goblin Marksmen that are across the chasm from me. I then take out the remaining warrior. Now the massive Orc fight is triggered, so Cassandra and Lanatir implement crowd-control. Once the monsters have died and the spells have worn off, Cassandra claims her ring.
Burning and Blade Skeletons
First, I pick up Misery's Herald (+3 flail, +4 vs. Elves, 10% chance of Horror on the target). I won't use it, but I will sell it.
Now I go back down the ramp to the 2nd level, then up the stairs in the middle to come to a different part of the 3rd level. The Black Thorn disarms the traps near a small bridge leading west.
Now I explore the rooms to the west and south. More of the same, but a new foe shows up, Burning Skeletons that can cast Fireballs. Hit them with missile weapons whenever you can in order to interrupt their spell casting. A container just a little north and west of the small bridge will have one of the following:
I didn't care which shield I got. The Ring of Dwarven Bone was the item I wanted to set when I first came here.
As I go towards the southeast corner of the level, another new foe is revealed, Bladed Skeletons. Not especially tough, but kinda freaky looking.
The rampart that runs eastward has a lift that leads down to the eastern half of the 2nd level. Just west of that lift are a few traps that need to be disarmed.
Serrated Skeleton
Now I go through the north door. I edge along very closely. The reason being that there will be a Burning Skeleton here, so I want to shoot him down at the earliest opportunity before he gets off a Fireball. After that, I fight a couple of Shattered Souls (which can cast Larloch's Minor Drain without limit), a few Bladed Skeletons, and a boss monster called a Serrated Skeleton. Take out the Serrated Skeleton's help first, then save him for last. He will drop one of the following items, which will be set when you first enter the 3rd level:
I'm not concerned which item I get from the Serrated Skeleton.
Shattered Souls
Now I go down the lift, and fight several Shattered Souls, who can cast Larloch's Minor Drain without limit, as well as several Armored Skeletons.
Towards the southeast is a container that will set one of the following when you first enter the 2nd level:
Severed Soul
Now I take the stairs leading down. As soon as I step down, I fight a few Blade Skeletons, and the Severed Soul. Once the Severed Soul dies, it leaves behind the Shadowed Boots (+1 armor class, +15% stealth) that I had set earlier. The Black Thorn now has his boots for the rest of the game.
I continue to battle Bladed Skeletons and Shattered Souls. I go for the Shattered Souls first because sometimes they disappear after using their Minor Drain powers enough times, so I don't want to miss out on the xp.
In the middle room to the east is a container that will have set one of the following:
In the northeast room is a container that holds a Piece of Broken Machinery, which is 1 of 4 quest items that will be needed.
Severed Hand, Level 4
Now I crawl all the way back up, and take the stairs leading up from the 3rd level. There won't be any battles here.
Towards the north side will be Lethain, and in a southwest room will be Telinas. Both can provide information on past events.
In a room to the northwest is Lehland, who can buy most of the spare loot you've acquired, as well as sell you magical ammunition. If you've got the gold for it, load up. I bought Hammering Darts (15% chance of stun) for Cassandra, Bolts of Fire +2 for Halagrim, Acid Arrows and Arrows of Fire for the Black Thorn, and Bolts +2 and Bolts of Lightning for Derrick.
The room to the east has an Shadowed Elf Girl named Sehriya. You can't get her to realize her mother is gone, but she will provide a safe resting place when you need it. A table in this room also has a scroll of Cone of Cold, which Lanatir scribes.
I now begin to explore the Towers of the Severed Hand.