-

- Forums
- Chatrooms
- Gallery
- Gameplay Videos
- Upload
- Articles
- Mod Reviews
- Shop SP: Games, Movies, Books
|
|
Shaengarne River | Logging Village | Shaengarne Ford | Horde Fortress Gates | Goblin Warrens (Level 1) | Goblin Warrens (Level 2) | Goblin Horde Fortress
That craven orc, Torak, will trouble us no more. He and his clan had enslaved an entire village. We were able to free the villagers before confronting Torak and his Broken Tusk Clan - although more than just their tusks are broken now. We were also able to locate the moonblade of the priestess Emma. The troll Vrek Vileclaw had secreted it away in his cave - he seemed to think that stealing the moonblade for himself would make him invincible! I believe we have shown him the error of his ways.
In return for freeing her village, Kaitlin Silvertongue has shown us the way to the Shaengarne Ford. She also spoke of a large dam the orcs had begun building somewhere further up the river. Should we find it, we must destroy the structure so that the horde cannot use it to flood Targos.
Alia Shield-Maiden, the Annals of Halgren
CHAPTER 1: THE SHAENGARNE FORD
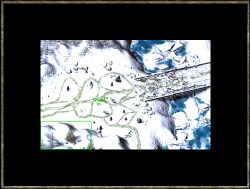
 As soon as you enter the first area of the Ford, you'll be attacked by a Highland Snake. A Wilderness Lore check may reveal that giant kin have passed this way, and there also seem to have been some badgers and rats - walking on two legs!
Head straight north from where you came in, past the small shack on the hill. At the end of the path, you'll see an abandoned house and will be attacked by a Verbeeg- perhaps the giant kin whose trail you noticed? Be sure to loot the corpse for a potion. Also check the south-east corner of the house for some hidden treasure.
Gaernat Sharptooth
Now retrace your steps to where you entered and follow the trail heading west. Not far along, the trail splits: one path heading north and another continuing west. Just as you reach this point, a wererat appears on the north fork. He warns the enemies that you're coming, just as a large boulder falls, blocking off the west path. You have no choice now but to follow the north fork.
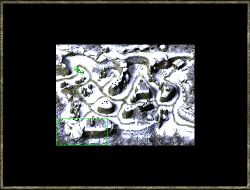
 With the western fork blocked, head straight north. You'll come across 2 harpies at the north end of the trail. Once you've dealt with them, keep following the path, now heading south west. Before too long you'll encounter Gaernat Sharptooth, a wererat with some attitude. Gaernat challenges you, saying that he rules the pass. You can talk to him briefly, but no matter what you say he'll attack you. Alongside Gaernat is another wererat, a werebadger, 3 Orc Archers and an Orc Shaman. The battle is pretty tough, but you can use the narrowness of the pass to your advantage. Find a very narrow section in the pass and place two of your toughest melee warriors there to prevent any of Gaernat's troops from getting around you. This way you limit the number of melee combatants that can reach your front line of warriors, while the rest of your party picks away at Gaernat's troops with distance weapons and spells.
If you're very careful, it is possible to prevent the alarm from being raised at all. To do this, have one of your party members sneak past the lookout and head down the west fork before it is sealed. You'll encounter Gaernat Sharptooth (another wererat) on the other side. You can then lead Gaernat and the others back along the western fork to where your party is waiting.
When you're finished with Gaernat, carefully move further down the trail. Just west of where you first encountered Gaernat is a large campsite. Unfortunately, the site is still occupied by a large group of Orc Archers, Orc Shamen and wererats. And if they aren't enough, there's a large spider web just beside the camp with several spiders, including the spider queen.
After the battle, take some time to look around the campsite, as well as the spider's web. You should find a decent suit of armour (Leather Armor of Movement). It's probably a good idea to rest a little while too before continuing on. When you're ready, follow the path north and then west to the next map (the Shaengarne Dam).
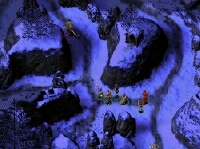
 As soon as you enter the map, you'll be attacked by a group of Malarites and some Arctic Boars. It's not a difficult battle, although the Malarites will cast some healing spells to last a little longer, as well as some enhancement spells. When the battle is over, take a quick look around. If you use the Wilderness Lore skill you may discover that humans, boars, cats and wolves passed this way together, with the humans trying to cover their tracks. Also note the large structure to the north. This is part of the dam that Kaitlin Silvertongue spoke about. Beside you is a large support beam - you'll want to destroy that beam.
Follow the wooden foot bridge that is laid out across the frozen river. Directly to the west you'll come across a few more Malarites, along with mad cats, and the Malarite High Priest. The High Priest focuses on summoning creatures amidst your lines, as well as healing his own forces. Search their campsite for oils of fiery burning, and some lamp oil. You'll also find the Thy-Dunag Blade.
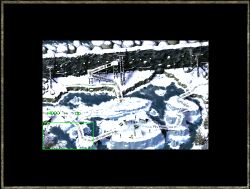
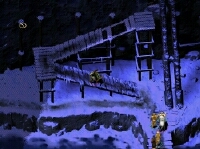 Keep following the boardwalk bridge until you come to a fork in the path. The bridge to the west is broken, although with enough lumber you might be able to repair it. Since your mission is to destroy the dam, you likely will have this lumber soon. Turn away from the broken bridge, and head east to the small island for a fight with 3 Malarites, 2 highland cats, arctic bears, and a snow leopard. After your battle, move north. Built into the dam is a lookout tower guarded by Orc Archers. From the top of the lookout tower, you'll see that the dam is being held up by support beams in the north-east and north-west corners. (Note: If you haven't already destroyed the eastern support beam you'll want to go back and do that to complete your mission of destroying the dam). Just to the west are some more Malarites, archers and other bad company. You'll have to deal with them first before you can destroy the second support beam. Break the support beam; you now have enough wood to repair the broken bridge and you'll receive 750 xp for destroying the dam. Cross the newly repaired bridge and travel west to the next map: the Shaengarne Bridge.
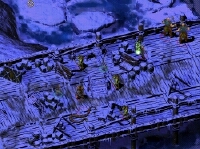
 The Goblin forces have learned of your final approach to the bridge. Since they can't hold the bridge any longer, the ogres guarding it have been commanded to destroy it. As destruction of the bridge begins, you are immediately attacked by a large group of Orcs and Bugbears. When this first battle is done, spend a few moments scouting out the area in front of the bridge. Anyone using the Wilderness Lore skill will quickly discover that an army of Bugbears, wererats, werebadgers, Goblins, giant kin and Orcs has passed this way; sure enough, this map is crawling with enemies. As you move towards the bridge you will have to fight every step of the way. Check every barrel and container you come across for healing potions.
When you finally reach the bridge you'll have to fight a few more Orc Archers and some Malarites before encountering Xuki and the ogres. Strange as it seems, however, Xuki wants to talk. He is interested in arranging for a parley with Lord Ulbrec to discuss the possibility of peace. If you stop the conversation with Xuki you'll receive 525 xp for not allowing him to delay your mission. However, if you keep talking to him, Xuki will present you with a few options, including peace, gold and even fame. Regardless of which motivation you decide to pursue, eventually Xuki will end the conversation himself. He can't believe that you're actually listening to him and admits that he's been wasting your time while the ogres destroyed the bridge. But you'll receive 700 xp because your intentions were good, even though you allowed yourself to be duped.
 When you finish talking with Xuki he attacks you. As long as you didn't deplete all of your resources getting to the bridge, the battle isn't too tough. Depending on how fast you were able to get to the bridge, and whether or not Xuki was able to delay you, you might have actually saved the bridge entirely. In most cases, the bridge will have sustained at least some damage, or even been rendered completely useless. The key is stopping the ogres first, then dealing with Xuki. Careful though, as he's likely to drop a fireball or two on you while you deal with the ogres (the fireballs also cause damage to the bridge). Afterwards, be sure to loot the barrels on the bridge to find potions of extra healing and a small shield, the Footman's Folly. Check Xuki's body for the Witherbranch Boots and a Bag of Holding.
With the bridge now in your hands, clear the rest of the map of all enemies (if you haven't done so already). You'll receive 525 xp for securing the Caravan Bridge. Then exit the map on the west side and return to Targos. Swift Thomas is happy to see you, and will still get you around town in a hurry. You can also collect your pay from Shawford (3,000 gp) before heading down to report to Ulbrec.
Return to Targos
Notify Ulbrec of your success; you'll receive 1050 xp for breaking the Goblins' grip on Shaengarne Bridge. But it would seem that you're not quite finished yet. With the bridge destroyed, the reinforcements from Neverwinter will have to find a way to get around the western pass. In the meantime, Targos will have to go on the offensive. While you were gone, the two scouts (Ennelia and Braston) finally sent word back to Ulbrec about the location of the horde's fortress. Ulbrec wants you to meet the scouts at the fortress and give them whatever aid you can.
Before you leave town, be sure to re-stock all your supplies, especially healing potions. Have a good night's rest at the inn, then head off to the Horde Fortress Gates.