-

- Forums
- Chatrooms
- Gallery
- Gameplay Videos
- Upload
- Articles
- Mod Reviews
- Shop SP: Games, Movies, Books
|
|
Kuldahar
Chult
Dragon's Eye
The Fields of Slaughter
We have slowly made our way through Dragon's Eye, one bloody step at a time. Descending down through its depths, we have encountered many strange beings, although the yuan-ti stand behind them all. Their obsession with the destruction of Kuldahar is all that drives them...and blinds them. They know little else other than their hatred for that small village. Even their leader, the snake-priest Thorasskus, could see no further than his rage. In the end, it was this blind hatred that undid him.
It would seem that, while the yuan-ti were in full control of the upper chambers, there are others below whose power was beyond that of the snake-people's. Rather than dread, I feel a strange curiosity...almost a kinship...with whatever denizens we shall find there.
Alia Shield-Maiden, the Annals of Halgren
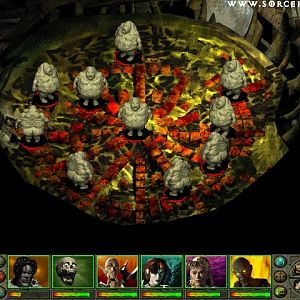
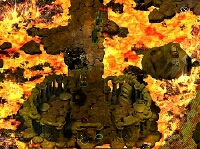
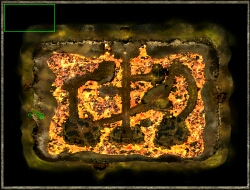 When you step through the hydraulic door, you will find yourself in a magma chamber underneath Dragons Eye. You can only move around a narrow path on the perimeter, and the path to the east is safer than that to the west. You will periodically be attacked by mephitis along the way. At the south of the map, you will find the remains of a bridge that connected the east side of the path to the west. You will need rope to repair this bridge. To renew it to its fully intact state, you will need four ropes, but if for whatever reason you only collected three, you can fix it enough to cross it. It does, however, remain dangerous and the person in the lead will fall through and take damage.
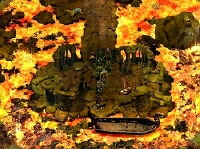
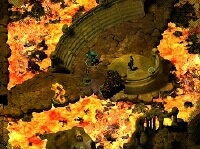
As you cross the bridge, you will see a man named Venomin cry out in despair and throw himself into the magma. This will have more significance shortly. On the west side of the map, to the right of the path, you will find a boatman named Archon who is willing to take your safely through the magma to various destinations for a fee of 300 gold per head. If your party is not all of good alignment, you should be able to trick him on the first few journeys by saying you paid double last time. If you dont have the gold, ask if he will take items instead. Be warned that you cant buy back anything you sell him, and his prices are terrible. Its better to head back up to Level Two and sell to the rakshaka-Nathaniel instead, if you havent already killed him. Archon can also sell a variety of very useful healing and protective spells.
 Ask Archon to take you to Lord Pyros domain. There, after defeating a random monster, you will learn from Ambassador Jasper that Lord Pyros died yesterday at the hands of Inquisitor Venomin. You can also learn that High Sorceress Izbelah, who attacked you when you first arrived at Dragons Eye, died two days ago while trying to escape from the cage where she was imprisoned. After you have finished speaking with the Ambassador, you can get Archon to take you to the Fields of Slaughter. You can explore further if you wish but there is no benefit to doing so at this stage.
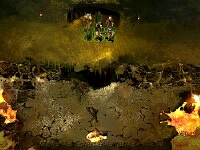
When you get to the Fields of Slaughter exit, you will find a beholder named Zil-tyor blocking the doorway. Although not hostile to you, he will not let you leave for political reasons. The only way out is to attack him, at which point you will have to fight the hellhounds, flamewalkers, trolls and other monsters in the area. None of them is very challenging, but the sheer number of opponents and poor tactical position make the battle surprisingly tough. If it gets too much for you, dont forget that by speaking to Archon - even in the middle of combat - you can purchase healing and protective spells that may well turn the tide of battle. When all are vanquished, step through the doorway
Second Loop
 You may be surprised to find that you are not in the Fields of Slaughter as you expected. In fact, you seem to be exactly where you started when you first entered the magma chamber, although your party will have automatically rested for a full day. This time when you speak with Archon, he tells you that Lord Pyros is having a private meeting with Lord Venomin. This is just the first of many clues telling you that you have gone back in time a full day. A brief visit with Ambassador Jasper at the embassy will confirm this: Izabelahs death now occurred yesterday instead of two days ago, and Jasper cannot remember ever having met you before. You will also find it easier to traverse the map, as the destruction that stranded the various buildings as individual islands in the magma has not yet taken place.
By the time you have spoken with Jasper, Lord Pyros should be ready to receive you. However, you arrive in his domain just in time to see Venomin kill him and flee to the embassy. Follow him back there, and hear him tell Jasper that he has killed Pyros and needs protection from Lothar. Indeed, Lothar arrives shortly thereafter and destroys the embassy. As you follow and watch, Lothar raises up an efreet army and demands that the head of High Priest Thorasskus be brought to him in any condition. Back at the embassy, Jasper points out that Lothar finally has an excuse to eliminate the Yuan-Ti as he has long desired to do. Venomin says he regrets killing Pyros and wants to return to yesterday to undo his action.
Walk north from the embassy to the guard post, where youll see the lava mephits, trolls, flamewalkers, and hell hounds that you fought yesterday. This time they are not hostile to you, but a fight will shortly break out between them and a group consisting of wyverns, Yuan-Ti pureblood thieves, Yuan-Ti pureblood warriors, Yuan-Ti halfbreed priestesses, and Lizardman shamen. When the fight starts, you can either join in or ask Archon to transport you to the Fields of Slaughter exit.
Third Loop
 Yet again you will find you have rested for a full 24 hours and found yourself back another day in time. Get Archon to take you to Pyros domain. Venomin will report to Pyros on his research into the crime for which Izbelah stands accused. You will learn that Thorasskus has had a vision from Sseth about a pending eruption that will destroy the magma chamber, taking Dragons Eye with it. Izbelah and Embassador Jasper were both warned, and Izbelah cast an Temporal Stais spell to try to forestall it. Unfortunately, she was rushed and her spell was imperfect. It has now begun to break down, which explains the time loop in which you now find yourself. Because she was acting on the wishes of her High Priest, and in self defence, Venomin has concluded that she is not guilty. Pyros promises to release her, and Venomin leaves.
You can offer Pyros an antidote, in return for which he will give you some random magic ammunition if you dont ask for payment. Pyros will tell you about Izbelahs trial, and urge you to talk to Lothar, who is the one charged with her confinement. He also encourages you to visit the amphitheatre to see the flamewalkers put on a play. Pryos then goes to tell Lothar to release Izbelah in the morning, but Lothar is outraged and wants no mercy to be shown to the reptile.
You must go to the amphitheatre to talk to Jasper about Izbelah, then ask the flamewalkers to put on a play. While youre sleeping through it, Lothar tears open the cage and kills Izbelah. You can now go to Lothars palace to watch the showdown with Venomin, who is outraged by Izbelahs death after Pyros promised to free her. Lothar lies and tells him that Pyros had ordered Izbelahs execution. Lothar then turns on you and attacks you for eavesdropping. Once you have fought Lothar and his forces, you can get Archon to take you to the Fields of Slaughter exit.
Fourth Loop
 After the now-customary 24 hours of sleep, you find yourself back in time to the day of Izbelahs trial. The best vantage point from which to watch the trial is a mephit lair south of the amphitheatre, because there is a chest there that you can loot for gold, treasure, ammunition and a random magical weapon. If you are unable to disarm the trap, though, it will cast Horrid Wilting on the party. Once you have watched the trial and looted the chest, go to the Fields of Slaughter exit.
As the fifth and final day in the magma chamber dawns, you must kill Izbelah before she has a chance to cast the Temporal Stasis spell that created the time loop. You must move quickly! To save time, go around the path to the west instead of to the east. You may take some damage from an avalanche, but you cant spare the time to go the long way. Only one party needs to talk to Archon to get on the boat. Upon disembarking at the embassy, kill Izbelah quickly before she can cast her spell. Range weapons will not disrupt her excellent concentration so dont waste time on them. If you are having trouble getting your melee fighters to her before she can complete the Temporal Stasis spell, Otilukes Resilient Sphere is an excellent way to stop her in her tracks while you line up your fighters. Once you are in range to hit her with melee weapons, she will go down fast.
This time, when you take the Fields of Slaughter exit, you will find yourself back at the Ice Temple, where Nickademus finally calls in the favour you promised him back in Chapter Two.
Return to the Ice Temple
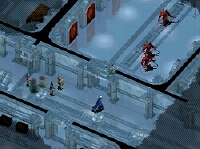 Nickademus finds himself under attack by the very demons he summoned to the ice temple. Fortunately, he knows some mercenaries who owe him a favour- and here you are. Every room and alcove in the lower level of the Ice Temple now contains at least one demon: Red Abishais, Lemures, Glabrezu, Gelugons, and Cornugons all await you. You cannot rest or leave until you kill them all. You should get some excellent experience points from many of these demons, and the Club of Disruption from Battle Squares is yet again your greatest asset. Almost every cupboards and chest in the area has been restocked, and now contain healing and other potions. Youll get a message when your task is complete, at which point, head to the stairwell and leave.