-

- Forums
- Chatrooms
- Gallery
- Gameplay Videos
- Upload
- Articles
- Mod Reviews
- Shop SP: Games, Movies, Books

Kuldahar | Chult | Dragon's Eye | Magma Chamber | Fields of Slaughter
Standing in the open air once again, I find my head is still spinning from the events of the past...days I suppose. By the will of some strange magic, we found ourselves trapped in the bottom-most chamber of Dragon's Eye, each day moving further back in time, rather than on to the next! I still do not understand it, but I believe we have, in some way, made a an ally of the denizens of the fiery volcanoe beneath Dragon's Eye. Of one thing I can say for sure, those yuan-ti are the most foul, most twisted of all beings I have encountered. They are beyond reason...lost somewhere in a madness of their own making. The nearness of the Severed Hand beckons us onward, and I can only hope that we find our way quickly through these Fields of Slaughter...
Alia Shield-Maiden, the Annals of Halgren
CHAPTER 5: THE FIELDS OF SLAUGHTER
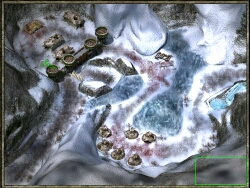 You will now finally find yourself in the Fields of Slaughter, site of an ancient battle between elves and orcs. As soon as you arrive, a Red Wizard of Thay named Saablic Tan challenges you. He will flee but leave a small army to block your path: a half-dragon, a Neo-Orog priest, another red wizard, elite half-Goblins, red Neo-Orogs, and several Feyrs. There are some Fallen Bladeslingers just to the north, so you will probably want to avoid straying far enough to engage them until you have completed the fight at hand.
Follow the path to the north until you encounter Blahgmah, who mistakes you for an awaited war party and offers to take you to Kratuuk. If you have strong Bluff skills, you can go along with this misidentification, but youll more likely end up fighting him. He has the Axe of the Souls and the key to the orc encampment in his inventory. Kratuuk has the gate key, in addition to a Staff of Greater Spell Resistance, a Ring of Protection +2, and the Black Goat Girdle. Be sure to loot the camp, too, for random but valuable treasure.
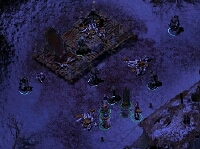 Inside the gates to the right of where you met Blahgmah, youll have an opportunity to release a group of imprisoned elves. One of them, Tsol Silverblade, will ask you to keep an eye out for the cleric Saralon who seems to have wandered off. Head south to meet Gorg and his orc warband, who are fighting elven dread warriors. He thanks you for the help, and you will have a chance to bluff saying that you were sent by Kratuuk. If your bluff fails, youll have to fight him, but if it succeeds, hell ask you for help killing a lich named MDarfein. A paladin will attack him without any bluff opportunity.
Whether you get the quest from Gorg or not, you will find MDarfein and the lost elven cleric Saralon a short ways to the south. Your party will overhear a conversation between them, and learn that Saralon is trying to purify the Fields of Slaughter with elven holy water. MDarfein promptly kills Saralon and turns on you with his Elven Dread Warriors.
Killing MDarfein is one of the toughest challenges in the game. He will cast a number of defensive spells, such as Improved Invisibility, Non-Detection and Seven Eyes, which will make it almost impossible for you to hit him. He will then do substantial damage with death spells and devastating area effect spells. Meanwhile, his Elven Dread Warrior companions will provide an interesting challenge in physical combat. Even if you do get MDarfein down to Almost Dead, chances are excellent that he will cast Horrid Wilting at that point and kill himself as well as some of your party members, depriving you of the experience points you came so close to earning. Your best strategy is to repeatedly try to inflict the same kind of damage, such as fire, acid or electricity, since Seven Eyes only guards against the first attack of each type. A character with Blind Fight should be able to do substantial damage in melee as well.
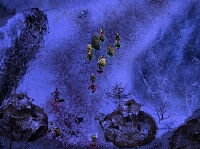 The good news is, theres no need to go through all this aggravation. The conversation you overheard with Saravon suggested an easier way to quickly purify the Fields of Slaughter of the lich and other undead. To do so, first distract MDarfein- either by having your strongest melee fighters charge him, or by running away- and then have a fast and stealthy (or invisible) party member take the vial of Elven Holy Water from the fallen Saravon. This party member should then keep running until he reaches the waterfall, into which the Elven Holy Water should be thrown. All undead on the map, including MDarfein, will be killed immediately. There isnt much to loot on MDarfein, just a handful of scrolls and a scroll case, but Saravon has some useful treasure including Boots of Speed, Chainmail +1, and a Warhammer +2. There is also some useful loot to be had in the nearby scout tents.
There are other minor monsters on this map, so if youve been badly injured you may want to take some time to rest and heal before proceeding. If you didnt purify the Fields of Slaughter to end the fight with MDarfein, do so before exiting to the next area.
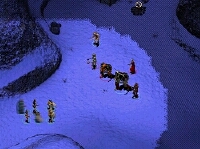 The last map of the Fields of Slaughter is quite a small one, but full of danger. Saablic Tan meets you again, and this time stays to fight you. With him he has a Neo-Orog named Wanmuk, a Neo-Orog priest, two red Neo-Orogs, a red wizard, two guards (archers), a Greater Feyr, and two Slayer Knights of Xvim. The Greater Feyr can cause panic, but the greatest threats are the priest and the Slayer Knights of Xvim. Take them out as quickly as possible to avoid substantial damage to your party. Saablic Tan himself can cast some nasty spells so he should be one of the first targets as well. When you have defeated this army, you will be able to search the campsite for some interesting treasure, including the Xvimian Fang, and the Shroud of Bankao. It is also worthwhile to search the abandoned campsite just northwest of where you fought Saablic Taan. There are also some half-dragons and elite half-goblins to the east that youll have to fight before finally clearing the route to the Severed Hand.
Even if you dont have a paladin in your party that can use the Holy Avenger, you may wish to fight the Lost Followers for the substantial experience point reward. It is definitely a challenging battle- possibly the most difficult in the game- but worth it. To do this, you need to return to Kuldahar. Conveniently, everyone in the town with something to sell has clustered around the statue in the town square so that you can stock up for the battle before heading into Hrothgars Vale.
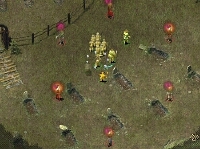 As the Medallion of the Lost Followers you found in Dragon's Eye suggests, you need to return to the cemetery in Hrothgars Vale and visit the grave of Duke Kholsa Ehld. The grave you are looking for is labelled simply, "Old Kholsa, Traveller and Farmer". Click on it, and the Holy Avenger will appear hovering in the air before you, while the six Lost Followers spring into life around you. Although they have technically been raised from the dead, your chance of disrupting or turning any of them is very slender so it's more practical to fight them as though they were ordinary living opponents. The Lost Followers retain the strengths and weaknesses they had in life, so you can prepare for this fight by carefully reviewing the information the medallion provides about their skills.
Inhein-Who-Was-Taken is a cleric who casts spells of death and flame, as well as a very high-level Animate Dead. The quicker you can take her out, the fewer of her high-level summoned undead you will need to deal with in the battle.
Broken-Khree is a monk. Missiles and spells are useless against him, and he has powerful elemental resistance as well. He takes piercing and slashing damage with only minor resistance, but is immune to bludgeoning damage.
Kaervas Deaths Head, a duergar warrior-king, is immune to piercing and slashing damage even from Cera Sumat. He takes bludgeoning damage, magic damage, and some electrical damage.
Atalyclys the Lost is a powerful wizard. He is more susceptible to fire damage than any other kind.
Jaiger of the Fanged Season, the archer barbarian, is highly resistant to magic and missiles. Fortunately, he is quickly weakened in melee combat, where his bow can help him little.
Veddion Kairne is half storm giant, half demon. He has tremendous magical and elemental resistance, and can only be effectively hurt by bludgeoning weapons.
You will also want to prepare by casting lots of protective spells, as well as having several Resurrection spells ready. Summoned creatures can distract the Lost Followers to buy your party members some time, but they won't last long and they won't be able to do much damage. Don't forget to pick up the Holy Avenger when the fight begins!
In addition to the experience you will get for each of the six, you will get 5850 quest points for sending the Lost Followers to their second death.

