-

- Forums
- Chatrooms
- Gallery
- Gameplay Videos
- Upload
- Articles
- Mod Reviews
- Shop SP: Games, Movies, Books
|
|
Chult
Dragon's Eye
The Magma Chamber Time Loop
The Fields of Slaughter
Finally, we have found our way through the Spine of the World, although we had to face one last adversary to do it. We left the Mind Flayer's citadel - what was left of it - and returned to the surface, only to find two mages blocking our path. At least these ones thought to bring a small army with them; a pack of those hideous harpies, as well as several elemental creatures formed of earth. The two mages wouldn't listen to reason and set their minions at us while they pelted us with their spells. But, in the end, they proved as unworthy as their fallen brethren. Tempus was with us, and I believe this bodes well as we venture ever closer to the Severed Hand and the leaders of this ill-begotten legion.
But the biggest surprise came as the battle cleared: the gnome Oswald stood before us - next to his airship! Most stiking of all, was the young, helmeted gnomish girl next to him - his niece I understand. It would seem that Kuldahar is besieged, and once again we are diverted from our true goal. So we board the cursed airship, yet again. I hope this gnome can crash somewhere...more suitable this time.
Alia Shield-Maiden, the Annals of Halgren
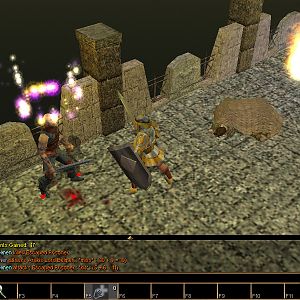
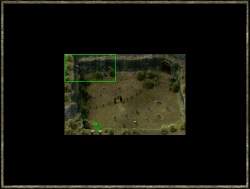
 Oswald soon returns you to Kuldahar safe and sound, but the moment you step off his ship there's trouble. A neo-orog priest of Bane named Hiepherus, from the Legion of Chimera, has raised an undead army from the local graveyard to seal off the Kuldahar pass. You may be able to use your Bluff or Intimidate skills to trick him into revealing his plans for Kuldahar, retreating, or both. When he vanishes, he summons a number of wights to fight you. More wights await just north-east of the ship and will join in the fight. Oswald hastily vanishes into the ship with his young niece while you battle it out. This map, and the Hrothgar's Vale map to the north, are swarming with undead so watch your step as you move about. If you won the Club of Disruption in Battle Squares, this is the best time in the game to use it.
In the Watchtower, you will find an ill-tempered ranger named Jermsy holed up with Nathaniel. They will tell you that Hiepherus is holed up in Hrothgar's Vale. After speaking with you, Nathaniel will alter the druidic seal on the gate to the north to allow you to enter Hrothgar's Vale. Jermsy also mentions that Gerbash went to Kuldahar a few nights earlier with the key to the watchtower, and he worries that if Gerbash has been captured or killed, the key could have fallen into the wrong hands. He asks you to get the key back from Gerbash. Nathaniel can provide healing services as well as selling some very interesting items. He can also tell you about Mother Egenia, adoptive mother to Isair and Madae, whose ghost haunts the burned-out building north-east of the Watchtower.
After you've cleared both this map and Hrothgar's Vale (see below) of Hiepherus' undead army, you can return to the Pass and wait until nightfall by Mother Egenia's house. Shortly after midnight, she will appear, lamenting her lost children Isair and Madae. Ask her to tell you about Isair and Madae, and what remains of your journey. If you have already spoken to Iselore (in Kuldahar) about Isair and Madae, you can also tell her news of Isair and Madae to comfort her and set her spirit to rest for additional experience points. Or, a paladin or cleric can simply banish her from the premises.
Return to the Watchtower to notify Jermsy and Nathaniel of your successes before heading into Kuldahar. For clearing the area of Hiepherus' undead army, Jermsy will give you gold and some minor treasure including Eye of the Hunter and the Farmer's Cloak. You can get quest points from Jermsy both for clearing the area of undead, and for retrieving the key from Gerbash. You can get additional experience points from Nathaniel once you have set Mother Egenia's spirit to rest.
Hrothgar's Vale
 In Hrothgar's Vale, you'll need to wipe out all undead, and then
enter the building where Hiepherus is waiting with a small army
of neo-orogs and shadows. This time, there can be no bluffing or
intimidating; you must kill him. If
you have a Dreadmaster of Bane in your party, he or she will receive
a +2 WIS bonus for killing a "false priest". After
looting the body, look in the chest in the right side of the room
for the rest of Hiepherus' belongings. In all, you will get some
gold, gems and cleric-spell scrolls, half-plate armour, the poisoned
blood flail, an amulet of protection, and a tower shield +1.
You will also find a parchment that tells you about the Holy Avenger,
but you won't be able to do anything about it until you find the
Medallion of the Lost Followers later in the chapter. (Note: Refer
to the end of the chapter for information
on completing the Lost Followers quest and find the Holy Avenger).
If there is a priest of Ilmater in your party, you can now sanctify
the Ilmater graveyard, by clicking on the statue to the north of
the graveyard.
In Hrothgar's Vale, you'll need to wipe out all undead, and then
enter the building where Hiepherus is waiting with a small army
of neo-orogs and shadows. This time, there can be no bluffing or
intimidating; you must kill him. If
you have a Dreadmaster of Bane in your party, he or she will receive
a +2 WIS bonus for killing a "false priest". After
looting the body, look in the chest in the right side of the room
for the rest of Hiepherus' belongings. In all, you will get some
gold, gems and cleric-spell scrolls, half-plate armour, the poisoned
blood flail, an amulet of protection, and a tower shield +1.
You will also find a parchment that tells you about the Holy Avenger,
but you won't be able to do anything about it until you find the
Medallion of the Lost Followers later in the chapter. (Note: Refer
to the end of the chapter for information
on completing the Lost Followers quest and find the Holy Avenger).
If there is a priest of Ilmater in your party, you can now sanctify
the Ilmater graveyard, by clicking on the statue to the north of
the graveyard.
 Throughout this map, you will have to fight lots of Yuan-Ti, Yuan-Ti abominations, and Yuan-Ti archers. They aren't particularly tough, but often quite a large number join in the fight, so area effect spells will be very useful.
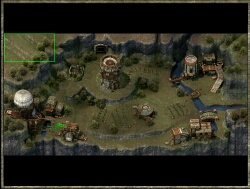
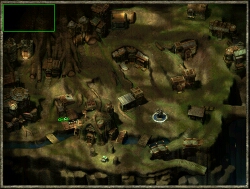
Conlan's shop is the nearest building to the Kuldahar Pass entrance. Conlan mentions that there was a commotion in eastern Kuldahar a few days ago, and suggests you start there in your search for Gerbash. His son, Sheemish, has gone to look for magic supplies in Orrick's Tower, and Conlan has become quite worried by his long absence. He will give you a quest to bring him news of his son. When you have visited Orrick's Tower and spoken to Sheemish, return to Conlan to collect experience points. Conlan has a wide variety of weapons for sale. Most are highly enchanted, thanks to the powers of the Heartstone Gem.
Sheemish has found a cache of scrolls and he is willing to sell them. Behind him, you'll see a book. If you click on it you will see some mysterious writing. Ask Sheemish if he knows what the writing means, and you'll inadvertently summon an air elemental who was guarding Orrick's stash of magical items. If you offer to free him, he'll transfer his inventory to Sheemish. You can now buy magical items from him any time you are in Kuldahar by asking to see "those items that magically appeared".
Gerbash is hiding in an abandoned building in the north-east of the town, nursing an arrow wound. He is very happy to see you, especially if the character who speaks to him is a dwarf, and he will give you the key that Jermsy wants. Use divine power or a potion to heal Gerbash for some additional experience points.
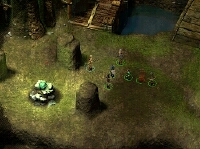 Iselore is in the south-centre of the map, near the Heartstone Gem. He can provide a wide variety of useful and interesting information about how the village and Dragon's Eye came to be full of Yuan-Ti abominations, about the Heartstone Gem, about Isair and Madae. He then tells you that before he can direct you on the next stage of your journey, you will have to help stop the threat to the village and the Great Oak. The Yuan-Ti have opened magical Crossroads to a jungle area called Chult. You can seal the portal, thus stopping the stream of Yuan-Ti attackers, by summoning and killing the Guardian of the Crossroads. The "Crossroads" is a blue portal that you should be able to easily see at the base of the great tree. When you are equipped and ready, find and click on it.
When you return to Kuldahar after resolving the Chult threat, you will find that an evil army led by a priestess named Cedra awaits you. They will attack you in waves, so that each time you think you have defeated them all, a new force will appear. Iselore will help you fight, or, if your party is not doing well, will cast "Heal" on your party members as often as necessary. Fortunately, Iselore is immune to nearly any area-effect spell he might wander into, so you don't have to worry too much about accidentally turning him hostile. You will get 2400 xp when the battle is finally over, but unfortunately not much treasure of interest. At this point, Iselore will put Dragon's Eye on your map, and all other locations on your map will become inaccessible. You will need to travel through Dragon's Eye and the Fields of Slaughter to reach the headquarters of Isair and Madae at the Severed Hand.