-

- Forums
- Chatrooms
- Gallery
- Gameplay Videos
- Upload
- Articles
- Mod Reviews
- Shop SP: Games, Movies, Books
|
|
CHAPTER 4
Black Raven Monastery
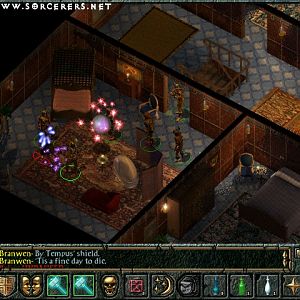
There won't be any combat in the Monastery itself for a good-aligned party. There will however be a few items of interest. They are:
The Eight Chambers

The keeper of the Eight Chambers is Morohem. Before you can enter any of the chambers, you must have ABSOLUTELY NOTHING in your inventory. These chambers were obviously easier for me just for having a Monk in the party. He can defend himself, dish out damage, and summon monsters to his aid without having any items.
Or ....
If you don't have a Monk, an arcane spellcaster can get the job done. The strategy is pretty routine. Start off with Mirror Image. Run around to stay away from the enemy monks as much as you can. Whenever you get the chance, use Animate Dead as often as you can. Once you tie the monks up with your undead, and you should, you can use something like Mordenkainen's Sword upon them at a safe distance.
Chamber of Stone
The goal here is to pull the levers in the correct order, and defeat the Stone Monks who appear after you've pulled each lever. Look on the patterns of squares on the west wall. Divide it into 3 x 3 grids, and you should then be able to figure out the correct order of levers.
Each time you complete a Chamber, you get an XP reward.
Chamber of Shadows
The goal here is to enter the portals in the correct order. I won't give out the exact order here. I will say this much, if you select the wrong portal, they all flash lightning, a Shadow Monk appears, and then you have to start over again. If you select the right portal, the portals twinkle with a beige colored light and no Shadow Monk appears.
Chamber of Sorcery
You have to defeat two Crystalline Monks who will crank out Lightning Bolts. Apparently one of the symbols on the floor is supposed to be able to protect you. I've never bothered to find out though, because they can't touch Akutagawa with his Spell Resistance and Evasion ability.
Chamber of Clockwork
You have to defeat three Clockwork Monks in a room filled with spikes and spinning blades. When you bring one close enough to death, it starts to count from 10 to 1 before exploding. At the same time, a button will appear somewhere in the room which you can press to stop the explosion.
Chamber of Sand
Two Sand Monks attack. Each lever activates a beam of fire that runs across the floor. It's a simple matter of luring the Monks across the beams enough times to kill them. Of course, unless you have Spell Resistance or Evasion, you have to account for the fact that the beams can burn you as well.
Chamber of Silk
Rather straightforward, simply kill all of the Poisonweb Spiders in the room.
Chamber of Battle
An Iron Monk appears. There is a switch on the east side of the room. You can't use it though while the pod in the middle of the room is shooting light upwards. The only way to prevent that is to leave the Iron Monk overtop of it. So, beat him unconscious so that he drops over the pod. Hit the switch.
The door to the west opens. Another Iron Monk appears, while the other one will revive. Bring them into the west room. Bring each of them to 'Near Death'. Then drop each one over each of the two pods in the west room. Once they're both down, hit THE OTHER switch in the east room.
Chamber of Immolation
The goal here is to defeat two Brass Monks, who also inflict fire damage with each hit. Flamestrikes constantly manifest at random throughout the room. If you don't have a Monk, again, a spellcaster may be the way to go.
If you are relying on an arcane spellcaster, immediately start with Animate Dead. Tie the monks down as soon as possible with a Zombie Lord. The ideal becomes to always have two or three undead (preferably Zombie Lords) holding them up, and peck away with Mordenkainen's Sword (which hopefully you have). Keep your eyes peeled both on your Mirror Images and the red circles that indicate a pending Flamestrike. Once you're down to two Mirror Images, cast another one.
Once you've mastered all Eight Chambers, go to Salisam for your XP reward and his permission to use the Underdark passage. Stairs will open southeast from where Morohem is.
Black Raven Tomb

The next battle, albeit an optional one, is the four Iron Golems guarding the Black Raven's Tomb. If this battle is tough enough for vanilla IWD2, it has gotten enough worse for Tactics. The key here is to put some extra preparation into your coming battles. In addition to the usual preparations, I also do the following:
1) Iron Golems take damage only from +3 or better weapons. So Markus switches over to Stormbreaker, and Stygar switches over to his Club of Disruption.
2) Elanna casts Mordenkainen's Sword. She'll be a key contributor since the sword acts as a +3 weapon.
3) Alliria casts Barkskin not on her herself, but on Markus (once from her memorized spells) and on Stygar (once from her Oakshield). Markus and Stygar will be the key sources of damage against the Golems, so it pays to maximize their protection. Keep in mind that Barkskin will stack with other sources of generic armor class like an Amulet of Natural Armor or the Brazen Bands.
4) Elanna casts Improved Invisibility on Markus, Stygar, and Akutagawa, again in order to maximize their protection.
4) Elanna then caps it all off with Mass Haste, in order to maximize damage output against the Golems.
Now to it. Don't spread out your damage between all the Golems. Have your warriors gang up on a single Golem so that they go down as quickly as possible, one at a time.
The Tomb itself holds:

The next battle is against the Duergar that you met previously. They'll come at you from both sides. For the north side, Stygar primes them up with Power Word: Blind. He and the rest of the warriors then wade into action.
For the south side, they have to come up a narrow pathway, so this represents the ideal bottleneck for crowd-control. Now my sequence is as follows: Alliria casts Spike Stones, then Spike Growth, then Ice Storm. Tithian casts Stink Cloud, then Cloudkill. Elanna casts Web, then Malison, and then starts to blast away with damaging spell after damaging spell. When the enemy is kept at a far distance, like for this battle, this represents the optimum time to unleash the Horrid Wilting power from the Bracers of Icelandic Pearl.
Crowd-control will trap, or at least delay, the south crowd. Alliria and Tithian can now open fire on the Duergar archers of the north crowd, or even help out with a few spells of their own. Once it's all over, there's a considerable amount of loot to be had. The more notable ones included:
The Underdark
When you first enter the Underdark, its kind of like a merchant/trading bonanza. Lots of merchants to sell your items to, and plenty worth checking out yourself.
First is the Drow Wizard, Malavon Despana. He'll sell several wands, but also:
Kadresh, the Drow rogue, sells:
In the southeast corner of this area are a few more merchants.
One is a Deep Gnome wizard named Myrvek. He sells several spell scrolls and wands, as well as:
Also present is Wode the Guileful, who sells mostly missile ammunition.
Lastly, you'll find a Dwarf named Heggr, who wells quite an impressive array of weapons and armors. Notable ones include:
The monsters in this area, Shadow Drakes, Myconids, and Sword Spiders, weren't particularly challenging in vanilla IWD2, and aren't much more so in Tactics.
Drider Caves
Here you'll get periodically swarmed by Drider Fighters, Drider Wizards, and Drider Priestesses. Not particularly difficult in small groups. Tithian switches over to his Moonblade with the idea of preventing Priestesses or Wizards from getting off any spells.
In the southeast corner of the caves is a lake where you'll get ambushed by a very large group of Driders, the first battle of true difficulty. Summon a bunch of creatures beforehand. I recommend setting up crowd-control over the east shoreline of the lake, since it represents a narrower pathway for the party there. Your party can then concentrate on the Driders coming from the west.
On the south side of the Caves will be the Red Wizard Transmuter, Imphrailli. You can however choose a non-confrontational dialogue choice with her, then get the jump on her. The rest of her creations should then be much easier. She'll leave behind:
As an aside, in the southwest part of the caves will be a bunch of Myconids. Around here is where you can find the Incandescent Blue Ioun Stone (+2 wisdom) that the Mind Flayer wants.

Now your next major battle, the horde of Driders guarding the Viciscamera. Take the initiative by planting spells over the Drider cocoons. This is going to be a really long battle, so be prepared to buff up to the max, and to cast many spells repeatedly. Elanna keeps an eye out for when monsters are clustered around Akutagawa, Tithian, or even Stygar (who cast Spell Resistance on himself beforehand), and casts spells according to the situation. Alliria fires her bow at any spellcaster that is at a distance, or chips in with a few offensive spells of her own. Once they're all dead, use Imphrailli's potion to destroy the Viciscamera.
The Priestesses and Wizards will also summon a lot of creatures whenever they can. When enough summoned foes appear, use Banishment if you have it. Failing that, Chaos will work just as well.

After you've finished off the Driders, now you can decide what to do about the Mind Flayer's quest. One option is to give it the Ioun Stone. It is however worth a good deal more experience points to refuse the Mind Flayer, which in itself gives an xp bonus, and then kill off it and its minions for more xp. Keep in mind that Mind Flayers can use a stun effect that affects a cone-like area. They will also try to teleport away if their hit points are brought low enough. So, surround it before starting things. Then try to use an attack (e.g. Stunning Blow) that can stun it or otherwise immobilize it, so that you can net the xp for killing it instead of letting it get away. After that, mop up with its minions. The Mind Flayer will also leave behind the Mercy Killer Belt (+2 to Strength).
When all is said and done, go to Malavon for your rewards, which will include:
Now it is time to kill the Mind Flayer guarding the Z'hinda Citadel. Again, surround the Mind Flayer before starting combat. His minions are too spread out for offensive spells to be of much use, so you can try summoned monsters instead.
Z'hinda Citadel
A frequent foe here, besides Mind Flayers and their Thralls, is the occasional Mind Golem. What this Golem has going for it, besides powerful physical attacks, is a Mind Fog attack that can reduce your Wisdom, and thereby your resistance to psionics. If you do decide to attack one, two things: 1) Cast Haste and whatever protective spells you may need before hand and 2) Make sure you take it on away from any Mind Flayers. The Mind Fog can make you especially vulnerable to psionic powers like Domination and the Stun cone.
In the eastern part of the Citadel will be several Mind Flayers. In Tactics, they are now helped out by a few Umber Hulks. Cast at least Protection from Evil (saving throw bonus) and Haste beforehand. You may want to consider taking out the Umber Hulks first, since any character that gets stunned can easily get shredded by the Hulks. Try to take out the Mind Flayers one at a time. When you do target a Mind Flayer, position everyone around it first and then close in for the attack. This will minimize the chances of it teleporting away.
There may also be a few items of interest here as well. In one of the rooms to the east is a Stunning Longsword +2 (25% chance of stunning target for 1/2 round).
In the southwest is a room with several containers. Some of them contain Masterwork weapons. The Light of Selune mod also adds:

In the centre of the Citadel is the Elder Brain. Buff yourself up beforehand, including Mass Haste. Once combat begins, go for the Elder Brain first since it can use a stunning power in a cone-life area. Its minions are spread out, so you may want to summon help in order to occupy them while you go to work on the Elder Brain.

Once you leave the Citadel, you'll get ambushed by two Red Wizards, Mirabel and Mardrash, as well as their minions, which include four Earth Elementals and several Harpies. Majrash and Mirabel are capable of pretty powerful spells, including Disintegrate. Also, things like Stunning or Insect Plague won't work either. So ....
Start off with summoned help to keep them occupied while you go to work on their minions. Alliria casts Summon Insect near one of the Wizards. Elanna casts Animate Dead near another Wizard, and is always raise to cast it again once the previous undead goes down. This is to keep the Red Wizards occupied and focused on your summoned creatures for the time being. Stygar in the meantime casts Remove Fear to nullify the Harpies' wail ability. Tithian casts Slow against the oncoming crowd. Markus and Akutagawa wade straight into the Harpies.
Stygar then casts Animate Dead as well near the Wizards. He then changes over to the Club of Disruption, and takes out the Earth Elementals one at a time. Everybody else in the meaning is going to work on the Harpies.
Once you've cut the crowd down to size, take out the Red Wizards as quickly as you can. Akutagawa and Tithian, both having spell resistance and evasion, and Markus, having high saving throws, and Stygar, having cast Spell Resistance on himself beforehand, charge the Red Wizards up close and hack away. Alliria and Elanna hang back and fire from a distance.
Mirbal leaves behind:
Majrash leaves behind:
Now it's time to talk to Oswald and proceed to the next chapter.