-

- Forums
- Chatrooms
- Gallery
- Gameplay Videos
- Upload
- Articles
- Mod Reviews
- Shop SP: Games, Movies, Books
|
|
|
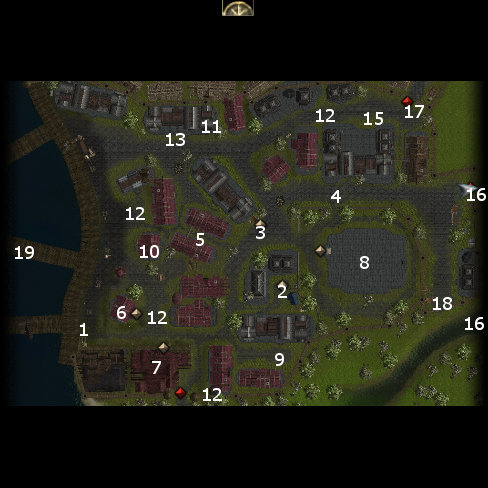
Docks District | ||
Upon setting sail, youre treated to a couple of cinemas that clue you in to whats at work. Wherever a Silver Shard is concerned, especially one thats a piece of an extra-dimensional Silver Sword, guess who cant be far behind? Thats right, the sinister Githyanki are players in the drama. |  | |
Another equally dangerous player has (re)entered the picture as well, and another victim falls to his machinations. |  | |
 If you still have Neeshka in your party, here youll run into a bunch of thugs led by Bennon, who try to shake her down.
 Also, shortly thereafter, and regardless of which path youll take, youll bump into a red haired sorceress thumping chests with two female mages just east of the Sunken Flagon. This leads to Qara becoming a joinable NPC. Leave the Flagon with Qara a first time, and youll get attacked by Paven and some academy students. Leave the Flagon with Qara a second time and youll attacked by Arnie and more academy students. Chances are youll lose a party member or two to the overwhelming numbers of spells thrown at you. Dont be alarmed though because its not permanent. Its simply a prelude to another mage, Jahric, showing up and promising future retribution against Qara.


