-

- Forums
- Chatrooms
- Gallery
- Gameplay Videos
- Upload
- Articles
- Mod Reviews
- Shop SP: Games, Movies, Books

Overview | The Trash Warrens | The Buried Village | Weeping Stone Catacombs | The Dead Nations | The Drowned Nations | The Warrens of Thought |
THE DROWNED NATIONS
This area is accessed via either the Dead Nations or the Warrens of Thought. This is where you find the Decanter of Endless Water and the Bronze Sphere that Pharod asked you to find, and it also has access to the Empty Tomb.
All the Ghouls in this area are quite friendly unless you attack or provoke them. So unless you're really spoiling for a fight, just attack the other monsters you find here (Vargouilles and Trocopotacas).
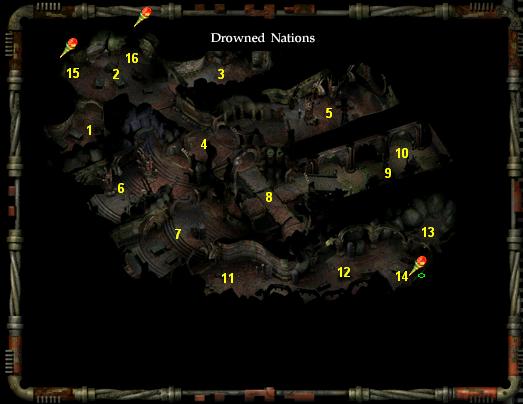
Map Key
About the Area
Search the open container at 1 for:
At 2 you will find a Female Ghoul who is more coherent than most Ghouls. She can't tell you where to find either the Bronze Sphere or the Decanter of Endless Water but at least she can suggest that you look for the Decanter to the East where it is more damp.
At 3 you will find two Ghouls facing a Trocopotaca. Kill the Trocopotaca for the Ghouls, then loot the dead Collector here for:
The pipe is particularly useful, as it can be used to cast the spell Cloudkill – a very powerful 5th level spell.
At 4 you will find four Ghouls facing a Trocopotaca. Help them kill the Trocopotaca.
At 5 you will meet three Trocopotacas, one of them injured. Kill them, then loot the container behind them for 371 copper pieces.
At 6 you will find two Ghouls facing a Trocopotaca. You should know the routine by now.
The two Ghouls at 7 have been poisoned and drop dead soon after you spot them. You can't help them but you can loot their bodies after they die.
Here you will also find the grave of the Nameless Zombie from the Dead Nations. Unfortunately the name is illegible, so you'll have to report back to her that her name is irrevocably lost.
The locked container next to the grave contains:
As you approach the two Ghouls at 8, a group of six 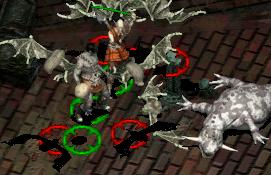 Varguilles will appear and attack the Ghouls. Kill the Varguilles while they are occupied. Or let them kill the Ghouls so you can loot the bodies.
Loot the body at 9 to find:
When you approach the body, a large group of Varguilles appear and attack you.
At 10 you will find:
Make sure to bring the Decanter back to the Weeping Stone Catacombs where you need it to set Glyve free. After that, make sure to hang on to it – in Act 5 you will learn its command word from Nemelle in the Clerk's Ward, and you can then use it to free Ignus.
When you approach the locked container at 11, you will be attacked by the six Varguilles nearby. The container holds:
Loot the open container at 12 to find:
When you loot, six Varguilles will appear and attack the Trocopotaca. Kill all the monsters.
You will need to kill the two Trocopotacas at 13 to get to the 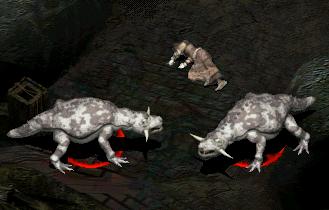 dead Collector behind them. The Collector's body will yield:
The Bronze Sphere is the sphere you need to take back to Pharod.
At 14 you will find the entrance to the Empty Tomb. When you open the gate, you are warned that you should enter alone. Your companions leave the party when you enter. They will be waiting for you here when you exit the tomb. Before entering the tomb I suggest that you transfer as many inventory items to your companions as possible – you will find some valuable stuff inside.
Some users have experienced problems with their party members being hidden behind the door when they returned form the tomb. If you have this problem, Platter's Lost Party Members Fix solves this bug.
There are exits to the Dead Nations and the Warrens of Thought at 15 and 16, respectively. If you haven't been to the Warrens of Thought before, the exit here is useless – you will find a locked door at the other end which you can't open.
You don't need to visit the tomb in Act 3 but you might as well; it will save you a bit of hassle at the beginning of Act 5.
You can enter the tomb easily enough but getting back out takes a bit of effort. The tomb is very linear. Please see below for detailed instructions on how to get out again.
There are several minor traps in the tomb but the ones you really should be aware of are the Lightning traps which are marked with Symbols of Torment on the floors.
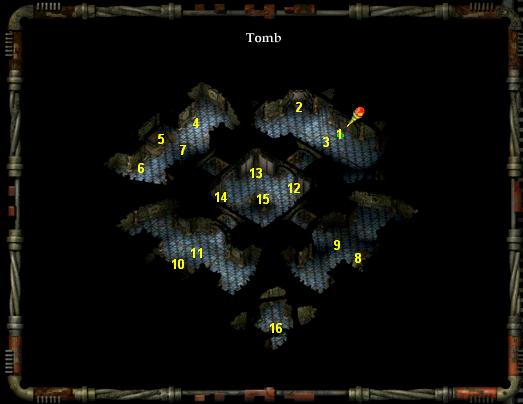
Map Key
Getting out of the Tomb
You've managed to get into the tomb. Now, you want to get out again, and hopefully learn something useful in the process.
1 is the place where you enter the tomb.
On the wall at 2 you will find a plaque telling you that you are trapped, since no mortal man can escape. Good thing that you are immortal, eh? :-)
The large Symbol of Torment at 3 marks a Lightning trap which you will want to avoid.
Run towards the middle of the tomb (15). You will be teleported to 4.
At 4 you will find a dead body with:

Search the container at 5 to find Tomb Key 1.
Loot the body at 6 to find:
If you try to get back to the central room, you are teleported back here, so the only way to escape this part of the tomb is to die. Step on the Lightning trap at 7. You will be hit by lightning, killed and teleported back to 1.
Run towards the middle again. This time you will be teleported to the right side of the map.
Search the container at 8 for Tomb Key 2.
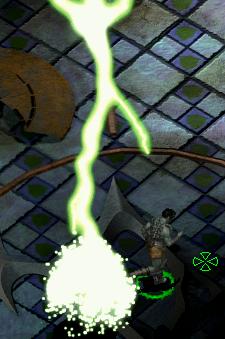 Step on the Lightning trap at 9 to be killed again. You will be teleported back to 1.
Run towards 15 again, this time you are teleported to 10.
Search the container at 10 for Tomb Key 3, then step on the Lightning trap at 11. Die and awaken again at 1.
Run towards the middle again. This time you will be allowed to enter the central area.
The container at 15 is locked. To open it, you need to read and push all the panels at 12, 13 and 14. Once you have read them all, you can search the container for Tomb Key 4.
Reading the panels also completes the "Find your Journal" quest you got way back at the beginning in the Mortuary.
Make sure to read the panels at 14 carefully – one of them has the same text as the one Morte read from your back, but with one extra line he must 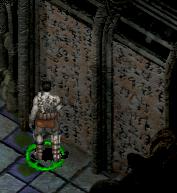 have "forgotten" to read to you: "Don't trust the skull!" You should grill Morte about this when you get him back after leaving the tomb.
After getting the fourth tomb key, run towards 10. This time you are teleported to 16.
At 16, loot the container to find:
At this point a portal will open. Enter it to exit the Empty Tomb. You will find yourself back at the entrance to the tomb, with your companions waiting for you.

