-

- Forums
- Chatrooms
- Gallery
- Gameplay Videos
- Upload
- Articles
- Mod Reviews
- Shop SP: Games, Movies, Books

THE CIVIC FESTHALL
The Festhall is the headquarters of the Society of Sensation, also known as the Sensates, and one of the most important buildings in Clerk's Ward. You will gain a few important quests here, and you have to come here to resolve other quests that you gained elsewhere.
The Festhall consists of four areas:
You can explore the first three rooms freely; however if you're hoping to rest for free in the Sleeping Quarters or enter the room to the right of that area, or if you wish to enter the Private Sensorium, you will have to join the Sensates or at least convince them that you are already a Sensate. You need to do these things, so start by talking to Splinter, the huge man standing near the entrance from Clerk's Ward.
This is where most of the action takes place in the Festhall. Begin by exploring this room fully. You are sure to come back once or twice.
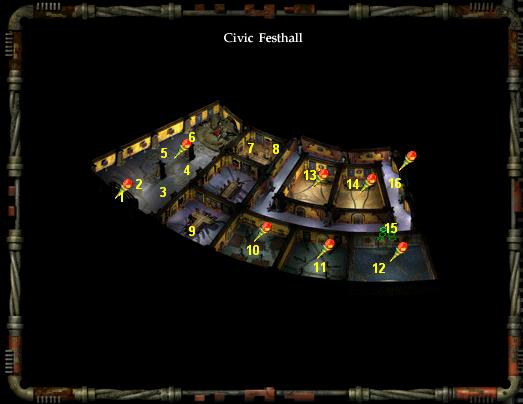
Map Key
At 1 you can exit back out to Clerk's Ward.
Splinter at 2 is the Festhall's doorman and the first person you should speak to. He may look imposing but he is really as meek as a lamb – unless of course you start a row, in which case he will throw you out!
If you wish to join the Sensates, Splinter is the man you need to speak to. You can either join the Sensates for real, or you can convince Splinter that you are already a Sensate. To do the latter, you must have solved Nemelle's and Aelwyn's quest in Clerk's Ward and then learned from Aelwyn that you were once a Sensate, or you must have a Charisma of at least 16.
If you join the Sensates for real, you gain the special ability "Sensate Touch", which allows you to heal 6 HP of damage for one of your companions, while taking the same amount of damage for yourself. Also, the Tattoo of Sensation and the Tattoo of the Sensates become available in Fell's Tattoo Parlor.
Splinter can guide you to the Public Sensorium and, once you have joined the Sensates, the Private Sensorium. If asked, he can also tell you where to find Jolmi, Montague and Merriman, and he can tell you which lectures are currently being given in the Festhall and inform you of the Training Rooms.
When you have joined the Sensates, Splinter will sell you various scrolls and items from the Sensate vaults. Nothing very much out of the ordinary; but if you're playing a mage, you can buy a scroll of Power Word: Blind here.
Jolmi at 3 is a noblewoman who wishes to experience what it is like to kill somebody. You may already have met her messenger in Clerk's Ward. She has heard of this immortal whom she could kill without facing murder charges afterwards and will offer you a sum of money if you will let her kill you. The sum gained depends on your Charisma: 1,000 copper pieces with a Charisma of 12 or less, 1,500 copper pieces if your Charisma is between 13 and 15, and 2,000 copper pieces with a Charisma of 16 or better.
Jumble Murdersense can usually be found at 4 or in the next room. He is the mage who cursed Reekwind back in the Southwestern Hive Sector, and I know you've been aching to get rid of that quest! Jumble will refuse to even speak to you, and if you threaten him, he curses you with a bad case of hiccups!
Let him curse you, then exit back out to Clerk's Ward and speak to Salabash the Onyx outside the Festhall. Ask for his help, and when he refuses to teach you a curse you could use against Jumble, just use reverse psychology: "It's not because you won't; it's because you CAN'T!" Salabash can't resist the temptation to prove himself to you and teaches you a curse. ;-)
Step back in, speak to Jumble, and throw Salabash's curse on him! Jumble will roll over and agree to remove his curses from both you (10,000 XP) and Reekwind (1,000 XP) if you'll only remove your curse from him. Don't forget to report back to Reekwind at a later opportunity, as this will net you another 5,000 XP, plus he will scribe any stories he hasn't yet told you into your journal for free.
Mertwyn the Headless at 5 is a body with a wooden head. His real head has gone missing, so promise him you'll look for it. His head is currently in the possession of the Clerk's Ward Thugs outside the Linguist's Home in Clerk's Ward. Seek out the thugs and get the head from them by buying it, winning it in competition, or taking it by force.
Behind one of the panels at 6 you can find a Scroll of Force Missiles.
Montague at 7 is the lover of Juliette in the Brothel of Slating Intellectual Lusts. Speak to him according to which solution you have picked to Juliette's quest and if necessary show him the fake love letters. When he resigns, tell him it was all a ruse, and that turnabout is fair play. Be careful if you're pretending to be a rival suitor; you don't want to turn Montague hostile or killing him.
Qui-Sai at 8 is a Stone Genasi and the Festhall's Warrior Trainer. Ask him what he was meditating on to learn that he is trying to learn the "Way of Stone"; a way of combat that, if understood, will render him invulnerable in combat. With an Wisdom of 16 or better you will understand some of what he tells you and gain a permanent +1 bonus to your Armor Class.
You can ask Qui-Sai to train you as a warrior. But first you have to convince him that it is not enough to rely on thievery or magery alone. With an Intelligence of at least 16 you can convince him outright; otherwise you will have to seek the advice of the Thief and Mage trainers of the Festhall:
Convincing Qui-Sai to resume training warriors earns you 10,000 XP.
Ghysis the Crooked at 9 is giving a lecture on the Blood War. Listen to his lecture and make sure to ask all the questions you can. You will regain a memory (1,500 XP) of yourself serving in the Blood War. If you have bought the stained lens from Vrischika's Curiosity Shoppe, you will know that Ghysis got out of his tour in the Blood War by betraying two of his comrades. If pressed, Ghysis will tell you how he fed them to the Pillar of Skulls in Avernus in return for information on how to escape.
At 10 you'll find the Warrior Training Room. Some of the Warriors-in-training will tell you that the trainer, Qui-Sai, isn't here at the moment. Unless of course you have already convinced him to return as described above under 8.
At 11 you'll find the Thief Training Room. The Thief trainer has also left, but you can find him outside in Clerk's Ward – it is Eli Havelock at 15 on that map – and convince him to return.
The Mage Training Room is at 12. Again, the trainer has left, but you can learn from some of the students that she is in the Public Sensorium, where she spends way too much time. Seek her out and convince her to resume training mages.
Three-Planes-Aligned at 13 gives a lesson on "Alignment". Most readers of this walkthrough will probably hear little they didn't already know, but pay attention to what he says about "gate towns" and how they can "slide" into the planes they border on.
Death's Advocate at 14 explains the concept of petitioners – that when you die, you go to another plane, depending on your alignment. Despite Morte's skeptical comments this is an important concept in the Planescape setting. Feel free to ask Death's Advocate any questions you like and make sure to kill yourself and get back up – but when the time comes for him to prove his point, don't kill him! Unless you want a little run-in with the Harmonium, that is! Making as if to kill him, then stopping *just* short of the neck is quite funny, though! ;-)
Merriman at 15 is the man you need to speak to on behalf of Dolora, one of the prostitutes in the Brothel of Slating Intellectual Lusts. Unfortunately, Merriman will only give you the keys  to Dolora's heart in return for a favor. You can kill or pickpocket him for the keys but doing his quest yields more experience. Merriman wants to forget everything and start all over:
The entrance to the Sleeping Quarters is at 16.
This is the area where the Sensates rest. You will find that you have your very own room here.

Map Key
At 1 you can exit back out to the Main Hall.
If you have joined the Sensates, the Festhall Clerk at 2 will give you the key to your own room and offer to let you rest here. As a Sensate, you can rest here for free. If you are not a Sensate, you can rent rooms at extremely low prices.
Unfulfilled-Desire at 3 can help you remove one of your desires. Speak to her to learn this. You can now refer the Drunken Mage in Clerk's Ward to Unfulfilled-Desire; in return he will give you his Frost-Ale Mug.
Unfulfilled-Desire's drawer can be looted for 34 copper pieces. Hardly even worth the trouble to open it.
The two locked chests at 4 can be burgled for a total of 137 copper pieces, a Silver Bracelet and a Silver Earring.
The locked chest at 5 contains 187 copper pieces.
The door to your own room at 6 is locked. You need to get the key from the Festhall Clerk, which means you have to join the Sensates.
The cupboards at 7 contain:
The Scroll of Fire an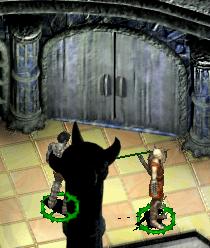 d Ice and the Dodecahedron are in the locked closet to the right. The Dodecahedron is important to finding Ravel. Examine the Dodecahedron to open it. Depending on your intelligence, you may take some damage:
Once you have unfolded the Dodecahedron, you will find that it is a journal in a language you don't understand. Take it to Finam the Linguist in his home in Clerk's Ward. You can learn the language of the Dodecahedron either by running Finam's errand and fetching his book from the Brothel of Slating Intellectual Lusts, in return for his father's notebook, or by casting Stories-Bones-Tell on his father's ashes and learning the language from him.
After learning the language of the Uyo, read the Dodecahedron – a journal by an earlier incarnation who was certainly anything but sane – to learn that you have saved a legacy for yourself at the Advocate in Clerk's Ward.
This sensorium is open to the general public. Here you can experience the sensations that Sensates have recorded for your enjoyment.
You enter this room by speaking to Splinter in the Main Hall and ask to be taken to the Public Sensorium.

Map Key
At 1 you will find the exit back to the Main Hall.
The Sensate Guides at 2 can unlock the sensory stones for you. There are 20 sensations that you can experience. Each of the 14 ordinary sensations will give you 750 XP and each of the 6 more elaborate sensations will give you 1,500 XP. Speak to any of the guides and choose an experience, then follow the guide's directions to the right sensory stone.
Lady Thorncombe at 3 is the Festhall's Mage Tutor. Speak to her to learn that she has become addicted to sensory stones and doesn't want to teach any longer. To convince her to return, go outside the Festhall and tell Salabash the Onyx about Lady Thorncombe's addiction. He will be overjoyed and plot to take over the prestigious position. Run back to Lady Thorncombe and tell her about Salabash's decision, and she will immediately return to teaching, leaving you behind with another 12,000 XP to your credit.
After returning to training, Lady Thorncombe will sell you the following higher-level scrolls:
This exclusive sensorium is only accessible to Sensates. To enter here, speak to Splinter in the Main Hall. After joining the faction or convincing Splinter that you are already a Sensate, ask to be taken to the Private Sensorium.
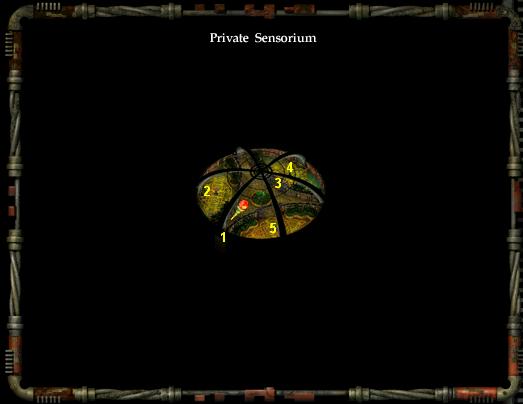
Map Key
Overview of the Private Sensorium
At 1 you can exit back to the Main Hall.
The Trapped Sensory Stone at 2 was made by an earlier, rather insane incarnation. Fortunately for you the trap was clearly harder to make than it is to break. You get 500 XP for escaping the sensation.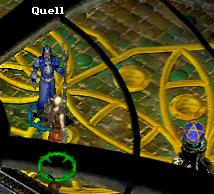
Quell at 3 knows the key to Ravel's Maze. Unfortunately, before telling you he wants you to bring him some extraordinary candy. Go to the Curiosity Shoppe and buy the Chocolate Quasit and give it to him. Quell will now tell you that the key to Ravel's maze is a piece of Ravel herself; alas he doesn't know where to find a piece of Ravel when Ravel herself has been mazed. (If you can't figure this out yourself, ask Annah. She will suggest to look for a daughter of Ravel!)
If you ask Quell for some candy, he will offer to sell it to you. But his candy is not ordinary chocolate; he sells magic candy:
If you are a mage, Quell can also sell you a number of low-level scrolls plus the following higher-level scrolls:
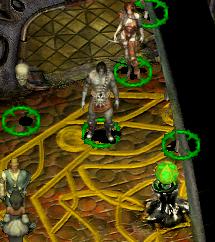
Deionarra's Sensory Stone at 4 is quite sad, as it tells how Deionarra loved you, and you just used her love as a tool. But you do earn a total of 6,000 XP for enduring her sad tale, and you learn that she has left a legacy for you – all you need to do now is claim the legacy at the Advocate.
Ravel's Sensory Stone at 5, on the other hand, is rather creepy. You don't learn anything really important from it but there is nothing wrong with the 6,000 XP you get for checking it.

