-

- Forums
- Chatrooms
- Gallery
- Gameplay Videos
- Upload
- Articles
- Mod Reviews
- Shop SP: Games, Movies, Books
|
|
The Castle | Hazard Zone | The Mines | The Mountain | The Pyramid | River Styx | Hall of the Dead | The Forest | The Temple of Ramm |
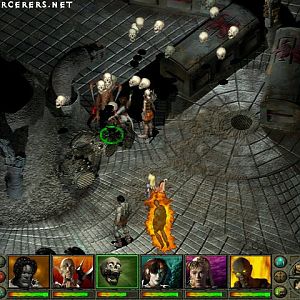
HAZARD ZONE
Hazard Zone Map
Miner's Pick
Now I begin to explore the Hazard Area, which has a newer assortment of monsters. My first fight is against Jungle Vines. They're not especially difficult, but they can attack the same character, even a back three character, three times a round.
I try to rest, but get interrupted by three Zombies. Zombies can be challenging, especially in numbers, since they can spew bile that temporarily inflicts a nausea effect that can either reduce your chances of landing an attack, or prevent you from attacking altogether. If the Zombies are numerous enough, I earnestly recommend using the Dispel Magic spell. In this instance Terra my Bishop had a Dispel Undead scroll on hand, and used it to get rid of two of them outright.
I try to rest again, but am interrupted a second time by several Slimes, which aren't particularly difficult except that they have decent resistances against my spells. Acid Slimes can inflict extra acid damage with their attacks, while Poison Slimes can poison a character after an attack.
I continue northeast and fight a few Dungeon Leeches in another room, starting at 7:07 of the video. The chief danger for these monsters, if there is any, is that their bite attacks can reach the back three characters. Zarax gains enough xp to advance to his 7th level.
Entering the room at #2 leads to a fight with several Killer Rats and Rabid rats. They're pretty much like the Rats I've been killing all along, except they have a little better chance to hit me and tend to be more numerous.
I find the Miner's Pick in the southwest corner of the room. This is a needed item for several points in the game.
Dungeon Key
In the course of this video, I then make my way towards #3 on the Hazard Zone map, and find the Dungeon Key.
At #4 of the map, I first Search to discover that here was a recent cave-in. I then use the Miner's Pick to clear away the rubble. This reveals a chest that has random loot. I reloaded and re-opened the chest until I got a Chain Hosen. Zarax wears it in the interinm, and he can import it into Wizardry 7.
I also use the Miner's Pick to clear away the rubble at #5.
I then spin around for enough experience for the rest of the party to advance to the 7th level. After that, I pass through the gate at #1.
Lower Level 1:
J.R. Decoder
That brings me to #10 on the Lower Level 1 Map. The Dungeon Key will open the various gates around #10 and #11 on the Lower Level 1 Map.
I head to #11, and find the JR Decoder Ring. When I use the Ring on the Deadman's Log, it reveals that the Captain buried his treasure on 'Giant Mountain.'
I make my way to the NW corner of the Lower Level 1 map, and Search it in order to start a set encounter against several Dungeon Leeches.
A pile of bones is in the room south of where I fought the Leeches. I search them and start a set encounter against Zombie Bones, which by now is be easy enough.
I next go to Queequeg at #2 and sell him my excess loot. I also tell him "Giant Mountain" and he in turn tells me the password for the nearby Captain's Den, which is 'Skeleton Crew'.
Captain's Den
Now I go to the door east of #12, the door to the Captain's Den. Unless you know the password, the pirates will be able to force you away from the door. So I simply speak the password, "Skeleton Crew". I choose to 'Fight' for the experience points. This fight shouldn't be difficult for a 7th level party, as you remember to take out Captain Matey first and foremost. Terra my Bishop also casts Missile Shield as a precaution against thrown daggers. Errol the Bard also makes generous use of his Lute to incapcitate the other Pirates. I also use Heal Wounds when needed.
I next go to #12 and use the Silver Key from L'Montes to open the gate. The key item to be found is a Steel Hook. It will soon be needed to make progress.
I also disarm and loot the chest at #13. After that, I go back through the gate to the Hazard Zone at #10.
Hazard Zone Map
Bell Key
I am back to #1 on the map of the Hazard Zone. The key point here is to get to #6 on the map, and search the corner for the Bell Key. I thereafter come back to the gate at #1.
Lower Level 1:
That brings me back to #10 on the map of Lower Level 1 of the Castle. From there I go up the stairs a little south of #5.
Entrance Level:
That brings me to the stairs a little east of #2 on the map of the Entrance Level. I go up the stairs a little west of #1.
Upper Level 1:
The Belfry
Now I on the west side of the Upper Level map. I go up the stairs at #10, which is the entrance to the Belfry tower.
I go all the way up to the top. There's a point where I reach a rope overhanging a chasm. The correct option is 'Attempt to Swing across the Belfry'. Each time you make the attempt, you'll have to fight a group of Bats that will likely include Vampire Bats that can poison you. Also, chances are about 50/50 that you'll either be back on the side where you started, or on the other side of the chasm. It really is a matter of patience and persistence. It took me several tries, but I don't mind since I get xp and skills practice while I'm at it. Notice that Errol the Bard now casts his Blink spell to get in some Oratory practice.
Once I do manage to get on the other side, there will be a locked door that requires the Bell Key to open. Inside will be a chest that holds the Heavy Rope. I use Merge to combine the Rope with the Steel Hook, in order to get the Rope Hook. Zarax carries it as he has the highest carrying capacity.
I now retrace my steps and go back the way I came to return to the Hazard Zone.
Hazard Zone Map
The Chasm
Now I head for #7 on the Hazard Zone map, and thus use the Rope & Hook to cross the Chasm.
Now I make for #8 on the Map. Shortly before I hit #8 though, I encounter a couple of Hydra Plants as well as several Jungle Vines. The Hydra Plant is a lot like Jungle Vines. It can attack multiple times, including back rank characters, only it hits more often and has a good deal more hit points. This fight is nonetheless very winnable as long as you take out the Hydra Plant first, and make sure your healers keeps everybody's health on the up and up.
I spin around until I advance my Bard, Lord, Monk, Ninja and Bishop to their 8th levels. I make sure Ryu gets 10 skill points to reach 44 Alchemy skill points, putting himself with reach of 54 skill points on the next level up. I also make Terra gets to 36 Thaumaturgy skill points, so she gets her Fireball spell.
#8 itself is an elevator that leads downwards. My next destination is the Mines.