-

- Forums
- Chatrooms
- Gallery
- Gameplay Videos
- Upload
- Articles
- Mod Reviews
- Shop SP: Games, Movies, Books
|
|
The Castle | Hazard Zone | The Mines | The Mountain | The Pyramid | River Styx | Hall of the Dead | The Forest | The Temple of Ramm |
THE PYRAMID
Pyramid Entrance:
To the Pyramid
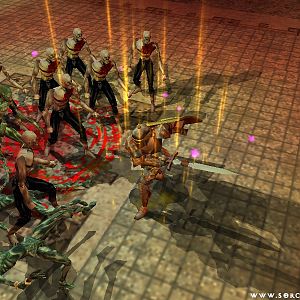
I am now at #1 on the Pyramid entrance map. I frequently run into a new kind of monster in this area, Amuzulu Zombies. They're basically somewhat tougher versions of the Zombies I've run into off and on. They're also very frequent in this Pyramid area. Zarax can soften up a single group with his breath weapon, allowing Chun-Li and Ryu to bring them down rather quickly. Terra uses Dispel Undead if there's more than one group. I also rest up until you've recovered all of mana expended after a fight, so that I can use Dispel Undead whenever needed.
At #3 on the Pyramid Entrance map, I use the Miner's Pick. This will open the wall, meaning that I can travel from the Pyramid straight to the north side of the Mountain map.
At #4 is a place where there is a lot of sand. The point of this will become evident very soon.
I go up the stairs at #5, and up the next set of stairs.
The Pyramid:
Bag of Sand
At the start of this video, I am at #8 on the Pyramid Level 1 I then go to #10 on the Pyramid Level 1 map. In this room is a chest with an Empty Sack. I back track all the way that I came and down the stairs at #8 on the Pyramid Level 1 map. Pyramid Entrance: I am now at #4 on the Pyramid Entrance Map. I take the Empty Sack to #4 on the Pyramid Entrance map, and fill it with sand in order to get a Bag of Sand. The point behind this will also be evident quite soon. I go back up the stairs at #5 to return to the Pyramid itself. The Pyramid: Gloop Sploch
Now that I have the Bag of Sand, I head back to the Pyramid. Now I go from #8 on the Pyramid Level 1 Map to the stairs at #6. I fight a large group of Amazulu on the way there. Most Amuzulu attack with spears, meaning they can also reach your back three characters. I often use powders or charged items that either inflict some damage on them, or afflict them with conditions like blinded or sleeping. Zarax sometimes softens them up with his acidic breath weapon too.
Once I go up the stairs, I go to the room on the west side of the Pyramid Level 2 map in order to fight some monsters and gain experience.
Now I'm heading for the stairs at #4 on the Pyramid Level 2 map. I run into two groups of Amazulu on the way there. In such large groups, don't be afraid to have your main spellcasters let loose with spells. In this battle, my Monk also attempted to used Psionic Blast on one of the groups although that fizzled. Keep in mind that your dedicated spellcasters (e.g. Mage, Priest) will recover mana much faster than hybrid characters (e.g. Samurai, Monk). So let loose with your main spellcasters and rest up until they've recovered all their mana, but be more discreet or discriminating as to when your hybrids use spells.
I head westwards after going down the stairs at #4 on the Level 2 map, I run into a large group of Amazulu, with a group of Priestesses at the forefront. The Priestesses can be dangerous if they get enough spells, epecially Poison Gas, so this is a prime instance for using Silence multiple times to make sure no enemy spells come my way.
I then make for #11 on the Level 1 map. There I have to fight and kill a couple of Goop Gloops, and get a Gloop Sploch for my troubles. This is a quest item that I will be using very shortly.
Bone Key
Now I leave #11 on the Pyramid Level 2 map and go up the stairs at #4. I next go down the stairs at #6 on the Level 2 map. From there I go up the stairs at #5 on the Level 1 map, and then up the stairs at #10 on the Level 2 map.
I now find myself at #8 on the Pyramid Level 3 map. I make my way to #3 and press the button there.
That means there will be another button at #4. But I have Errol cast a Levitate spell first. I press the button, which briefly opens up a pit at the floor beneath my feet. I fall just a little east of the stairs at #10 on the Pyramid Level 2 map.
This sequence was necessary because it opens up a doorway that provides access to the northeast corner of the Pyramid Level 2 map for later on. Having the Levitate spell in place beforehand meant that I took no damage when I fell. Now I simply go back up the stairs at #10 and return to #8 on the Pyramid Level 3 map.
Now I go to #2 on the west side, and press the button there. That places a tile just west of #2 that now allows me to head for the northwest corner of the Pyramid Level 3 map without falling to my death.
I head to #1 and press another button. I then go down the stairs at #6.
That brings me to #8 on the Pyramid Level 2 map. I go down the stairs at #1.
I am now at #1 on the map of the Pyramid Level 2 map. I next press the button at #12 to open the north wall, and then press the button at #13 of the Level 1 Map.
I now go to the room at #14 of the Level 1 Map. In this room is a chest that will keep bouncing around among the four corners of the map. That is, until I use the Gloop Sploch on one of the corners. I then chase the chest around until it goes to the corner where I used the Gloop Sploch. The Gloop Sploch will then keep the chest stuck in place. Inside the chest is the Bone Key.
Idol of Mau-Mu-Mu
Now it's time to back track the way I came until I come to the stairs at #10 on the Pyramid Level 2 Map. I go north and then east and then down the stairs at #3.
That brings me to the #3 on the Pyramid Level 1 Map. I go down the stairs at #9.
Pyramid Basement:
I start off near the stairs at #1 on the Pyramid Basement map. I go ahead a little bit and run into a new monster, Pharaohs of Phyre. They almost always cast either Energy Blast or Fireball. If it's one or two, you can usually kill them quickly enough before they cast any spells. Otherwise, make sure you can use Silence on them to prevent spellcasting. I then use the Bone Key to open the gate at #1.
Now I go to #3, and a pit opens up in front of me. I simply go back one square and press a button on the east wall. This closes the pit.
Now I go to #4, and press a button on the east wall in order to open the way to #5. At #5 is a button that will prevent a boulder from crashing down the hallway. Can anybody say "Raiders of the Lost Ark?" There's even more of this to come later.
Now I go to #8, and press the button on the south wall in order to close a pit at #9. In the meantime, there will now be a pit at #10. To progress the game, I'll have to fall down the pit and end up at #11. Errol's Levitate spell prevented the party from taking any damage during the fall.
I go to #12 and press the button instead of #13. Errol's Direction spell helps me get to #12 instead of #13.
Now the party will wind up at #14. I go to #15, and press the button which will open the gate ahead. I do not go straight ahead just yet, since the room is full of traps. Instead, I go to #16 and press the button there.
Now I head for the north, and run into a massive fight that consists of 4 Pharaohs of Phyre and 4 groups of Amazulu Zombies. This is one reason why I like to include hybrid characters who can also fight, even if they duplicate spells that the main spellcasters already have, they provide extra options and flexibility. I am in real danger of getting overwhelmed by multiple fire spells and 'stench attacks', so I have to pull out every stop I can. The Valkyrie and Ninja attack the foremost group of Zombies. My Monk casts Silence on the Pharaohs (remember my note about options and flexibilities). The Bard casts Fear on the group of 4 Zombies at least hoping to minimize their ability to attack. The Priest uses Dispel Magic on the group of 6 Zombies, while the Mage casts Fireball at the group of 5 Zombies. For the second round, the Pharaohs are harmless now that they've been silenced, so I take out the remaining group of Zombies first, saving the Pharaohs for last.
Once the battle is over, I press the button at #17 to open the west wall, and then press the second button in the little alcove that's revealed.
I then head east for an upcoming boss battle. The battle consists of 4 Pharaohs of Phyre, another group of 2 Pharaohs of Phyra, and a boss Pharaoh called Amen-Tutt-Butt. Amen can inflict pretty severe damage with his spells, and Silence is unlikely to work on him, so it is imperative to take him out as quickly as possible. Fortunately, my warriors managed to take him out without him getting a spell off. Rothgar used Silence on the group of 2 Pharoahs, and Terra used Dispel Undead on the group of 4 Pharoahs.
I get a few random Ankhs, including an Ankh of Might. Zarax already maxed out his Strength at 18, so I have him invoke the Ankh of Might to raise it to 19. I save the Ankh of Sanctity for when Terra maxes out her Piety. She keeps the Ankh of Phyre for use as a kind of Fireball wand.
Now for the other "Raiders of the Lost Ark" reference. Save your game first. Do not attempt to grab the Idol right away. Otherwise, you'll get hit with a really nasty poison gas trap. Instead, "USE" the Bag of Sand and attempt to switch it with the idol. If you fumble the attempt, simply reload. If you manage to pull the swap off without setting off the poison gas, great, save your game and get out of here. Ryu did it on his first try, as he previously maxed out his Dexterity to 18.
Now I head back east towards #14 and fall into the pit ahead of me. Now I will wind up at #11 again, but this time I now press the button at #13.
Now I head north to #19 and press the button on the west wall. This opens the way to #20, where I also press the button on the west wall.
Now I simply leave the basement, and return to #9 on the Pyramid Level 1 map.
The Pyramid:
Amazulu Queen
Now I go up the stairs on #3 on the Pyramid Level 1 map. From there, I go up the stairs at #9 on the Pyramid Level 2 map. This brings me to #7 on the Pyramid Level 3 map. I then go to #5 on the Level 3 map. I then use the Idol of Mau-mu-mu to open the gate and then go up the stairs.
As soon you go up the stairs, you'll run into the Amazulu Queen at #1 on the Level 4 map. You can avoid this fight if you're so inclined. And in fact, if you don't have the Levitate spell in your spell books, you're well advised to do so. If you want to avoid a fight, do not indicate that you've come for "The Rock", and gift her with something. By the way, the Baubles & Trinkets from the Captain's Treasure is the one item you can possibly give her that will offend her initially. You can still avoid a fight by apologizing and gifting her with gold or another item.
Once you've avoided a fight with the Queen, a priestess named Kuwali Kubona arrives. You can then buy the Foot Powder from her, as well as other miscellaneous items. The Foot Powder is your key to progressing the game if you don't have the Levitate spell.
I just as soon pick a fight with the Queen since I have the Levitate spell. I do this by giving her the Baubles & Trinkets and refusing to apologize. She'll likely call for help so that Kuwali Kubona and several other Amazulu join in as well.
Rothgar casts Armorplate while Errol uses a Blind Dust on the largest group of Amazuli.
The first priority must be Kuwali Kubona, since she can cast pretty dangerous spells like Poison Gas and Fireball. I killed her in the first round, but not before she got off a Silence spell. That in itself becomes a scare considering that the Queen attacks Terra and nearly kills her. And Terra fizzled her attempt at using a Conjuration Scroll she found as a result. And now most of my spellcasters are now Silenced.
My warriors take out the Queen next, but I have Ryu cast Heal Wounds on Terra. He can't be Silenced. But Terra is poisoned from the Queen's attacks, and she's still being brought down by the attacks of the other Amazuli. I take a chance on the next round that the Silence spell has worn off, which proves to be a correct guess. Rothgar casts Cure Poison on Terra, and Terra casts Heal Wounds on herself. I eventually manage to wear the rest down. Rotghar equips the Spear of Death that the Queen left behind as an interim weapon. It can be used from the back ranks, and can Poison or Critical Hit its targets. Zarax equips the Bone Necklace, and hands over the Ruby Talisman to Chun-Li.
Mau-Mu-Mu
Just beyond is a narrow walkway that will inflict fire damage if you try to cross it without either using the Foot Powder or Levitate beforehand.
Once you reach the end, Mau-mu-mu emerges from the lava pit. Terra invokes a Fire Shield Scroll she had found beforehand. The rest of the party wears him down in the first round.
I get the second Ruby Eyeball as a reward. I go back down the stairs at #1 on the Pyramid Level 4 Map.
I go from #9 on the Pyramid Level 3 Map and down the stairs at #7.
That brings me to #9 on the Pyramid Level 2 Map. I go down the stairs at #5.
And from #5 on the Pyramid Level 2 Map I go down the stairs at #8.
Pyramid Entrance:
That brings me to #5 on the Pyramid Entrance map. I go east to #3, to return to the Mountain.
Mountain Map
The Castle Spires
I am now at #13 on the map of the Mountain. I go to #7 and go up the elevator.
Hazard Zone Map
That brings me to #8 on the map of the Hazard Zone. I go east and use the Rope & Hook to shimmy across the chasm at #7, and then go through the gate at #1.
Castle, Lower Level 1:
Now I'm at #10 on the Castle, Lower Level 1 map. I go up the stairs that are a little south of #5.
Entrance Level:
I arrive at the stairs just a little east of #2 on the Castle, Entrance Level map. The entrances to the Castle Spires are the stairs leading up, and located just south of #4 on the Castle Entrance Level map. I go up the West Spire first. Each Spire will have a door that requires a Key of Spades (both from the Basement Level) to open. The West Spire has a Zombie at the top, who it turns out was the Mistress of the Vicar and the mother of a thus far vaguely referenced 'demon girl'. The chest has random items, as well as Chrome Keys.
The East Spire has a Gate that requires the Spire Key from the Wizard's sanctum to open, as well as a door that requires a Key of Spades to open. The top of the Spire holds the ghost of the Vicar who broke his vows of chastity for his mistress. He leaves behind the Horn of Souls, which will be needed very shortly.
I head back down to the Entrance Level. I also go back down the stairs east of #2 on the Castle Entrance Level map.
Castle, Lower Level 1:
That brings me to the stairs a little south of #5 on the Castle, Lower Level 1 map. I go down the stairs a little northwest of #9.
.Castle, Lower Level 2:
I am now at the west side of the Castle, Lower Level 2 map. I go east and place both Ruby Eyeballs in the door at #11 to open it.
The stairs at #12 lead to the River Styx.