-

- Forums
- Chatrooms
- Gallery
- Gameplay Videos
- Upload
- Articles
- Mod Reviews
- Shop SP: Games, Movies, Books
|
|
LOWER MONASTERY

Crash Landing
This video shows both the process of importing my Wizardry 7 party, as well as the opening sequence.
The video then shows me resetting my formation. The default formation is:
Front - Ryu, Zarax, Rotghar
Middle - Errol, Chun-Li, Terra
There is a problem with this configuration. In fights against numerous foes, the party can get surrounded on all sides. With the present configuration, the monsters will be within easy reach of Chun-Li, the most vulnerable character in the party.
So I change the configuration a bit to move Errol to the left flank, and Terra to the right flank.
This way, my main hitters are up front to address the foremost advance, while the Priest and Bard act as flank guards so that monsters can go after my Bishop from the sides. There is still a risk that some monsters may curl all the way back around and go after my Bishop from behind. If I anticipate this may happen, I'll have my Ninja change position to become the rearguard.
Imported characters get to advance to the 5th level once the game starts. Which skills to put points into can be a tough call. I would suggest skills are worth adding to in two different situations. One is where adding to a skill will immediately assist your character's performance. The other is where you won't be using the skill for some time yet, but will in the future. The reason for allocating skill points in the latter situation is a recognition that you won't be able to train the skill with practice for the time being. By comparison you can avoid putting points into a skill if you have an opportunity to power train it to 100.
Zarax puts all his attribute points in Strength and Vitality. Both to raise his Stamina pool, and to close in on both the Power Attack and Iron Skin expert skills. He adds skill points to Close Combat, Dual Weapon (immediate) and Mace & Flail (immediate).
Rotghar emphasizes Piety and Vitality, in pursuit of Iron Wila and Iron Skin respectively. He puts his skill points into Mace & Flail (immediate), Shield (immediate) and Bow (future). He also takes Stamina on his 5th level-up. Stamina is a staple spell, even during later parts of the game, as I often need to recoup characters' stamina during long battles. It also begins an early accumulation of Water Mana.
Ryu emphasizes Intelligence and Dexterity, in pursuit of Power Cast and Reflextion respectively. He puts his skill points into Sword (immediate), Critical Strike (immediate) and Shield (immediate). He also takes Frost on his 5th level-up, which begins his accumulation of Water Mana.
Terra also emphasizes Intelligence and Dexterity, and for the same reasons. She puts her skill points into Critical Strike (immediate), Dual Weapons (immediate) and Dagger (future). She also takes Heal Wound on her 5th level-up, which should be an obligatory spell for any character who doesn't yet have it.
Errol emphasizes Strength and Vitality in order to enlarge his pool of Stamina, and to reach the Iron Skin skill. He emphasizes Shield (immediate), Bow (future) and Communication (not easily trained).
Chun-li emphasizes Intelligence and Piety, both to accumulate more Mana and to obtain the Power Cast and Iron Will expert skills. She puts three points into Psionics, and two points each into Alchemy, Divinity and Wizardry. She takes Itching Skin on her 2nd level-up to begin the accumulation of Earth Mana. She takes Divine Trap on her 3rd level-up to begin the accumulation of Mental Mana. She takes Stamina on her 4th level-up, as it is a valuable spell throughout the game. She takes Cure Lesser Conditions on her 5th level-up, which allows her to get rid of things like Blindness and Paralysis and Nausea when they hit her party members.
At any rate, Vi Domina tells me to meet her in Arnika.
Note that there's a chest and a few Crabs in the background, as well as a chest. The Crabs can actually be avoided, and I do since I may want to use them as a training opportunity afterwards.
Desk in the Monastery
Now I start to explore the Monastery, getting involved in rather casual fights with low-level monsters like Bats and Rats and Slimes. Note that I seize every opportunity to practice my skills, casting spells, using weapons, etc.
I wind up at the placed marked 'Desk' on the map and 'search' around. I find a Book of Light that Chun-Li uses to learn the spell. I also find a clue as to some of the purposes served by the Monastery.
Dead Rapax Prisoner
Now at this point I begin exploring the hallways of the western side of the Lower Monastery, sometimes finding bits of treasure here and there. There is also a Book of Stamina to be found on the south side of these hallways if your party members' Senses are good enough.
For the east part of the hallways, but more towards the middle of the map, there are two jail cells right next to each other. I visit the first such one, the one labelled 'Dead Rapax'. It has a skeleton lying on a bed, as well as a Tattered Note that reveals it was a Rapax prisoner subjected to interrogation and starvation. If you 'search' this room, you can find a Ring of Protection. This makes for a nice interim magic item, but it is also an ingredient for the Ivory Blade if you wish to pursue its crafting.
Slithering Slimes
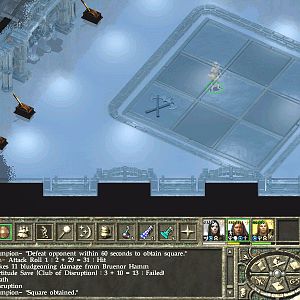
Here is my first training opportunity. At the spot labelled '3 Cockroaches' is a room with 3 puny level-two cockroaches. A lot of players, including myself during my early playthroughs, will simply unlock the door and kill the cockroaches. This throws away some wonderful opportunities to train up and perfect some skills.
I grab the first such opportunity here, in order to raise my Bard's music skill all the way to 100. First, I belly up to the door, but never pick the lock or open the door. I then press the sword icon at the bottom of the screen in order to start combat. I then start a certain cycle. Errol always plays his Poet's Lute in order to put the cockroaches to sleep, and does so repeatedly until he drops from exhaustion. Then either Rothgar or Chun-Li pick him back up again with a Stamina spell. He then resumes his music playing. I run away and savegame only after I've run out of Water Mana for Stamina spells. I then camp out in the Dead Rapax room to start another cycle. The end result is that Errol raises his Music skill to 100, and Rothgar and Chun-Li raise their Divinity and Water Magic skills as well.
Once in a while, some monsters do come by, but they're easily taken care of.
Ryu and Rothgar both advance to their 6th levels after I defeat several Slimes. Ryu takes Terror to begin accumulating Mental Mana. Rothgar takes Charm, likewise to begin accumulating Mental Mana.
At some during my Music Training, I scope around and notice six Slithering Slimes. Individually they're 6th level slimes capable of causing Nausea with their attacks. Even one of them is a challenge for my party. I start to lead them back to the Rapax Prisoner room. But they start retreating. I zero in one on one that's separated from the rest, and eventually wear it down. I heal up and track down the rest to east of the Monastery Desk room. I lead them back to the Desk Room and halt just a little west of the east door to set up a bottleneck. Also, I have Zarax switch to the Stun Rod, since it has more of a to hit bonus and scores more damage. Every little edge I can get. I gradually wear each one down one by one at the bottleneck.
Terra takes Sleep on her 6th level-up, in ordr to begin accumulating Air Mana. Chun-Li takes Missile Shield, since many enemies are capable of missile attacks from the start of the game.
I find another group of four Slithering Slimes and repeat the process. Zarax and Errol advance to their 7th levels.
Pustulant Slimes and Slithering Slimes
I do some more music training, which I didn't show in the video. I go out and scope for monsters after resting. I find a group of Pustulant Slimes, as well as a Green Slime. Pustulant Slimes are a little weaker than Slithering Slimes, but can use an ooze attack that can nauseate multiple party members. But I still don't have much trouble wearing them down.
I return to the Monastery Desk, and notice on oncoming group of six Slithering Slimes. I repeat the bottleneck procedure.
Rothgar takes Light on his 7th level-up, partly to begin his accumulation of Fire Mana. Ryu takes Enchanted Blade, which will be a useful buff in its own right but also begins the accumulation of Divine Mana.
Shrieker Bats
Close by are two groups of Shrieker Bats. They hit often, but for lower damage. And their shrieks can terrify party members. They'll make short work of a lower level party if they surrounded it. I again use a bottleneck approach. But it's easier for them to come two at a time through the opening since they're smaller than slimes. So I have to find just the right sweet spot where they'll be stuck at the doorway one at a time, reloading if I have to. I also have Errol up front with a shield, and Zarax attacking with his Stun Rod from the rear. I eventually manage to bring them down one by one.
Terra takes Blinding Flash on her 7th level-up. It's a useful debuff spell, but also beings the accumulation of Fire Mana for her. Chun-Li takes Armorplate, which is a staple buff for the party. I return to the Rapax Prisoner room and rest.
Music Training
Now I show how my training has evolved, and the last session needed to get Errol's Music skill to a perfect 100. Errol is of course using Poet's Lute on the Cockroaches every chance he gets. It's no big deal if he falls unconscious. He'll either get up a round or two later on his own, or be helped back up by a Stamina spell.
But I also treat it as an opportunity to train magic skills for several characters. The key is to use only Stamina, or spells that inflict status effects on the cockroaches without inflicting any Hit Point damage on them.
Rothgar begins by spending all of his Water Mana on Stamina spells for Errol, always at power level 1. Multiple power level 1 castings tend to raise magic skills faster than single casting of the same spell at higher power levels in my experience. He simply waits until he gets 2 Water Mana again before casting another Stamina on Errol.
Ryu begins with a power level 3 casting of Enchanted Blade, which fizzles. But that's fine, since unsuccessful attempts contribute to skill development too. He expends his Air Mana on power level 1 castings of Sleep, and his Mental Mana on power level 1 castings of Terror respectively. He'll recast Sleep when he recovers 3 Air Mana over time, recast Terror when he recovers 3 Mental Mana over time, and recast Enchanted Blade at power level 1 when he recovers 4 Divine Mana over time.
Terra spends her Air Mana on power level 1 castings of Sleep, and her Earth Mana on power level 1 castings of Itching Skin. She'll recast Sleep when she recovers 3 Air Mana over time, and recast Itching Skin when she regains 2 Earth Mana over time.
Chun-Li beings by casting a power level 1 Itching Skin, and a power level 1 Sleep. She then casts a power level 1 Stamina on Errol. She begins repeated and alternating castings of Sleep and Itching Skin at power level 1, but she'll pause and interject a power level 1 Stamina on Errol when her Water Mana is back up to its maximum. She switches to a new cycle after she's expended her Air and Earth Mana. She begins repeated power level 1 castings of Stamina on Errol. But she'll interject a power level 1 casting of Sleep when her Air Mana is back up to 3 over time, or a power level 1 casting of Itching Skin when her Earth Mana is back up to 2 over time.
It is only when Errol is unconscious, and everybody has more or less completely expended their Mana, and there won't be any regaining of Mana points fairly soon, that I break off combat and run away. I run until the combat ends and return to the Rapax Prisoner room. Errol has his perfect 100 points in Music, so now I rest.
King Crab
I soon run into another group of Slithering Slimes. I lead them back to the Rapax Prisoner room, and use the doorway as a bottleneck.
I find a group of Metallic Slimes near the Monastery Desk. They use spit attacks, so there's no danger of getting surrounded by them. But both their touch and spit attacks can knock a party member unconscious. Chun-Li casts Missile Shield to minimize the number of spit attacks that can actually hit party members. I wear them down one by one. But even so, I am always careful to position myself so that only one can reach me with its touch attacks. That means the others use their spit attacks, which often get stopped by the Missile Shield.
I backtrack and go north from the Cockroaches room to the room labelled 'King Crab'. I unlock the door and defeat the King Crab, which is fairly easy. I then 'search' around the room for bits of treasure.
Some Seekers come down the adjoining hallway to attack me, but they're easily dealt with.
Gregor
The door on the north side of the room can be opened by lifting the bar. Several Wolf Spiders are on the other side. They're spit attacks can paralyze their targets. But they have few hit points. I start off by having Errol put most of them to sleep with his Lute. The party then runs to them and takes them out one by one.
Now I return to the King Crab room, head up the passageway the Seekers came from, and to the hallway labelled 'Gregor'. Gregor is in fact a giant cockroach. As long as he doesn't poison or paralyze, he'll actually fall quite easily.
Burz
I go through the tunnel that starts east from where I fought Gregor, but actually runs north.
I continue to go north, and find a Trynnie merchant named Burz. Burz sells a lot of mundane stuff, and his shop is a good place for you to unload your excess inventory in return for gold.
A NPC is also a chance to train your Mental Magic skill. Once in a while I speak to him, have Rothgar cast Charm to Power Level 1 on him, end the counter. Speak to Burz, rinse and repeat.
There is a nearby chest, and this is where I grab another training opportunity. All my Bard needs to do is 'inspect' the chest for traps, over and over and over again. This raises the Locks & Traps skill, although the pace is slower as the Bard's skill increases. If the trap springs but without opening the chest, Rothgar or Terra or Chun-Li can train their own magical skills by healing Errol. If the chest opens, I simply reload.
Of course, the odd monster group will come my way and provide the occasional distraction. I sometimes search along the tunnels after I raise Errol's Lock & Traps skill to scope out for any monsters coming my way. The tunnel leading to Burz provides an excellent bottleneck that forces the monsters to approach my party one at a time. I also sometimes scope out the tunnels when it's been a while since the skill has been raised, as I prefer to fight the monsters away from Burz. He may end up wanting to participate in the fight, and change from his original position, which I don't want. I want to keep my bottlenecks clear.
One such fight was against several Slimes, after Errol had reached at least 60 in his Music skill. Rothgar and Ryu both take Web on their 8th level-ups. Web can be a good disabling spell in its own right, but it also begins the accumulation of Earth Mana for both characters.
Another fight was against 4 Metallic Slimes after Errol reached 72 points in his Locks & Traps skill. My spellcasters practice their magic skills with single-target skills. At one point, when Terra has used up her Mana to the extent it's possible, I decide to have her switch positions with Ryu. She can get in some training with her Wands skill. And Ryu can cast single-target spells to get some practice with his magic skills.
Terra takes Stamina on her 8th level-up. Recouping Stamina is crucial during long-haul battles. The more characters who can cast it the better.
Chun-Li takes Fireball on her 8th level-up, so she now has a group-damage spell.
I fight 5 Metallic Slimes after Errol reaches 80 points in his Locks & Traps skill. Zarax and Errol both advance to their 9th levels. Zarax reaches 100 Vitality, and will soon train his newly acquired Iron Skin skill.
Another fight against 4 Metallic Slimes resulted in one of them dropping a Solleret. Rothgar equips it as an improvement on his Chain Hosen, as he is one of the party's tanks. Errol reaches 90 points in his Music skill thereafter.
Another fight against 4 Metallic Slimes yields a Ring of Protection (+1 AC), which Ryu equips. It makes sense as he is one of my tanks. It will also be an ingredient for the Ivory Blade when I commission its creation.
Rothgar takes Cure Poison on his 9th level-up after another fight against 4 Metallic Slimes. Ryu takes Detect Secrets, which will help uncover hidden items and such. Errol reaches 96 skill points in Music shortly therafter.
Terra takes Chameleon on her 9th level-up after another fight against 3 Metallic Slimes. It provides an option for avoiding or sneaking past monsters without being detected, and as long as you don't get too close. Chun-Li takes Haste, which will provide the whole party with boosts to Speed and extra attacks. It's the very reason not to put any ability points in Speed for any party members.
Errol a good time thereafter reaches 98 points in his Locks & Traps skill. I decide I now mix in training for the last 2 points with other things, like training the next skill, and chests and traps in the rest of the game. This kind of practice and training is beneficial though, although it did require patience. Very hard to open trapped chests and multi-tumbler doors are going to get in my way soon enough, and now I stand in good stead.
Emerald Slimes and Metallic Slimes
Zarax has reached 100 Vitality to obtain the Iron Skin elite skill. So now I train that. First, I do about 80 or more inspections of the chest. I want to intermingle the last bit of Locks and Traps training with Iron Skin training too.
I return to the room with 3 Cockroaches. Zarax strips himself of all armor. I also position him so that he's by himself at the front of the party. I then have Errol pick the lock to open the door.
The Cockroaches attack, but I just have everyone set themselves in defend mode. I don't want them to kill the Cockroaches. I want the Cockroaches to peck Zarax non-stop. Any of Rothgar, Terra or Chun-Li will cast a Heal Wounds to power level 1 on him when he's lost 10 or more Hit Points. If a Cockroach passes out from losing stamina, I cast a Stamina spell on it so it can keep pecking Zarax. I keep going until I completely run out of Divine Mana for Heal Wounds. The exercise also trains my Divine Magic skills too.
When that happens, Errol uses his Poet's Lute to put them to sleep. I run away from them for a couple of turns to end combat. Now this is the important part. I go back and close the door so that they can't leave the room. That allows me to call on their 'help' as often as I need to for purposes of skills training.
I have to fight my way through several Metallic Slimes in order to return to Burz. I rest once I'm back. After that, Rothgar casts Charm on Burz multiple times in order to train his Mental Magic skill. Chun-Li casts Divine Trap on the chest multiple times to train her Mental Magic skill as well. Errol will inspect the chest another 80 times or so. A new cycle begins.
I run into a pair of Emerald Slimes as I start the third cycle. They're rated at 10th level, and can cause Nausea and Paralysis with their attacks. But Missile Shield will block a lot of their spit attacks, so I can gang up on each one at a time.
I go around and fight several groups of Metallic Slimes, just to be sure the area is clear to resume my skills training uninterrupted. Both Zarax and Errol reach their 10th levels. Zarax is close to maxing out his Strength and obtaining the Power Attack skill. He also starts putting points into Piety, both because it increases Stamina and because the Iron Will skill just might be within reach. Errol continues to pump up his Strength and Vitality.
I return to the Cockroaches for another cycle. Zarax reaches 46 points in Iron Skin at the end up. I return to Burz to rest up and conclude the cycle.
Pestilent Rats
I start the chest inspection phase of my fifth cycle when some Pestilent Rats come for me. I don't want to fight them in an open space, so I reload. I practice a bit and now go along the gangway that had led to Burz. That's when I have the Rats where I want them. I didn't want to fight them in the open cause they can cause either Nausea or Disease with their bite attacks, and I don't yet have the Cure Disease spell.
They can only approach me one at a time on the gangway. Chun-Li blasts them with Fireball after Fireball, to get rid of them as quickly as possible and minimize any risk of characters getting Diseased.
I return to the chest and practice on it a bit more. Errol reaches 99 skill points in Locks and Traps.
Ring of Protection and Solleret
I complete another cycle. I fight several Metallic Slimes and Pustulant Slimes, along with a pair of Emerald Slimes, on my way to the Cockroaches. I don't want to spend any Divine Mana on this fight, as I want all of it for training Iron Skin. Note that I shifted Errol to the back ranks when he was starting to take a beating. Zarax's ability to bring down enemies with his Stun Rod attacks that both score hefty damage and inflict either paralysis or unconsciousness allow me to pull through.
Zarax reaches 74 points in Iron Skin after I exhaust my Divine Mana on him, and letting the Cockroaches peck him as part of the cycle.
I head back to Burz, and run into several more Metallic Slimes. I get another Ring of Protection, which Rothgar wears as a tank, and another Solleret. Zarax will wear the latter once he's done maxing out his Iron Skin skill.
Locks and Traps
I grind the chest some more until I finally reach 100 points in Locks & Traps for Errol. Chun-Li practices Divine Trap on the chest, and Rothgar practices Charm on Burz.
I make my way back to the Cockroaches and fight groups of Metallic Slimes along the way. Rothgar takes Cure Paralysis on his 10th level-up, while Ryu takes Missile Shield.
I make another round of letting the Cockroaches peck Zarax until I run out of Divine Mana. His Iron Skin skill reaches 92 points.
From this point onwards I won't be going back to Burz anymore. Now I adjust the cycle so that I rest in the Rapax prisoner's room to replenish Divine Mana. In this instance, I had to fight Pestilent Rats and Metallic Slimes in order to secure a safe rest.
Iron Skin for Zarax
I perform a few more cycles. The video shows the last one where Zarax reaches 100 skill points in Iron Skin. I put the Cockroaches to sleep with the Poet's Lute, run away to end the combat, and then close the door. I'll want their grinding services again when other characters obtain the Iron Skin skill.
Zarax puts all his armor pieces back on, and I put the party back into the formation it had beforehand. I conclude by resting up.
Monastery Safe
I kill three more Metallic Slimes when I head back to the room where I killed Gregor.
Now I head for the room labelled 'Statue'. Whatever you do, do not click on the base of the statue, or you'll get dumped down below. I click on the skull being held up in the air by the statue. This reveals a hidden alcove that holds the Safe Key.
I then go the room marked 'Safe' on the map. There's a fair amount of loot to be had here, including the Cleaver, which is an ingredient for the Beastslayer Axe that does double damage against animals and such. The key opens the safe, revealing a Resurrection Powders.
To the Upper Monastery
I return to the room where I killed Gregor. The west side of the room has the gate that leads to the next level of the Monastery, but first I have to open it. So first, I take the hallway to the left, which leads to the location marked 'Button'. I end up having to fight a few more Spiders, and then press the button.
The 'Gate' is now open, and I can proceed to the Upper Monastery.