-

- Forums
- Chatrooms
- Gallery
- Gameplay Videos
- Upload
- Articles
- Mod Reviews
- Shop SP: Games, Movies, Books
|
|
| Pillars of Eternity 2 Video-Based Walkthrough by David Milward |
Queen's Berth
*Evil* Heaven's Cacophony
The evil party is now at #1 on the map of Queen's Berth. Zarathos advances to his 9th level. He takes Bloody Slaughter. It's a passive that provides a 20% chance of converting Hits to Critical Hits and +50% Critical Hit Damage, both against Near Death targets. Landing the killing blow will trigger Bloodlust and later on Blood Thirst. It will also instantly recover any Rage spent on using Barbaric Blow once I get Barbaric Smash. And the damage bonus against near death targets from this passive will stack with the bonuses provided by the Death's Usher passive of being a Death Godlike.
I then head over to a merchant named Wanika at #11. I buy a helmet called Heaven's Cacophony. The per Rest powers like Avenging Storm are not the reason I get it for Xoti. The +2 to Intellect will extend her buffs, and enlarge the area-of-effect of her spells. The +1 to Religion will enhance her use of both Xoti's Sickle and Xoti's Lantern.
I head over to the door at #20.
Heaven's Cacophony
Mirke gains Snake's Reflexes on her 9th level-up. The +10 to Reflexes will augment her use of Adept Evasion.
I also drop both Giordu Red-Handed and Mother Sharp-Rock from the ship.
I bring Xoti in, as she'll soon acquire an item I want for her. I also include Ydwin, Rekke and Fassina as party members falling behind in xp.
I also purchase Heaven's Cacophony for Xoti. The +2 Intellect will expand the area-of-effect of some of her activated powers. The +2 to Religion will enhance the power of Twin Eels once she gets it.
*Evil* Mapping the Archipelago: Port Maje
The evil party goes through the door and informs Sanza of what they have discovered. I get 1,600cp and about 7,500xp to conclude the Quest called Mapping the Archipelago: Port Maje. He also gives me a new Quest, Mapping the Archipelago: Tikawara.
Mirke advances to her 9th level. She takes Soul Mirror, which reflects half of any missiles that Miss her back to damage her shooters. It's a natural passive for a Monk-tank build that prioritizes Deflection.
Xoti takes Blade Turning on her 9th level. Blade Turning for its very brief duration renders a Monk completely immune to harm from melee weapons, as she simply redirects any attack made against her so that it instead strikes another enemy adjacent to her. The brief duration would ordinarily mean I would never touch it. But it's one of those abilities that can become awesome when extended by Salvation of Time. Once I get Salvation of Time, I'll add a script condition so that she'll use Blade Turning when her Wounds (and Intellect bonus) reaches +10 and she's near two or more enemies. The reason I insist on the 10 Wounds condition in the script is to maximize the initial duration, and thus maximize the chance it will get extended by a subsequent Salvation of Time.
Mapping the Archipelago: Port Maje
Xoti in the good party gains two abilities on her 9th level-up.
One of them is Enervating Blows. Critical Hits will put the Weakened (-5 Constitution, -50% Healing Received) Affliction on her targets.
The other is Raised Torment. It upgrades Torment's Reach so that its cone-attack after the initial blow will Afflict targets with Stunned (-5 Might, -4 Penetration, cannot Engage, cannot take actions) instead of Staggered.
Bounty on Meryel the Mad
I go in through the door at #24.
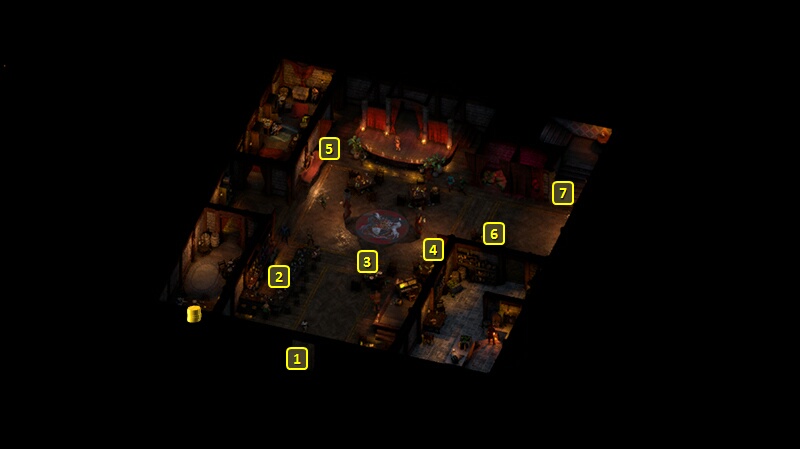
That brings me to the door at #1 on the map of the main floor of the Wild Mare. I speak to Abboco at #3, and gain 1,400cp and close to 3,000xp as rewards for the Bounty on Meryel the Mad. I also accept the Bounty on Purakau.
Now I put together my core party with the caveat that Serafen goes in for Eder for now.
Pallegina takes Rejoice my Comrades! Two Fingers of Daylight on her 9th level-up. It's a way to immunize the good party against Resolve Afflictions, especially Terrified, when needed. The Healing will also be augmented by Pallegina's bonuses to Might and Healing.
Aloth takes Bull's Will on his 9th level-up. And now he rounds out the maximizing of his Defenses through passives. I thereafter leave the Wild Mare.
Lord Admiral Imp
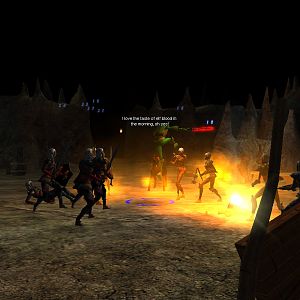
I go east and to #23. Waiting for me is the first of Dessiral's bounties, the Bounty on Lord Admiral Imp. He has several Imps with him.
I position Serafen so that he's close to the Xaurip Priest closest to the Imp, but without having to face the onslaught. That's for Aloth. I position Alliria and Mirke behind them, and Pallegina behind all of them.
I speak to Lord Admiral Imp to start the battle. Alliria casts Infuse with Vital Essence and then Blood Sacrifice to recover the spell. Serafen activates Frenzy and Savage Defiance, and begins attacking the Priest right next to him. Pallegina uses Shatter Their Shackles on the party.
Aloth starts with a buff sequence of Infuse with Vital Essence, Merciless Gaze, Llengreth's Displaced Image, Disciplined Strikes and Wizard's Double. His job is to hold up the Xaurip Champions while the rest of the party goes to work. The Champions are Paladins with shields, so they're actually the toughest to bring down. The path to victory is to first eliminate the squishier Priests and Skirmishers.
On that note, the Xaurips themselves have high Burning Armor Rating. Alliria makes use of a spell that is unique to Ninagauth's Teachings, Ninagauth's Death Ray. It has decent range, inflicts Raw Damage every second for about 10 seconds or so, and only affects enemies. She uses it whenever she can catch Priests and/or Skirmishers together in a straight line, and recovers it with Blood Sacrifice. She also puts up Arcane Veil followed by Blood Sacrifice when she has to.
Mirke has to be careful. The Huana in the district may turn hostile if she damages any of the Huana Guards with her Powder Burns if they come near the battle. I tend to have her focus her attacks on the Xaurips that are on the east edge of the dock.
Eventually only Lord Admiral Imp and the two Champions are left. It's a matter of ganging up on the Champions one at a time, and then Imp. Note that I avoided Mirke attacking at all when any Huana Guards came near during that phase. I eventually wear down the last enemies too.
Lord Admiral Imp leaves behind a Torc of Intellect and a Ring called Ibis. Serafen wears the Ring for the rest of the game. The key point is the +3 boost to Burning Armor Rating, which will stack with his other Armor Ratings. The +10 to Defenses to Fire Attacks is sugar on top. There is a mild concern of an Interrupt and a -10 penalty to Will should he get Critically Hit by a Fire Attack. But I can overlook that, both on that Critical Hit being made less likely by the +10 Defenses to Fire Attacks, and that he's a ship combatant.
I go to the east exit at #22. I switch out Serafen for Eder, and Pallegina for Ydwin. Eder, with his Burglar's Gloves, and Ydwin with her class bonus to Mechanics, are going to help Mirke with some thievery.
*Evil* Lord Admiral Imp
The evil party likewise emphasizes taking out the Priests first and foremost. Tekehu helps matters along with a Chill Fog spell that is cast over most of the Xaurips once they crowd together. Ydwin likewise keeps all of the Xaurips Flanked with repeated castings of Phantom Foes, and Puppet Masters a Skirmisher for a long time who had a weak Will.
Tekehu advances to his 9th level. He takes Purge of Toxins. It provides a single character with complete immunity to any diseases or poisons for 30 sec, which can be useful in some battles (especially spiders). It can be extended endlessly with Salvation of Time too.
Time to return to Periki's Overlook.