-

- Forums
- Chatrooms
- Gallery
- Gameplay Videos
- Upload
- Articles
- Mod Reviews
- Shop SP: Games, Movies, Books
|
|
| Pillars of Eternity 2 Video-Based Walkthrough by David Milward |
Desert Island
*Evil* The Servant of Rikihu
The evil party having at least 3 points of negative reputation with the Huana means that a Huana Voyager called The Servant of Rikihu will now be on the world map near the island of Neketaka at #17. It is captained by a Huana Priestess of Berath named Whenena Eel's Kiss. It will attack me on sight.
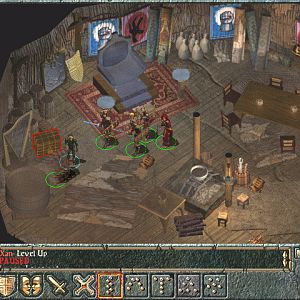
I sail south a bit and board it. The ship itself is very hard to hit in naval combat, even after "Hold Position". The boarding battle itself is not particularly difficult. Whenena Eel's Kiss leaves behind a Large Shield named Akola's Apex Ward. Mirke uses it for the rest of the game. A Large Shield with a high Deflection bonus is enough reason to take it. I enchant it with Hide and Tooth (+5% Damage with Melee Weapon Attacks, +3 Deflection vs. Melee Weapon Attacks) as an easy choice over Shark Frenzy, which is a per Rest power. I also enchant it with Hunter's Vigor, which adds +1 Armor Rating. The stackable bonus to Armor, combined with its high boost to Deflection, are the key reasons I choose this shield for her. Obtaining this shield for her was the key objective behind gaining negative reputation with the Huana.
I continue south and my crew wants to get drunk. Zarathos uses a Cruel command to make them fall in line. A wave comes for the ship, but Llendreth makes a Helmsman check of 3 to keep the ship safe.
I continue southwest, and then attack a Vailian Master Captain. I follow the familiar strategy of hitting it up close with Magranite Flamethrowers to whittle down its crew and then boarding. As for the ship battle, I let the Vailian Fighters and Paladins and my party tie each other up. Zarathos breaks away from the main fight, and then goes after the squishy Priests to take them out with his powerful Melee Attacks. This kind of fight is otherwise distinctly easier owing to new abilities I've acquired with my recent level-ups.
I attack a Deadfire Merchant Ship to recoup my ship supplies, and then dock at Port Maje.
Bottom's Up
The good party likewise makes its way to Port Maje, but has a different objective on the way there. A priority for me is to get the next upgrade for Alliria's secondary Sword, Modwyr. She has 17 out of 25 killing blows on Kith with Modwyr for the next upgrade.
I sail northeast of Neketaka and board a Royal Deadfire Company Novice Captain. Alliria either kills off a weak enemy herself (e.g., Sailor) or lets her ship comrades wear down an enemy to almost dead and swoops in for the killing blow. She gains 2 killing blows during the battle.
She sails southwest and chases down a Vailian Expert Captain. She gets 4 killing blows during this battle, bringing her total to 23 for purposes of the upgrade.
I continue south and board a Deadfire Merchant Ship. I get the last two needed for the upgrade.
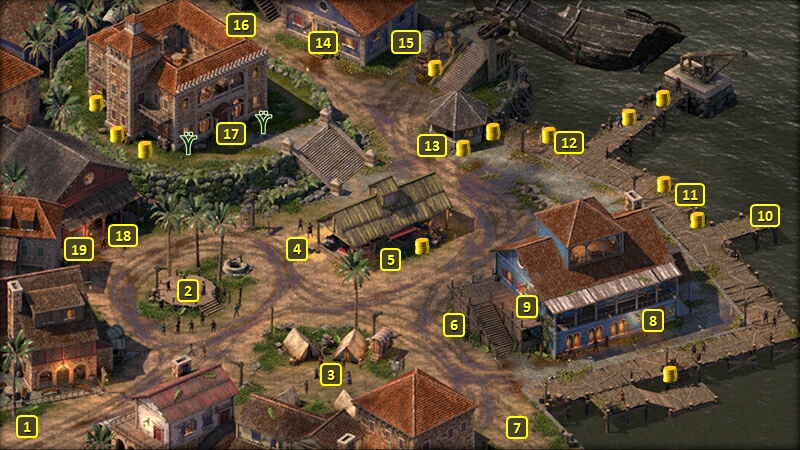
I continue south and board Port Maje at #1 on the World Map.
I am now at #10 on the map of Port Maje Harbor. Alliria speaks with Modwyr again, with an understanding to have a discussion with the blade's previous owner.
Modwyr now has a new once per Encounter called Bottom's Up. It scores +25% bonus Crushing Damage and +25% bonus Shocking Damage to a single target, and Stuns it for at least 10 seconds.
To actually speak with the previous owner is the requirement for the last upgrade.
Lone Survivor in Port Maje
I start off by briefly switching Ydwin in for Pallegina.
I speak to the Lone Survivor, who is now at #12. He gives me a Cloak of Greater Deflection out of gratitude. Eder wears it for the rest of the game, as it's a natural choice for a tank.
I go to the Well-Supplied Traveller at #4, and purchase a Girdle of Mortal Protection for Ydwin (which I should have done earlier). The +2 bonus to Constitution, and 15% chance to reduce Critical Hits to Hits, will likewise improve her resiliency and survivability.
I go to the exit, bring Pallegina back in, and return to ship.
*Evil* Lone Survivor in Port Maje
Mirke gets the Cloak of Greater Deflection in the evil party. Maximizing Deflection is always a good thing for any tank build. But there's the additional point in this instance in that it maximizes the chances of triggering instant Recovery through her Rannig's Wrath Rapier.
Galawain's Bounty
I sail west from Port Maje, and board a Deadfire Merchant Ship.
I then sail to the southwest corner of the World Map. A Crookspur Galleon called Galawain's Bounty, and captained by Dour Old Dorwin, attacks me. But I wipe out the enemy crew easily enough during a boarding battle.
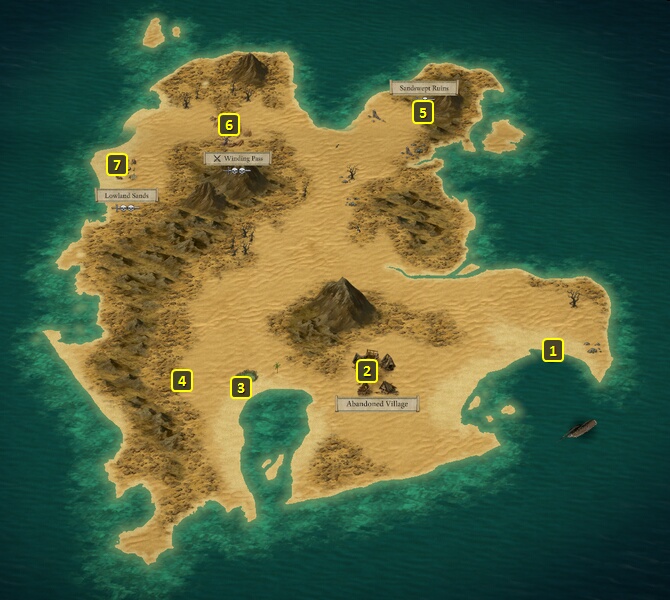
I dock at the Desert Island at #6 on the World Map.
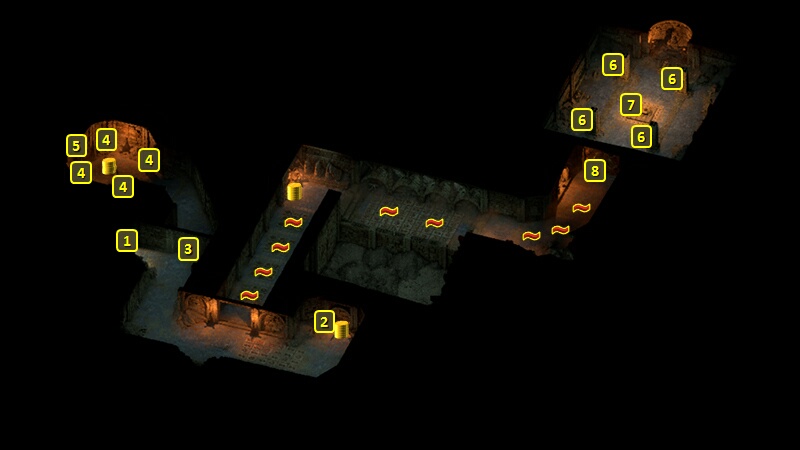
*Evil* Sandswept Ruins
I also show this part from the perspective of the evil party. I get some random items from the Abandoned Camp at #2, and then some Water from the Oasis at #3. I enter the Sandswept Ruins at #5.
Winding Pass
The Winding Pass is at #6, and it is inhabited by a few Eoten giants. There are a few ways to handle the situation.
One way is to try and sneak past them. It requires a Stealth check of everyone in the party. A fight with the Eotens will occur if even one party member fails a Stealth check.
You can have a character make a Survival check of 15, an Athletics check of 10, and then an Athletics check of 13 to get past the Eotens without a fight. Failing any of the checks will lead to a fight with them.
The Watcher can make a Bluff check of 8. That has to be followed up with either a Watcher-only Bluff check, or a companion Bluff check (the "My friend saw ..." option), either of which is quite high. Failing any of them will lead to fighting the Eotens. Succeeding will trick the Eotens into looking for their 'missing food' while you make your way through the Pass.
The Watcher can make an Intimidate check that is quite high to scare them away. Failing it will lead to a fight against them.
The Watcher can make a Diplomacy check of 12 that opens up the possibility of giving them food to let you pass. Offering them Hardtack will offend them, leading to a fight against them. They'll reject offerings of Candied Nuts or
Vegetables, although they'll still allow you to offer an alternative they like better. Offering them the Baby Boar if you got it from the Boa Hika Pass at #7 on Tikawara
Island will convince them to let you pass. Offering the Baby Boar will earn disapproval from Eder if he is in the party. A surefire way to convince them to let you pass peacefully is to offer a seafood item, such as Aged Shark Meat, a Captain's Banquet, Seafood Stew or Shark Soup.
Alliria offers them Hardtack to start the fight. This has the benefit of clearing a safe passage for somebody else for purposes of the next encounter. I don't have much trouble gradually wearing down each Eoten one by one.
*Evil* Zarathos picks a fight with them straightaway.
Lowland Sands
I travel to the Lowland Sands at #7, and encounter another adventuring company. I ask who they are, and they will identify themselves as the Adra Ban Adventuring Company.
They will be curious about the nearby Eoten Giants in the Winding Pass. You'll always have the option to try and collect money from them, whether or not you actually killed the Eoten. You'll earn Shady reputation if you lie to them about having killed them, but it leads to collecting 1,000cp. The "Let's say I killed them ..." option leads to possibilities of being offered 2,000cp if you have 2 points in certain kinds of disposition (Benevolent, Honest or Aggressive for example). Alliria of course has that option available to her, but she turns it down to earn Honest disposition. Accepting it would have earned Shady disposition.
If you took a path around the Eoten by making Survival and Athletics checks, an option will become available to tell the Company that you found a path around the Eoten. Different options become available. You can accurately tell them where the path is to earn Honest disposition and 800cp. You can make a Streetwise check of 13 to increase it to 2,000cp instead. There is also a dialogue option that leads the Company to their deaths that earns Cruel and Shady reputation.
If you got the Eotens out of the way through the Bluff, Diplomatic or Intimidation options, and say as much to the Company, they'll be upset that the Eoten are still nearby to prevent their travel and not offer you anything.
If you did kill the Eotens, the "permanently" dialogue option won't lead to any reward for the party. Select the "Let's say I killed them ..." option instead if you want to collect money from the Company.
The Company will then offer to share their camp with you. You can either join them or leave at that point.
Alliria joins them, and questions them thoroughly about their history and the nearby lands.
You also have three options to steal items from them. You can only use one of them. You select that one, the other two will become unavailable. A Sleight of Hand check of 10 can get a Superb Dagger. A high Bluff check can get various Potions from them. A successful Stealth check by one of your characters can get coins as well as various Food from
them.
You can at any point choose to eat and rest with them, attack them (leading to a fight against them), or simply leave to end the encounter. Choosing to eat and rest with them will end any Resting bonuses you may have in place.
Alliria simply leaves after hearing what they have to say with respect to history and geography and such. She thereafter returns to her ship.
*Evil* Lowland Sands
Zarathos uses the "Let's say I killed them ..." option and then makes the Streetwise check of 13 to extract 2,000cp from them, which earns Shady reputation.
He also chooses to attack them. The party begins already placed at an ideal bottleneck, where Tekehu and Ydwin can safely do their thing from behind a line formed by the rest of the party. I therefore win the battle without much to worry.
Amira's Island is my next destination.