-

- Forums
- Chatrooms
- Gallery
- Gameplay Videos
- Upload
- Articles
- Mod Reviews
- Shop SP: Games, Movies, Books
CHAPTER 1 | CHAPTER 2 | CHAPTER 3 | CHAPTER 4 | CHAPTER 5 | CHAPTER 6 | CHAPTER 7 | CHAPTER 8 | CHAPTER 9 | CHAPTER 10 | |
Amkethran | Sendai's Enclave | Abazigal's Lair | Return to Amkethran | |
ABAZIGAL'S LAIR
Draconis
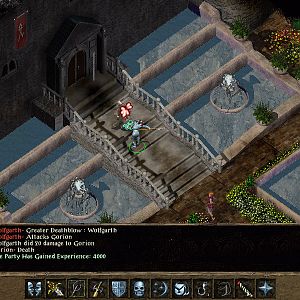
Now I head over to the entrance to Abazigal's Lair. I buff up a lot for this one, including buffs against magical attacks, and Protection from Acid for everyone. Everybody also gets a Scroll of Protection from Acid as a backup. Jaheira also switches over to Pitchwife to up her acid resistance.
I also summon a Deva and a couple of Skeleton Warriors as magic-resistant meat shields. The party moves westward. But at some point most of the party stays back. Avastrian leads the summons onwards.
Draconis initially appears as a Mage, with a few Invisible Stalkers to help him out. It's crucially important to get through this part unscathed, or close to. SCS changes the Mage form's approach somewhat. The Mage form of Draconis may invoke a Wish spell to obliterate the party's buffs. If that happens I'll reload. The Mage form also becomes much fonder of bringing in its own summons, multiple Glabrezu in particular.
I let the summons go after Draconis by themselves, and retreated Avastrian. Keldorn uses a Dispel Magic from outside the fog of war. Jaheira then marches up, and bounces a Creeping Doom off of one of the Invisible Stalkers. This hopefully forces Draconis to expend his spells harmlessly, his Wish included. Meanwhile I kill his Glabrezu as they teleport towards me.
At some point Draconis himself teleports towards me. That's when I pounce. Keldorn's Carsomyr gets rid of his spell buffs, allowing the party to bring him down quickly. He then goes into his Brown Dragon form.
Draconis' approach to combat is considerably different from other Dragons. He uses Remove Magic far more often, which can make preparing for him very difficult. He often summons in Invisible Stalkers to help out, which can cause things to get out of hand. He often turns invisible (without apparent limit), and then pounces on a vulnerable character, or slinks off somewhere to heal himself. And indeed he can also cast Cure Critical Wounds on himself without apparent limit. He also has a breath weapon which scores SEVERE ACID DAMAGE on one character.
However, the fight ended in rather short order thereafter for the good party. Here's the reason why. When Draconis' Mage form is killed, the Dragon form will start off 'badly wounded'. Draconis' immediate priority is to hide with invisibilities, and then bring itself up to fuller health with Cure Critical Wounds spells. Once he's revived he'll start to go on the offensive. Thing is, Jaheira's Pitchwife planted those 3 damage per round slivers into him shortly before his transformation into Dragon form. Draconis activates a Spell Trigger that includes Spell Immunity: Abjuration and Protection from Magic Weapons. But the lingering damage from the slivers prevented him from really getting going with his invisibilities and his Cure Critical Wounds.
Imoen casts a Project Image spell. The Image then goes into a Time Stop sequence that consists of Spell Strike (from a spammed scroll), then Breach, then Lower Resistance. This seals Draconis' fate as the warriors then gang up on him with multiple Greater Whirlwind Attacks.
If I did have to go the distance, it would have been a matter of Keldorn keeping True Seeing active and the party staying on top of him and either attacking him, using Healing Potions, or using a Scroll of Protection from Acid as the occasion may have warranted.
Draconis leaves behind Tzu-Zan's Bracers (+1 armor class, +15 hit points, Monks only) and his head, which is needed to open the gate into Abazigal's Lair.
*Evil* Draconis
This plays out a little differently for the evil party. In addition to the usual buffing up process, Jan lays his Spike Traps across the breadth of the stairs near where the party first enters.
The evil party was much more direct with Draconis' Mage form. I had Asteroth and Korgan charge right in. Edwin immediately goes into Time Stop, and then uses Spell Strike to bring down Draconis' anti-magic buffs, then Horrid Wilting to kill off the Invisible Stalkers, and then Breach on Draconis. Note that there's a particular technique to this. When I use Spell Strike while closer to Draconis, and then Breach while further from Draconis, what happens is that the Spell Strike will rip down any buffs that may have prevented Breach from taking effect. Once that happens, the Breach that hits a 1/2 second later will rip down any buffs that prevent the party's weapons from causing physical damage. The Mage form soon goes down.
Edwin then summons a Fallen Planetar to distract Draconis. This gives the evil party a chance to retreat behind the Spike Traps, encouraging Draconis to step across a mine field so to speak. When he gives chase he ends up being brought to 'badly wounded'. He wing buffets the party but ends up stepping on more Spike Traps and is thus brought to 'near death'.
Draconis retreats, and starts trying to heal himself while invisible. But it's just not quite enough. The party tracks him down and continues the attack. In fact it's Viconia of all people who lands the killing blow with her sling.
Empty Breath Potion Flash
Draconis' Head allows me to walk in through the front gate. A Greater Werewyvern and several Lizardmen attack me. I have everybody stand still. Avastrian, Jaheira, and Keldorn attack the Greater Werewvyern only when it comes right next to them, but standing still. This buys Imoen enough time to disarm a trap that's right at the party's feet. After that, I can freely wipe out the Lizardmen. The Greater Werewyvern has left behind an Empty Breath Potion Flask, and a Scroll of Stone to Flesh, both of which are quest items that I'll be using very soon.
Lizardman Captain and Shamans
I can only descend down the large pool on the west side for the time being. There will be another fight at the bottom. SCS replaces the Frost Salamanders with a large force of Lizardmen that includes their Captain and two Shamans. The Lizardmen are actually quite tough fighters. To make matters even worse, both of the Shamans will try to hit the party with Creeping Dooms. If both spells spread to the whole party, with the Lizardmen pounding away to boot, it can make this fight really ugly really fast.
Firstly, Imoen hits the Lizardmen with her Spell Trigger. I then show a trick for minimizing the harm done by the Creeping Dooms. I scroll up to find out which party member they targeted for the Creeping Dooms. It turns out to be Sarevok. Once I know that I have Sarevok retreat to the north end of the room. I retreat the party to get them clear across to the south side of the room as quickly as possible. I keep things this way until the Creeping Dooms hits Sarevok, with the result that only he gets affected.
Once that happens, I have Sarevok quickly regroup with the rest of the party. I have Anomen cast a Heal on Sarevok as a precaution. The rest of the party has been busily going to work, and the battle is soon won.
Anadramatis
Now I have to prepare to fight a Yellow Dragon on the other side. I cast Protection from Fire on everybody, and make sure everyone has a Scroll of Protection from Fire as a backup.
I then speak briefly with the Dragon before combat begins. This fight is tougher than usual in comparison to other dragon fights for a few reasons. One, it occurs in a much smaller room, which makes its breath weapon, wing buffets, and other attacks that much harder to avoid. It's not impossible. It's simply harder as a matter of degree. Second, its breath weapon inflicts fire damage but in a single line comparable to that of a Black Dragon's breath weapon. Even so, it will still hurt even when characters have fire resistance in place. Thirdly, it has plenty of instances of Protection from Magic Weapons, so cutting it down is decidedly more difficult.
Nonetheless I am eventually able to win by persisting with standard anti-dragon tactics, albeit in more difficult circumstances. I did hit a rough patch when multiple party members were severely wounded. Imoen had to bring in a Planetar long enough to distract it so that Jaheira and Anomen could get off their Heal spells. This resulted in the Dragon going after Imoen as well, and she barely survived. Anomen also has to pick his spots to cast spells like Mass Cure whenever he can.
With persistence I am able to bring him to 'near death', and he considers the battle honorably ended. He'll also give me Anadramatis' Amulet, which will immunize its wearer against a Dragon's wing buffets.
*Evil* The evil party just as soon kills him.
Breath Potion
I click on the pool, and the Empty Breath Potion Flask becomes a Breath Potion. Before I leave the room, I buff up for another fight, including Protection from Fire for everyone and Remove Fear.
Once I leave the room several Pit Fiends and Cornugons appear ahead of me. Imoen gets in a first strike with her triple shot of Skull Traps. After that it's a matter of chopping them down one by one. Keldorn also uses True Seeing to make sure the Pit Fiends can't use Improved Invisibility.
The party then returns to the surface.
Olhydra
The party, now having the Breath Potion, descends down the large pool on the east side. The next part of the Lair will have a lot of Koa-Toans, but they're easily dealt with by fire-based spells.
The rooms will also have Greater Water Elementals, but they're also pretty easy to kill. The room to the northwest has a couple of Greater Water Elementals and a Water Elemental Prince named Olhydra, who emits a Fire Shield: Blue aura. Once the party kills off the other Elementals they don't need to damage themselves on the cold aura. They simply shoot Olhydra down at a distance.
Rope
Now the party heads for the room towards the northeast corner, and kills a Koa-Toan Whip. Imoen opens the cell door, and then Avastrian speaks with the Monk. The Monk leaves behind Hindo's Hand after dying.
The latest release of SCS makes you work a little harder for the rope that the Monk used to have. I head back to Amkethran, and get the Rope I need from the Tavern keeper.
I head back to the entrance to Abazigal's Lair, and then return to the Pocket Plane. I give Cespenar Hindo's Doom, Hindo's Hand, and 5,000gp, in order to upgrade to Hindo's Doom +4 (+4 Katana, Death Ward on wielder, +10% magic resistance, Greater Restoration 1/day). This provides an off-hand option for Avastrian if he feels a more magic-resistant alternative is in order.
Dragon Posse
Now I move ahead a bit, and then start to prepare. I will soon need to fight four Dragons in continuous succession. First, I distribute my remaining Scrolls of Protection from Acid and Scrolls of Protection from Fire amongst my party members. Imoen uses her Project Image spells to spam in four Planetars. In addition to other buffs, I make sure to cap things off with a Remove Fear that includes the Planetars, and a Spell Immunity: Abjuration for Avastrian. After that, the party members use a Scroll of Protection from Acid on themselves.
Everybody continues west, and then I fight the first two Black Dragons. I want to burn through this as quickly as possible, so I have Avastrian use his Time Stop spells to bring one of the Black Dragons to 'near death' via Greater Whirlwind Attacks.
For these fights, it's a matter of trying to kill them as quickly as possible. Anomen is of course always ready to cast healing spells when needed. Imoen saves her Breach spells for when it's truly needed (i.e. when a Dragon has used Protection from Magic Weapons). She's also ready to bring in more summons if needed. All of the party members never hesitate to use healing potions when needed, and to use another protective scroll if they get hit with Remove Magic.
After the Black Dragons it will be a Green Dragon. After that it will be a Red Dragon, whereupon the party uses their Protection from Fire Scrolls. With time and persistence, I manage to kill all of them.
Eyes
The party now descends the pool in the middle. They'll find themselves on a level with various monsters patterned around an 'eye them'. The idea of having one character who is immune to most of what they offer still works with a few provisos.
The monsters are as follows:
Scroll of Reversal
The party now heads for the northwest corner of the level. The encounter a Mage named Iycanth the Mad. Iycanth has a Scroll of Reversal, but wants a Gauth Eyestalk in return. He suggests I might contract out to the nearby petrified adventurers.
Avastrian then uses the Scroll of Stone to Flesh he obtained earlier on the petrified advenuters, Bondari, Nanoc the Barbian, and Tim Goldenhand. What follows is a rather amusing sequence that parodies the fantasy rpg genre, but the end result is nonetheless me getting the Gauth Eyestalk that I need.
I then go through the nearby pool. One of Iycanth's tables has the Juggernaut Golem page, but I prefer to keep my Tome of Golems as is so that it summons the slashing immune Clay Golem.
I then trade the Eyestalk for the Scroll of Reversal, and leave the laboratory through a secret door to the south.
Elder Orbs
At the bottom of the pool just to the right will be several Elder Orbs. This can be a tough fight, since they can keep themselves perpetually covered with Protection from Magic Weapons, and can also cast Imprisonment.
Given those circumstances I don't mind cheaping this one out. Anomen isn't the foremost character, and thus won't be targeted for an Anti-Magic Ray, so he casts a Storm of Vengeance. Imoen casts Project Image. I have the Image retreat behind the party, so it won't get targeted with Anti-Magic Rays. I then have the Image go into a prolonged Time Stop sequence that includes summoning Planetars and unleashing a Dragon's Breath.
After that it's a matter of persisting and playing it by ear, and grabbing a chance to bring them down when there's a lapse in their Protection from Magic Weapons. Imoen then creates a second Image, which goes into another Time Stop. This time it hits two of the surviving Orbs with spammed Spell Strike scrolls. It also summons two more Planetars.
The stragglers are still hanging on. Now Imoen herself demonstrates another tactical use for Time Stop, and that is simply to wait it out so that any Protection from Magic spells are likely to have expired once Time Stop ends, thus rendering the remaining Orbs vulnerable. Ok, so Imoen didn't completely wait it out. She put in a Dragon's Breath. But the idea works, as the remaining Orbs soon fall.
Fll'Yissetat
Now the party heads down a pool to the south. They emerge on a different level. To the northwest is a Green Dragon named Fll'Yissetat. I use the Scroll of Reversal to free her of her geas. The way to Abazigal is now open.
Abazigal
First I buff up. My buffs including giving Scrolls of Protection from Electricity to both Avastrian and Keldorn, the only two characters in the party who may have to worry about electrical damage. I also distribute Scrolls of Protection from Cold to everyone in the party. Everybody uses at least one of the Scrolls. The reasons for this particular preparation will become evident very soon.
SCS makes a few differences from Ascension Abazigal. I'll explain as we go along. First, the Drakes will rush me. Imoen uses a Time Stop sequence that includes two Horrid Wiltings and her triple shot of Skull Traps to cause as much damage as she can. The party then starts taking them out in physical combat. Note that I avoided charging any of the Drakes too far. The reason was to avoid bringing Abazigal into view for the time being.
The second key difference is that Abazigal won't rush the party just yet. He'll remain where he is for the time being. Tamah the Purple Dragon hasn't appeared yet either. So now the party goes around the perimeter, getting rid of the Frost Salamanders before engaging Abazigal himself.
Once the Salamanders are dead, Imoen brings in a Planetar and a Mordenkainen's Sword. Keldorn and Sarevok prepare themselves with Hardiness. Anomen uses Improved Haste.
The party now goes on ahead. Abazigal appears as a warrior with a two-handed sword. Avastrian starts off with Protection from Magic Weapons to present himself as Abazigal's initial target. Once this happens the other warriors jump in and gang up on him.
Now comes the other key difference. It is only once Abazigal has turned into a Blue Dragon that Tamah now appears as well. SCS forces you to fight both Tamah and Dragon Abazigal at the same time.
Abazigal is a Blue Dragon whose breath weapon works like a super-powered Chain Lightning spell. In SCS he has 700+ hit points and can also cast spells like Earthquake and Imprisonment. Tamah is a Purple Dragon whose breath weapon can both inflict cold damage, and knock characters unconscious.
First I have Jaheira (protected by Ironskins) and the Planetar keep Abazigal busy. I have Keldorn and Sarevok occupy Tamah. Imoen hits Tamah with a Breach spell. Avastrian retreats to a safe distance, and then casts Time Stop. He uses the Time Stop to Greater Whirlwind Attack Tamah to death.
He then uses his second Time Stop to try and do the same thing to Abazigal. I'll admit it was a bit of a misfire, as Abazigal's Protection from Magic Weapons had not yet elapsed.
Even with this procedure, my characters are taking a beating, so I retreat them to the west side and let the Planetar and Mordenkainen's Sword (Imoen summoned another one) keep Abazigal occupied. This gives Anomen the time he needs to bring the party more or less back to full health.
Abazigal charges, and Imoen hits him with a Breach spell. He appears to be going for straight physical attacks, so the warriors grab the opportunity pounce on him with Greater Whirlwind Attacks. He soon goes down.
I can't say this enough, this kind of battle can't follow a set script. The best you can do is try to adhere to some tried and true themes, and react to the situation as it develops using your judgment.
The video concludes with a cutscene of Balthazar trying to apprehend Melissan.
*Evil* Abazigal
After some buffing up, the evil party wastes the Drakes, with a difference being that Edwin uses his Spell Trigger instead. Note again the hesistancy to chase after the surviving Drake in order to avoid bringing Abazigal into view.
And again I clear the perimeter of any Frost Salamanders.
A couple of differences soon manifest. One, Jan spreads his Spike Traps around the west side. Second, Viconia and Edwin try to keep themselves in an out of the way spot towards the northwest corner, and behind two of Jan's traps. Jan also hangs back along the west edge.
Edwin then casts a Project Image, and has the Image spam Mordenkainen's Swords and Fallen Planetars. Asteroth and the summons then bring down sword-using Abazigal.
I don't have the luxury of combining Time Stop with Greater Whirlwind Attacks like in the good party, so I have to rely on making the summons occupy Abazigal and the Spike Traps to bring down Tamah as quickly as possible. Korgan and Asteroth do eventually manage to bring her down.
Meanwhile Edwin uses a second Project Image, and it begins to spam in more Fallen Planetars.
After that it's a matter of using the standard themes against Abazigal: persisting with the physical attacks whenever I can, retreating characters for healing when they need it (like Korgan getting a Heal from the Fallen Planetars at around 12:35), and bringing down its defences (especially Protection from Magic Weapons). Korgan eventually manages to land the killing blow.
The Five
Avastrian is called back to the Pocket Plane. The Solar summons the spirit of Yaga-Shura to explain the intent and purpose of the Five. The video shows dialogue choices that are considered good instead of evil.
When I return to the Pocket Plane, Abazigal leaves behind the following:
*Evil* The Five
Here is the equivalent video for the evil party, showing the dialogue choices that are considered evil instead of good.
Cyric
I go to the southeast room of the Pocket Plane, and get a visit from Cyric. I choose the good-aligned dialogue options. The encounter ends with Cyric summoning a few *Favored of Cyric*, Assassins who can cause extremely damaging backstabs and extremely potent poisoning. I take the opportunity to buff up against physical attacks, and to bring in a Planetar and a Mordenkainen's Sword. It's then a matter of cutting them down one by one.
The good power is inherent immunity to level draining. Even if this is redundant with the immunity provided by Angurvadal, I still like the 22 Strength and fire damage that the sword provides.
*Evil* Cyric
The equivalent video for the evil party, and again showing evil dialogue choices. The evil power is the Hand of Murder, which allows Asteroth to inflict extra damage with his physical attacks and heal himself at the same time. The duration, damage, and healing increase with Asteroth's character levels.
Elminster
Here's where I leave the Lair and get a brief visit from Elminster, who indicates that Saemon Havarian may be able to help me get into Balthazar's Monastery.
Now I return to Amkethran.