-

- Forums
- Chatrooms
- Gallery
- Gameplay Videos
- Upload
- Articles
- Mod Reviews
- Shop SP: Games, Movies, Books
CHAPTER 1 | CHAPTER 2 | CHAPTER 3 | CHAPTER 4 | CHAPTER 5 | CHAPTER 6 | CHAPTER 7 | CHAPTER 8 | CHAPTER 9 | CHAPTER 10 | |
Brynnlaw | Spellhold | Asylum Dungeon - Level 1 | Asylum Dungeon - Level 2 | Asylum Dungeon - Level 3 | Asylum Tests | Escape from Spellhold | City of Caverns | |
CITY OF CAVERNS
Sekolah's Prophecy
The heroes are taken captive to a Sahuagin settlement, the City of Caverns. They are taken (at least by some) as saviors under a prophecy by the patron deity of the Sahuagin, Sekolah. There's actually a dispute about this, which the King settles by having me fight an Ettin. Casting Doom on it, and then attacking it and pecking it with single-target spells suffices.
Now that I've proven myself, the King tasks me with bringing the heart of the leader of the Rebels, Prince Villynaty. The High Priestess bids me to come and see her afterwards.
So I venture towards the northwest corner. There's a Priestess who runs a store. The store includes your typical selection of weapons and magical ammunition. It also offers quite a few spell scrolls. The ones I bought were:
Cloak of Mirroring
Now notice that there's a large dome-like structure in the northern part of the city, which is shaped like a shark's maw. There's a battle I want to fight and win in the middle of this dome, but I want to make sure that this fight is concluded in isolation. It is quite easy to start this fight, and then end up battling nearby Sahuagin forces.
Therefore I make a point of clearing out the perimeter surrounding the dome. I take out any Sahuagin forces near the dome. Keep in mind that Sahuagin can fire both poison and stunning bolts from a distance, so they won't be a complete cake walk. The method is simple. Minsc scouts out the location of a Sahuagin force. And then, from outside their fog of war, I hit them with a triple shot of Cloudkill from Avastrian, Fire Storm from Anomen, and Skull Trap from Imoen. If it doesn't kill them outright, Cloudkill and Firestorm will continue to inflict lingering damage. I can hit any that remain inside with missile weapons, or hack down any that come towards me after they've been weakened. I repeat the process until the perimeter surrounding the dome has been completely cleared out.
Now I am ready for the fight inside the dome itself. It will consist of two Sahuagin archers who will be at the bottom-left side of the dome and outside the reach of melee weapons. There will also be a Sahuagin Priestess and a Sahuagin Warrior at the east end of the dome. The fight will trigger once a character enters the west side of the dome. The plan for this is quite simple.
One of the most useful aspects of Skull Trap is that will have an indefinite duration until a nearby creature triggers it. It is thus open to Imoen to plant several Skull Traps where she wants, even allowing for resting. So she plants three Skull Traps near where the Archers will appear. The party rests up, and then she plants three more Skull Traps near where the Priestess will appear. The party then walks in east to the west side of the dome. The Skull Traps kill one of the Archers and the Warrior protecting the Priestess outright. The remaining archer is brought to near death, and is easily shot down. The net result is that the Priestess is left without any support and, having been heavily wounded herself, has to expend time by casting Sanctuary and then Heal on herself. This is a considerable improvement on having to deal with her help at a distance, and allowing her free reign to cast spells. Keldorn uses True Seeing to blow her cover, and then the party easily chops her down.
She leaves behind the Cloak of Mirroring (any damage from spells is deflected away from the character wearing the cloak). This will be Avastrian's cloak for the rest of the game. I've already intimated that quite a few of my tactics are based on Avastrian rendering himself invulnerable, and then stepping up to the monsters by himself while the rest of the party can fire away at a safe distance. This cloak augments those tactics, as he can step right up to Mages and other creatures that have spell-damage effects with little fear for himself. Keep in mind that the Cloak won't protect him from damage by a cloud-damage spell, like Cloudkill and Incendiary Cloud.
Sekolah's Tooth
Now I head for the southwest part of the city. There will be narrow walkways. There are two things to look out for. One is traps. Imoen makes a point of searching out ahead. The other are monsters. These include a pair each of Sword Spiders and Ettercaps, as well as a Bone Golem. They can be overwhelmed in physical combat though.
I continue south and west, watchful for traps along the way. I eventually run into a pair of Imps who offer to allow me to open a treasure chest safely if I humour them in a game that resembles Trivial Pursuit of the Forgotten Realms. It basically amounts to receiving an item from each Forgotten Realms celebrity, and then placing it in the correct chest behind the celebrity it belongs to. Be careful to check for traps as always. The correct placement is:
Sea Zombie Lord
Now I leave this party of the City, and head eastwards. I blow away another group of Sahuagin.
Somewhere along the south edge of the city will be a pit of sorts. It has lots of undead, like Sea Zombies and Lacedons (aquatic Ghouls). They are led by a Sea Zombie Lord. The Sea Zombie Lord has a long range attack that can level-drain a single character. Suffice to say I'm hesitant to expose any party members unprotected against level draining to this.
My approach was to have Jaheira summon a Fire Elemental, and then send it into the pit. The Fire Elemental is immune to non-magical attacks, so it's quite safe. The party shoots down the undead with missile weapons at a safe distance. I then bring the Sea Zombie Lord into view, and begin that fight. Again, the Sea Zombie Lord focuses its attention on the Fire Elemental, allowing me to fire at a distance. Keep in mind that the Sea Zombie Lord requires +2 or better weapons to hit.
Prince Villynaty
Now I make for the northeast corner of the city. There will be stairs leading down. I am obliged to kill the Sahuagin standing guard at the stairs, and then shoot down a pair of Sahuagin archers on the other side of the stairs who stand beyond the reach of any melee weapons.
There will be more Sahuagin to the south. I dispense with some of them with spells from beyond their fog of war. Others I have to shoot down at a distance. Imoen helps distract one archer by using her Kitthix Figurine right next to him.
I continue south through the door, and receive an audience with Prince Villynaty. I agree to an alliance with him, and agree to take the Fake Heart to help stage an attack against the King. This is ultimately more beneficial for me, in terms of xp, then allying myself with the King.
King Ixilthetocal
Now I make my way back to the western part of the city. I sell off my excess loot to the Priestess in the northwest corner.
I then set up just east of the King, and take the opportunity to buff. Avastrian and Imoen both have Stoneskin and Mirror Image in place. The Mirror Images in particular will protect them against the Sahuagins' stunning bolts. Anomen and Minsc both use Armor of Faith. Jaheira also summons a Fire Elemental. Avastrian caps everything with Haste.
Now I charge in for the battle. Anomen casts Holy Smite (which is party friendly) to soften them up. Imoen (protected by Mirror Image) has the time to throw in Chaos, which will render the Sahuagin unable to aim their bolts at me. It then becomes a matter of cutting them down one at a time.
Prince Villynaty rewards me with a Treasury Key and a Magical Rope that will allow me to reach the Underdark. The treasury itself has another Magical Rope, a spell scroll for Protection from the Elements, and the Rod of Lordly Might. A warrior character can equip this in one of his quick item slots, and have the option of creating either a +2 Mace that can inflict fear on the target unless a saving throw vs. spells is made, a +1 Flaming Longsword that can paralyze its target unless a saving throw vs. spells is made, or a +3 Spear that can inflict an extra 2d4 points of magical damage unless a saving throw vs. spells is made.
King Ixilthetocal leaves behind the Impaler (+3 spear, +1d10 points of piercing damage on target), which will make for a useful weapon in some upcoming situations.
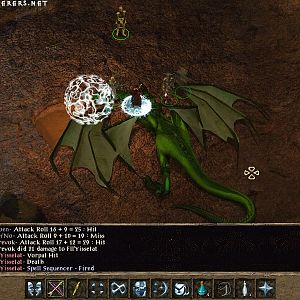
I'm not done yet. Prince Villynaty has an item I want, so I have Imoen attempt to pickpocket him, knowing that she'll fail and turn the rest of the Sahuagin hostile. Once I've killed them off, the Prince leaves behind the Wave Blade, which is one half of a weapon that can instantly kill fire-specific creatures.
Now I make my way towards the southeast corner of the City, killing the odd Sahuagin Rebel along the way. I am now ready to use the Magical Rope at the exit and enter the Underdark to start Chapter 5.