-

- Forums
- Chatrooms
- Gallery
- Gameplay Videos
- Upload
- Articles
- Mod Reviews
- Shop SP: Games, Movies, Books
CHAPTER 1 | CHAPTER 2 | CHAPTER 3 | CHAPTER 4 | CHAPTER 5 | CHAPTER 6 | CHAPTER 7 | CHAPTER 8 | CHAPTER 9 | CHAPTER 10 | |
Shadow Thief Contact | Cult of the Unseeing Eye | Anomen and Keldorn | Slave Lords | |
SLAVE LORDS
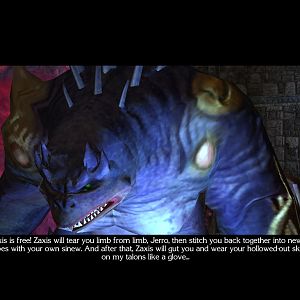
Glabrezu Guardian
Now I head for the Temple District, and then enter the compound of the Slave Lords. Sion and Ketta greet me rather rudely before teleporting away. SCS introduces a few changes. One is that the other monsters like the Nishruu, the Ogre Berserkers, the Ettercap, and the Efreeti, won't attack the Glabrezu. They'll attack me on sight.
So Minsc goes into stealth and walks around to get the monsters to show up. I then deal with the other monsters piecemeal without bringing the Glabrezu into view. First the Nishruu, then the Ogre Berserkers and the Ettercap, and then the Efreeti. Keep in mind that the Efreeti can turn into an invulnerable cloud of gas if I bring him to near death, so I'm hoping for an especially hard hit to kill him outright before that can happen.
The other changes introduced by SCS has to do with the Glabrezu itself. It actually looks like a Glabrezu this time. It is also much more dangerous as it can cast spells like Mirror Image, Power Word: Stun, and Unholy Blight. So Yoshimo plants all the traps he can in the party's midst. Keldorn then goes forward and casts True Seeing to get rid of the Glabrezu's Mirror Images. He then leads the Glabrezu back to the party. The traps bring the Glabrezu to 'near death'. Even so, Avastrian casts Haste to ensure that the party can finish it off without suffering any casualties.
The video concludes with Yoshimo going around scoring loot. One of the more notable items will be a Mace +2.
Slave Lords
Upstairs is the fight against the Slave Lords. This fight can be challenging for higher-level parties in SCS, let alone a lower-level party like mine. Yet I am doing this early so that Avastrian can get the Celestial Fury katana before going off in search for Imoen.
First, my preparations. I include the usual suspects like Armor of Faith, Haste, and Protection from Evil 10' Radius. Jaheira and Keldorn also gulp down the Potions of Giant Strength I earned from beating Suna Seni. Keldorn also has True Seeing in place. Yoshimo also plants all six of his traps at the stairs at the left hand side.
As for the Slave Lords, they consist of:
I go up the stairs, and then go back down right away. There's two points to this. One, I dodge Stalman's use of the Greater Command spell, which can put multiple party members to sleep. Not a good way to start this fight. Secondly, the name of this game is divide and conquer. I want a few, but not all, of the Slave Lords to follow me back down so that I can kill them piecemeal. Keep in mind that who follows me down and who doesn't can be random, so I can't adhere to a rigid script. There is still an element of playing things by ear.
As it turns out it's Koshi, Ketta, and Stalman who follow me down. The traps bring Koshi to near death, and I kill him right away and thus avoid the dangers of his Celestial Fury katana. Next, Keldorn's True Seeing reveals Ketta, allowing me to kill her next. I then surround and kill off Stalman. Avastrian claims his prize from Koshi's corpse, Celestial Fury (+3 Katana, Lightning Strike once per day, Blindness once per day, 5% chance of extra +20 electrical damage on target, each hit stuns target unless a save vs. spell is made), which will be his main weapon during Shadows of Amn. Simply the stun power alone makes it one of the most powerful weapons in the game.
I then go back upstairs. Avastrian casts Cloudkill which, by the way, will damage Sion even in spite of all his protections. I then head back down. It turns out that Sion followed me to avoid the Cloudkill but not Olaf and Maferan.
So I go back upstairs. Olaf and Maferan use Potions of Giant Strength due to their SCS AI, but I hack them down while Yoshimo disarms the nearby traps. I now take my time to loot Olaf's and Maferan's bodies, as well as the rest of the chests on this level. The loot includes a Mace +2, a Battle Axe +2, two sets of Full Plate Mail +1, a Large Shield +2, a Helm of Defense that Anomen equips, a Helm of Charm Protection that Keldorn will equip, a Sling +2 that Anomen equips, as well as magical scrolls and ammunition.
The benefit of this going around exploring and looting is that Sion's protections will wear off. When I'm done, I make sure my characters are relatively healthy, and then go back down. Jaheira can aim an Insect Plague at Sion directly, since he has no invisibility in place. This renders him helpless, and I soon cut him down. I get more loot here, like a Leather Armor +3, and a Plate Mail +1.
Competing Offers
The Slave Lords are done, but now I'm inching along to the next chapter. I sell off all my excess loot to Ribald now, and this is where I choose my moment to go over 15,000gp. I get competing offers from Valen and from Brus.
Cohrvale and Bregg
Now I head over to the Slums District. I head north and east, except I get accosted by a couple of thugs named Cohrvale and Bregg. This should be an easy fight, even in SCS. The video also provides a preliminary view of what the Celestial Fury can do, stunning its target for 3 rounds, which often proves enough to kill the stunned opponent thereafter.
The party is now ready to begin Chapter 3.