-

- Forums
- Chatrooms
- Gallery
- Gameplay Videos
- Upload
- Articles
- Mod Reviews
- Shop SP: Games, Movies, Books
|
|
Kuldahar Valley | Kuldahar | Chult | Dragon's Eye - Level 1 | Dragon's Eye - Level 2 | Dragon's Eye - Level 3 | Dragon's Eye - Level 4 | Fields of Slaughter |
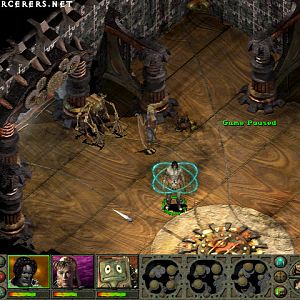
DRAGON'S EYE, LEVEL 2
The Fate of Mandal Graye
I don't bother buffing up for when I start to explore the second level. The reason is that there's 2 traps to either side of the entrance that will dispel any magical buffs of the character that trips them. They're also next to impossible to find. So I grab the opportunity to simply get the fights over with and trip them to get them out of the way.
I start off by killing a couple of Feyrs. I then go west, and run into a Half-Breed Sorceress. This fight is won in short order when Lady Elanna uses Banishment to instantly get rid of all the undead summons, and then Dispel Magic to rip down the Sorceress' magical protections.
The party continues to make its way eastward, fighting a few spiders along the way.
When I reach the northeast corner I send Stygar, the character with the most hit points, on ahead. He goes south down the tunnel, and then tucks himself into a kind of sideways niche in the tunnel. This way the boulder only damages him once. The rest of the party can then proceed.
At the end of the tunnel is the body of Nheero's travelling companion, Mandal. In the nearby chest I find among a few other things:
I become the bearer of bad news to Nheero. Nheero then has a new quest for me, to find Mandal's missing sword and bring it back to his dead body so that his spirit can tell me where a missing Mandrake root is.
Histachii Chamber
Now I make my way towards the Histachii Chamber in the northwest corner of the 2nd level. Along the way I have to fight Histachii, Half-Breed Sorceresses, and Half-Breed Priestesses. They are few enough and scattered far enough that I can win routinely by surrounding them and taking them one by one.
I do, however, take care to have Tithian disarm traps at the stairs leading to the Histachii chamber and the bridge before having the party advance forward.
Rakshasa Maharaja
I move westwards across the bridge and run into Nathaniel again, or so it seems. Lord Markus can sense something is up. This Nathaniel will sell magical scrolls and ammunition at exorbitant prices. I buy up the +4 ammunition anyways, since any item that will become a part of my lasting inventory has either already been purchased or will be found without having to buy it.
I decide to get the jump on Nathaniel by surrounding and attacking him. Lady Elanna helps matters along with a Maste Haste spell. Nathaniel then reveals himself to be a Rakshasa Maharaja in disguise. He starts with a triple shot of Stinking Cloud, Acid Fog, and Cloud Kill. But it's too late since he's already near death. Once he's dead, the party takes out the Ferocious Jaguars helped along by Elanna's Chain Lightning.
Yuan-ti Ziggurat
Just south now will be a large ziggurat that has a significant number of Half-Breed Priestesses and Sorceresses around it. They will have summoned a large number of undead beforehand.
The crowd-control method may look attractive given the narrow pathway leading to the ziggurat itself. But it doesn't work very well here because not all of them will follow after any lead character that I put out there.
Instead, I just have to dive in and brave it. This can be a dangerous fight, because I'll have to deal with numerous Blasphemies, Skull Traps, and so on. But I can minimize the danger by having Lady Elanna use Banishment multiple times to get rid of the undead, and anymore monsters they summons afterwards. This allows the party to weather things and concentrate their efforts on the Half-Breeds, eventually outlasting them.
Alchemy Laboratory
Towards the southwest corner is the Alchemy Laboratory. I need to kill off another couple of Half-Breed Sorceresses. Again, Lady Elanna uses Banishment to get rid of the undead summons, and then Dispel Magic to bring down the magical protections.
There's plenty of scrolls to be found here, one of which is of special interest to me. Tithian packs another Scroll of Protection against Magic and saves it for a certain special battle.
There are also some alchemical notes, as well as a Mandrake Root around, but I'm not concerned with these just yet.
Spiders in Dragon's Eye
Now I make for the exit to the third level of Dragon's Eye, which is towards the east. The area leading up to the exit has both lots of spiders of various sorts and lots of Web traps. The method is pretty simple. Tithian slowly inches forward in "Search" mode, and should any Spiders or Ettercaps come into view, he'll simply lead them back to the waiting arms of the party.
There will be Half-Breed Priestesses and Sorceresses around the exit. Once I get rid of them there's a unique trap just before the exit. It both summons more Half-Breeds, and hits its target with damage and a Dispel Magic effect. It is also a permanent trap in that it continues to work again no matter how many times it may have been tripped previously. The key is patience. It takes a long time to "Search" and find it, but it will eventually turn up if you're in "Search" mode long enough.
The way is now clear to the third level.