-

- Forums
- Chatrooms
- Gallery
- Gameplay Videos
- Upload
- Articles
- Mod Reviews
- Shop SP: Games, Movies, Books
CHAPTER 1 | CHAPTER 2 | CHAPTER 3 | CHAPTER 4 | CHAPTER 5 | CHAPTER 6 | CHAPTER 7 | CHAPTER 8 | CHAPTER 9 | CHAPTER 10 | |
THE RITUAL
Note that I've been holding onto all of my extra Potions of Extra Healing. I do so with this quest in mind.
Pontifex
I reconfigure my spells before leaving the forest. Avastrian changes his 8th-level spell slots to two Maze Spells. Imoen sets up a x2 Lower Resistance Spell Trigger. The reasons for this will become apparent fairly soon.
I then head over to the Watcher's Keep area. Before I proceed with the Watchers Keep proper, I take the opportunity to do on a mini-quest added by the Tactics Mod, the Ritual. Immediately in view is a yellow-robed person named Pontifex. He has a quest for me, disrupt "The Ritual" but without killing the priestess whos leading it.
How you handle the priestess is up to you. Remember that Pontifex wants you to disrupt the ritual but without killing her. If you so much as touch her once, or even use Power Word: Silence on her, shell die. If you feel like forcing a confrontation with Pontifex, this is certainly the way to go. Just so you know, hes a Yellow Dragon. And hell immediately start the battle with an instant Time-Stop and start inflicting all kinds of nastiness. He can also use Time Stop several more times over the course of a prolonged combat. This can be a lot to handle even for very high-level parties.
But I fall in with his request, and I intend to see it through for the most benefit, to stop the Ritual without harming the Priestess. Pontifex gives me a bunch of spell scrolls, and a wand or two, and teleports me to a nearby forest to begin the quest.
The Ritual Monk
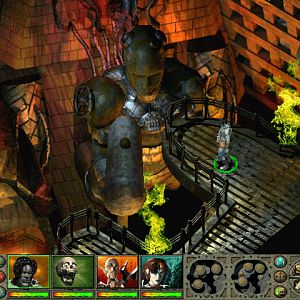
Before I can gain access to the Ritual itself though, I need to kill all of the Skull guardians. Before a Skull guardian can be killed, I need to kill every deluded servant whos protecting it. The servants typically included a couple of druids, a backstabbing assassin, a gnome or two who can throw stunning darts, a berserker, a mage, and a unique boss servant for each Skull guardian. Using cloud-like spells isnt helpful because the Skulls will just use Zone of Clear Air. The Skull guardians themselves can about once each turn use a Project Force ability that will blow the character back and drain him or her a level.
This is a very long term campaign, because I am allowed at most one rest (if at all, which means there's really not much point to buffing up). The best approach is to have characters protected against level draining lead the initial foray, while the rest of the party keeps a safe distance. Note how at the start of the video I had Jaheira equip the Holy Buckler of Amaunator. My procedure is then to send Avastrian, Jaheira, and Anomen ahead to draw away as many of the Skull's Guardians as I can. and towards the rest of the party.
This approach means that the Druids will hit me with Insect Plagues. Time is of the essence, so I need to kill everything as quickly as possible. This reality means there's really no alternative but to swallow it. This was one of the points behind me holding onto the extra Potions of Extra Healing along the way. I can always bring myself back up to full health afterwards. Notice that I always have Imoen stay invisible through her Staff of the Magi, as she will be particularly vulnerable to getting backstabbed.
Once I've killed all of a Skull's guardians, the Skull itself will scream "NOOOO!!!" That's my cue to send in Avastrian, Anomen, and Jaheira to march in and kill the skull itself.
The first Skull I try this on is the one to my immediate south. Its guardians are led by the Ritual Monk.
The Ritual Inquisitor
And here is me repeating the process for the Skull protected by the Ritual Inquisitor near the northwest corner.
The Ritual Thurgeons
Here I destroy the Skull guarded by multiple Ritual Thurgeons in the central portion of the area. One point of interest is where I have Avastrian isolate himself so that an Insect Plague aimed at him will not spread to the rest of the party.
The Ritual Wu Jen
Here I kill off the forces in the east-central area led by a Ritual Wu Jen, who fortunately does not seem interested in protecting himself with buffs. That I draw off members of other forces and kill them too is an added bonus. I then destroy the Skull after the Wu Jen dies.
The Ritual Shapeshifter
Now I destroy the forces in the northeast corner led by the Ritual Shapeshifter. The Ritual Skull soon follows.
The Ritual Captain
Now it's time for the last Ritual Skull, which is on the north-central edge of the forest. The forces that protect it will be led by a Ritual Captain, who is content to remain invisible and use his Bard song to buff up the other enemies. I lure back most of the forces away from the Skull and the Captain. After that, I have Keldorn join in. I have so far avoided having Keldorn use his True Seeing ability, but now is a prime time to use it. The reason being that it will keep the Ritual Captain exposed, but also a few backstabbing Shadowstalkers as well. Once they're all dead I kill the Skull itself.
I then head for the south central portion of the forest, killing the remaining Battlerager along the way.
Countess Maretha
Now I do some buffing up against physical attacks. I then begin the final encounter after speaking with Countess Merentha, who has her three Golems attack me while she begins her incantation to finish the ritual.
I begin to kill off the Golems, with Sarevok and Keldorn buffing themselves with Hardiness, and Avastrian and Jaheira using Greater Whirlwind Attacks. Remember, my goal is to disrupt the Ritual but without harming Merentha in any way. I show the reliable way to do it. Imoen zaps Merentha with a Spell Trigger that includes two instances of Lower Resistance. I then have Avastrian cast Maze at her while shes fairly deep into the incantation. I make sure to see the message ritual is disrupted before leaving the area.
I travel to the North Forest, and then back to the Watcher's Keep area, but then I get interrupted by rather strange creatures who call themselves the Avatars of Poison. This is a quest that will be resolved fairly soon.
I then speak to Pontifex again. He then leaves amiably, and each party member gets 90,000xp. Pontifex also rewards me with a Yellow Dragon Armor (armor class -1, +50% damage resistance against piercing and missile weapons), and six Lilith Amulets (vampiric immunities and resistances, cursed, cannot be used by Paladins), but I have no use for any of these items.
Avatars of Poison
Now I return to the pocket plane, to get my configurations back to their usual standard. Once I leave the Pocket Plane I get attacked by some nasty looking Avatars of Poison. They include:
So when the fight starts, Imoen immediately summons a Planetar to help things along. She then takes cover and keeps the mist occupied. Avastrian immediately creates a Simulacrum. He and the Planetar take out Bloodspear first and foremost, to remove his stun power from the battle. The other fighters go to work first and foremost on Redspike. Theyll often be kept off balance by the Project Force used by Bloodcaster and Bittersnake. But to my mind, its relatively better than letting Bloodspear and Redspike go to work.
The Simulacrum then uses the spammed Time Stop scrolls to get rid of everyone else except Fallowmist. Once only the Mist is left, its a matter of keeping as many True Seeings active as possible, and damaging it with non-magical weapons or in my case bare fists. Imoen for her part is going to have to drink quite a few healing potions. But once Fallowmist goes into a Troll-like state, she finishes it off with Magic Missiles.
Bloodspear leaves behind a magical throwing spear that always returns to its wielders hand (Bloodbane +5, 6 points of poison damage over 6 seconds with no saving throw. Target must save vs. breath weapon at -4 penalty or be stunned for a few rounds). This will be Sarevok's missile weapon of choice, at least once he gains proficiency in missile weapons.
Now I can begin to explore the Archives of Watcher's Keep.