|
Temple of Rillifane
|
|
|
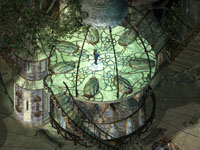
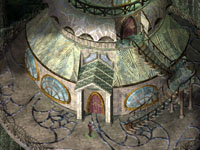
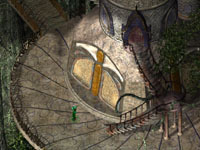
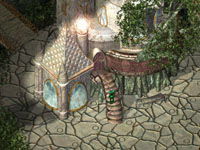
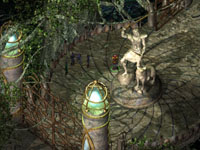
This magnificent temple is dedicated to the Leaf Lord Rillifane and is normally a sight to see in Suldanessellar
but due to the recent events, it has been trashed and ruined from the inside out. On any given day, elves by the hundreds would pay their respects and give prayers to
Rillifane but now it is heavily guarded and rightly so.
Jon Irenicus knows the potential of the Leaf Lord's abilities and how the Avatar of Rillifane would be able to summon up enough power
to remove the wards that Irenicus has placed on The Palace. Due to this, Jon Irenicus has placed a very powerful patrol on the outside to keep
wanderers away and a backup of strength on the inside. Reason for this is that by placing three artifacts into the hands of the statue of Rillifane would be enough
to awaken the Leaf Lord to the aid of the elves or anyone else who summoned the avatar.
Of course, these items have been scattered through Suldanessellar and it will be up to you to find them if you
want to gain access into The Palace but before that, you'll have to deal with the threat found on the outside and inside the Temple of Rillifane.
Your first threat will be the Rajah, Maharajah and Stone Golems that guard the entrance to the temple and best you be ready for a wild battle of magic for these
guards are not to be taken lightly. Battle your way through their defenses, heal your wounds and prepare yourself for another wild magical battle that will begin as soon as you make your way
inside!
|
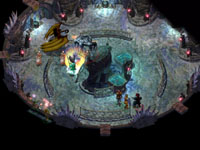
Inside Temple of Rillifane
|
|
|
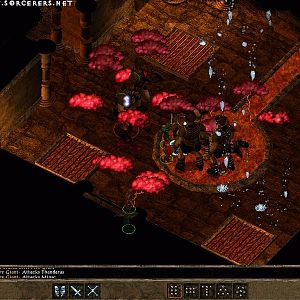
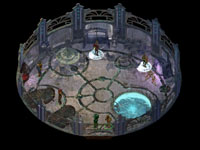
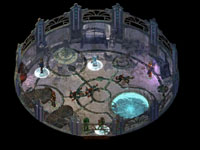
Suneer will be here, surprised that you entered and made your way past the guards situated outside but he is very confident in his abilities
and of those who stand around him. His personal pet Glabrezu will obey him to the very end, as will the Iron Golem and Rakshasa who also stand scattered in the room. Suneer
is a very powerful mage and will use every spell he has memorized to the best of his ability, including Time Stop and Gate which could very well have a Pit Fiend join the battle
and turn the tides into Suneer's favour.
Battle well and battle hard. The quicker you take down Suneer the better chance you'll have against the rest of the crew who follow him and you also
won't have to worry about Suneer's spells blasting their way through your party.
|
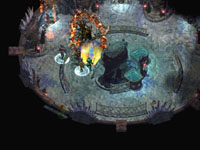
Inside Temple of Rillifane
|
|
|
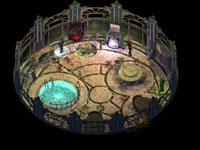
With the battle over, you may want to cast a few healing spells or drink a few potions if you happen
to have any handy and make note of this building. The reason for that is, as mentioned above, you'll be coming back here eventually with
the three artifacts needed to summon the Avatar of Rillifane.
These artifacts are a TALISMAN OF RILLIFANE, a GOBLET OF LIFE and, a MOONBLADE. Their
locations are noted below in case you're having trouble finding them.
Placing all three of the artifacts into the statue of Rillifane will summon forth the Leaf Lord, Avatar of Rillifane and one
who will be able to help remove the ward placed by Jon Irenicus on The Palace. Listen well to what the Leaf Lord has to say as you will
learn a lot of information regarding Jon Irenicus and afterwards, receive a very nice weapon that any Druid can make very good use of.
|
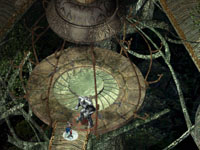
Elven Gazebo
|
|
|
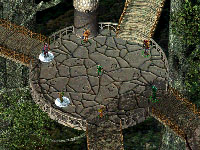
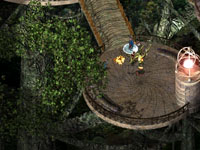
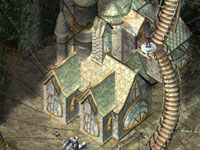
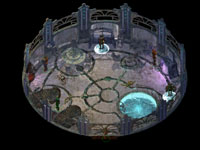
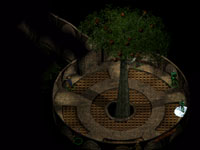
The Elven Gazebo is a magical place where many young elves that are falling in love come to view Suldanessellar at night when all
the glowing multi-colored globes appear to illuminate the walks of the city. It's a shame though that none of the elves are sharing in their thoughts during this time and reason for that would be the Adamantine Golem
and Stone Golem who are running around at the Elven Gazebo's base.
Dealing with them will be your duty as no Elven Battle Wizards or Elven Warriors can be seen although their battles can still be heard ringing through the treetop. Removing this thread will
clear the street so the young boy and young girl hiding out at the top of the Elven Gazebo can get to safety. Their sad tale will paint a picture of the early hours of when Jon Irenicus arrived and summoned
the beasts that walk through Suldanessellar so listen well.
Be on your way once you've secured the area.
|
Troll Trouble
|
|
|
Swords ring from this part of Suldanessellar as Elven Warriors and Elven Battle Mages are caught up in a heated
battle against foul green-skinned Trolls, their claws ripping the air and the elves alike. You'll have to rush in to defend the elves for they will not be able to
hold off the powerful Trolls for very long. By doing so, this will free up the elves and allow them to move onward to battle the other foul beasts that can be found
around the buildings in Suldanessellar.
| Suldanessellar - Locations - The House of the Talisman |
|
|
Outside the House of the Talisman
|
|
|
This silent, empty, rummaged floor may look like it holds nothing of interest but it would be in your best
interest to take a closer look, past the dead bodies on the floor and to the container on the right side of the room. Although this container
will not open by normal means, lockpicking or bashing it in, you can still get into it if you know which pressure plates to press.
There is an item, on the second floor found in the Priest's House that you can search
for and eventually find that will give you the correct order in which to press the pressure plates. This item is the ELVEN PRIEST STONE and is located
in the desk of his room. By reading the back of the stone, you can get the phrase you'll need for the container below.
|
Inside the House of the Talisman
|
|
|
Reason for needing to open this container is because inside it holds the TALISMAN OF RILLIFANE. It is one of the three
artifacts that are needed for the Statue of Rillifane within the Temple of Rillifane which will call forth the Leaf Lord, Avatar of Rillifane to remove the ward from The Palace.
You can also open the container without getting the ELVEN PRIEST STONE by simply pressing the plates in the following order:
Press the Corellon Lotharian plate first, followed by the Rillifane plate and the Elven Symbol of Water plate ending the order with the Tree of Life plate. When you press the Tree of Life plate, you'll automatically press the Suldanessellar plate
right after, being the last in the order and the container will then open.
| Suldanessellar - Locations - The Priest's House |
|
|
The Priest's House
|
|
|
Empty and messy as the floor below is this upper room where the elven priest of Rillifane lived but is not more, killed by the roaming
beasts that can be found littered in Suldanessellar. Search the room for you will come across a very powerful spell that will certainly
come in very handy in a large scale battle as well as the ELVEN PRIEST STONE which will give you
the phrase and proper order to press the plates in The House of the Talisman.
Once your search is complete, continue on your way.
|
Demin's House
|
|
|
Move slowly as you come to this area for rushing forward may only get you in a situation you would not normally want to be in.
Prepare yourself for a good battle against Raamilat and his Nabassu. Raamilat will stop at nothing to keep you from entering the building and will cast Time Stop if
he gets the chance to do so. Battle well and battle hard, then enter the building and ready yourself for yet another battle.
|
Inside Demin's House
|
|
|
As you enter you will spot Demin backing towards the far end of the room, her hands trembling and her eyes darting
back and forth between the threat that stands in front of her. Rajah, a Rakshasa and Adsaam are ready to strike her down and thankfully you entered just
in time to keep them from doing so!
Helping save Demin will only help you in the end for she is a source of valuable information that will get you moving
toward your final goal and that is finding Jon Irenicus! Once the threat has been removed, speak with Demin and you'll learn about the exile Irenicus
and how he was cast out by Queen Ellesime long ago.
Demin will share with you the information needed to summon the spirit defenders to protect Suldanessellar as well as the
Avatar of Rillifane who can remove the ward set by Jon Irenicus and The Palace. It will be three artifacts that you will be asked to find by Demin
and those will be the TALISMAN OF RILLIFANE, a GOBLET OF LIFE and, a MOONBLADE.
You are to return to the Temple of Rillifane and place these three artifacts into the statue which will in turn, release the Leaf Lord, Avatar of Rillifane.
Also, don't be shy and search the room. You'll come across some equipment that will be helpful in your search.
| Suldanessellar - Locations - The Harpist's House |
|
|
The Harpist's House
|
|
|
As the sounds of battle ring all around you and the cries for help reach deaf ears, you will be attacked by a trio of Golems,
Sand, Iron and Stone moving quickly and hitting hard as they look for those who still walk Suldanessellar. Battle well and battle
hard against these foul creations and put them to the floor before you make your way inside the building.
|
Inside The Harpist's House
|
|
|
An empty house left long ago when the first signs of trouble began to surface in Suldanessellar
and whoever lived here happily abandoned it. The Golems outside perhaps may have been left guarding this building because it is here you'll be able to
come across the STONE HARP that you will need to bring along with you to The Palace.
| Suldanessellar - Locations - House of the Moon |
|
|
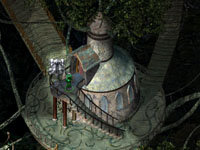
House of the Moon
|
|
|
This building is very close to The Palace and it is fairly quiet on the outside and that's a little
strange considering what you'll be able to find inside. Open the door and make your way in for there is a very important item that you'll need to take
with you to the Temple of Rillifane.
|
Inside the House of the Moon
|
|
|
The sound of maniacal laughter will ring to your ears as an Elven Warrior and Balor are discussing a few things that need
not be mentioned here but before you can act and save the Elven Warrior, he is killed along with the Balor. Easy enough and the room is now free for you
to search and do with as you wish.
Searching the room's contents you will come across the MOONBLADE which is
one of the three artifacts that Demin asked you to find and to place in the Temple of Rillifane. As well, there are other items that may prove helpful
to you and other members of the party.
Be on your way once you've cleaned out this place.
| Suldanessellar - The Woods - Nizidramanii'yt's Spot |
|
|
Nizidramanii'yt's Spot
|
|
|
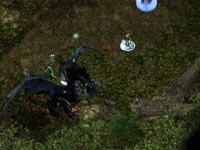
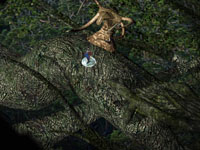
A faint rumble will be heard as you step onto the grass in this part of the woods, perhaps it was thunder or a party
members stomach trying to tell you something. Think again. In the distance, just out of eyes view is Nizidramanii'yt's a foul and evil dragon whose
breath you're about to smell first hand!
This is the very dragon that Jon Irenicus used to arrive in Suldanessellar and is also the very
beast that is guarding one of three artifacts needed for the Temple of Rillifane and you are going to have to get it. By now though,
this type of battle should be a walk in the park for you and your party considering all the levels you've gained, the items you've found and the spells you've
learned since you left Athkatla and went on that wild journey.
There is nothing more satisfying that bringing down such a large beast with your weapons and spells, battling toe to toe and screaming
battle chants at the top of your voice! Such spells as Bless, Defensive Harmony, Protection 10' Radius, Chant and other spells that will better your armor class
as well as saving throws and your THAC0 will be very helpful in this battle. A fair warning to all of those who will be up front and getting personal with Nizidramanii'yt's
as he has the ability to entangle everyone around him, making the battle a lot of fun to win.
I'm always looking for some BATTLE TIPS! to add to these types of difficult battles against Dragons, Lichs and
other tough foul beasts so if you have anything to add about your own adventure and victories, feel free to send them in. A screenshot of the foul beast lying on
the ground is even a better bonus to add for your own BATTLE TIPS! Please know that I am not looking for
any such BATTLE TIPS! that involve shooting Cloudkill Spells, casting 4x Lower Resistance and then casting a Finger
of Death or any other type of cheesy method. I'm looking for hard-nosed battles, front line attackers and long, magical battles for the BATTLE TIPS!
section.
|
Nizidramanii'yt's Spot
|
|
|
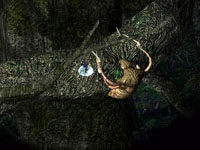
As the breeze blew Grub's hair back, he tilted his head upwards and sniffed the air catching the stench of the dragon
just feet away. The Flail of Ages dropped to his side and he raised his shield before his face only showing his hunting eyes as he moved forward, the
rest of the party behind him preparing for the kill. As Nizidramanii'yt came into view, Grub clenched his teeth and looked up at the large beast, the
smell it gave off stronger now than it had been before.
The greeting was short, Grub's spit was long and wet as it landed on the foot of the dragon and the battle began! Minsc and Boo
blessed the party and everyone glowed for a split second as the magic ran through them all, followed by Aerie weaving her hands and casting Haste and Protection from Evil 10' Radius.
Jaheira called forth a Woodland Being while Keldorn, Grub and Valygar ran in to attack, their weapons swinging
wildly about!
The added help of the Woodland Being came through as she began to cast Call Lightning. Added to that was another Call Lightning weaved by Jaheira and
a shower of bolts rained down on Nizidramanii'yt that even his magical resistance could not stop from causing damage. The bolts from above were simply too powerful. As the bolts continued to come forth and electrify
Nizidramanii'yt it was Grub, Keldorn and Valygar that added with their own strength and slicing weapons, digging deep cuts into the dragon's tough
leathery skin and standing hard against the strong, magical beast.
The fun though, was just about to begin! What looked like to be an easy victory for the party turned grim as the foul beast caught us all off guard and
surrounded himself with vines that came alive, grabbing and taking hold of those who were up front and personal with Nizidramanii'yt! Now stuck, the beast had the perfect chance to unleash
his claws and bite against us all, using a wing buffet to knock those out of the vines range to the ground! Bolts of lightning continued to volley from the gray clouds above as the Woodland Being
was the only one left standing, concentrating on calling forth the bolts that would ultimately be Nizidramanii'yt's downfall!
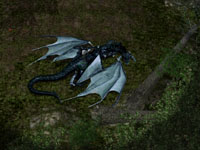
At what looked like the end of Grub, standing there helpless, another bolt crackled from the sky and in thanks and awe, Nizidramanii'yt was felled, never to stand again
and it was then we knew we were ready for Jon Irenicus!
Search the corpse of Nizidramanii'yt and grab the goods he has on him, especially the GOBLET OF LIFE which you will
need for the Temple of Rillifane.
|
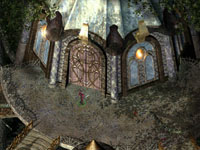
Outside the Palace
|
|
|
Your battles through Suldanessellar will eventually take you to The Palace and the large hand-carved gates
that keep the foul beasts at bay. A few elves have managed to trap themselves inside of the gates and await rescue or until the threat of Jon Irenicus' beasts has been taken care
of. An elven guard is keeping watch and how he managed to stay alive all this time when death and destruction is the main focus of Suldanessellar is beyond
me. Regardless of this, speaking with him will get you past the closed gates and into the area were the elves are holding up.
It is here you will meet Reirra, Captain Aduo'on and a wounded elf who they dragged here for safety and to heal his wounds. Reirra, if you take the time
to speak with her, will offer her services to you if the party needs any healing and taking it before you enter The Palace would be smart.
|

Outside the Palace
|
|
|
Moving onward, you will come face to face with a Balor who is guarding the main doors to The Palace and will rush towards
you and the party to stop you, the last line of defense for Jon Irenicus. You should have no problem defeating the Balor here and you'll be free to open the doors and step inside.
If the wards have yet to be removed, you will have to continue to search Suldanessellar for the three artifacts that need
to be placed in the statue within the Temple of Rillifane. Doing so will release the Leaf Lord, the Avatar of Rillifane and he will remove the wards that Jon
Irenicus has placed around The Place and you'll be able to walk inside.
The artifacts needed are listed below along with their locations.
Once you've removed the wards, head inside.
|
Inside the Palace
|
|
|
Stepping into The Palace, you shall be stepping to your final destiny with Jon Irenicus as he can be found
within these very walls, although unknown to him that you are on your way. The lush, green, healthy tree that grows here has many nuts growing on them and it
is suggested that you take the time to pick them, 4 SMALL NUTS and 4 LARGE NUTS will do just fine.
The reason for this is that four of the nuts you will need for The Tree of Life which will help regenerate lost branches that you'll need
to cross. The remaining four that you do not use can be eaten for healing purposes and they will come in handy for the next few battles you're about to face!
|

Inside the Palace
|
|
|
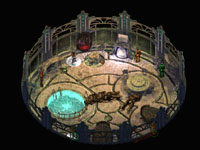
This very tranquil and lovely waterfall has more to it than just looking relaxing and refreshing. Try not to get caught up in
everything for you are here to do other things and one of them is figuring out a way out of this room. To do so, you'll want to take a closer look at the
statues that surround the smaller fountain to the left of the room. Examining this will tell you that a horn is missing on one side and a harp is missing
on the other.
Closer examination of the water will reveal there is something darker in its depths and you'll have to place the STONE HORN on
one statue and the STONE HARP on the other. Once both missing pieces have been put back, the waterfall will cease and the pool shall dry up. In its place
are spiral stairs which wind up the inside of the Tree of Life and to the top branches where Jon Irenicus can be found.
Gather yourself here, speak with the members of your party and make sure that they're willing to go with you to face the man you've been hunting down
for ages on end. Once you're ready, take the trip and face your destiny, Child of Bhaal.
|
Tree of Life
|
|
|
Ellesime will immediately greet you, and
although it will only be a projected image of herself, she will speak
to you with great urgency and tell you what needs to be done. It's time
to get serious now as your journey is almost at an end so listen well
to what she has to say and be on with it! It would also be a good chance
to prepare yourself for the first of two battles against Jon Irenicus.
Potions, scrolls, spells, equipment should be well organized and properly
distributed between each party member and those who would make the best
use out of them during battle. It's not going to be easy, but with good
planning you'll be able to get yourself through it and to the final stage
of your adventure. With that, let us gear up and move on.
Your first job is to locate the parasites that are sucking up the Tree of Life's resources which Jon Irenicus is swallowing for himself
to gain more and more power. With the tree almost at its end, it's up to you to remove each parasite and their guards that will appear when you move in to attack them. You will also need
the 4 LARGE NUTS to help the dead branches grow again so you can cross and get to the parasites and if you did not pick them,
you can find them in the first room of The Palace.
Finding the parasites isn't difficult and all you have to do is walk around until you find them and they are the only real threat you have to worry about here, besides
Jon Irenicus himself. Once you find one, attack it and kill the guards that will appear and once you've taken care of the guards, you'll be free to put the parasite to its death and continue looking
for the next one. A total of three parasites exist here, so search well.
|
Tree of Life
|
|
|
The very last parasite you should greet with a smile for once you've killed it, you will be teleported to Jon Irenicus where he will
realize what's going on and it will be Ellesime who will also fill you in on everything that happened between Joneleth and herself. The love that flowed so freely
between the two of them is now gone and all that is left is an empty shell of hate and revenge that Jon Irenicus has carried around with him since he was exiled by the
elven queen.
You on the other hand are soulless and
soon to be dead if you don't defend yourself against Jon Irenicus and
it is here the first of two battles take place so be on your guard and
be ready.
This battle I found a little more difficult than the last battle for Jon Irenicus doesn't spend his time teleporting around the battle field
and into the fog of war and concentrates his attacks on one NPC until they're dead as well as uses radius attack spells. If you have any Time Stop spells, now is a good time
to use at least one so you can get some defensive measures up and possibly summon some additional help. Bless, Protection from Evil 10' Radius, Defensive Harmony, Potions, Scrolls
and anything else you can think would help give you an edge, use it. You've been saving items all this time during your adventure and there is no reason to continue doing so for
these last two battles.
When Jon Irenicus has finally been brought to the ground, he will be sucked into Bhaal's Realm and if you thought you were
going to get your soul back when he died, you're wrong. You'll be sucked down with him and you'll have to go through a series of five personal tests to see what you're really made
of and then face Jon Irenicus one last time to gain your soul back from him.
| Suldanessellar - The People |
|
This is a full list of all People found within Suldanessellar.
- Ellesime
- Jon Irenicus
- Elves
- Leaf Lord, Avatar of Rillifane
- Young Boy
- Young Girl
- Elven Battle Mages
- Elven Warriors
- Demin
- Elhan
- Reirra
- Wounded Elf
- Captain Aduo'on
| Suldanessellar - All Quests |
|
This is a full list of all Quests found within Suldanessellar.
| FIND ELLESIME AND THE HIGH PRIESTESS DEMIN |
Your search for both elves will be asked of you by Elhan and finding them will help you in your adventure and also put things together for you in
terms of the story and your advancement through Suldanessellar. Ellesime won't be found until you reach The Palace
and to get inside you'll have to find Demin first so she can tell you about the three artifacts needed to get past the wards on The Palace.
Demin can be found in Demin's House.
The Palace ward created by Jon Irenicus will keep you out of The Palace until you are able to locate all three artifacts. These artifacts and their location
are listed below.
Placing the artifacts in the Statue of Rillifane which can be found in the Temple of Rillifane will call for the Leaf Lord, Avatar of Rillifane who will remove
the ward on The Palace for you.
The entire party will receive 65,000xp for completing this quest.
| GETTING TO THE TREE OF LIFE |
The waterfall that you'll find in The Palace hides the stairs that will lead upwards into the branches of the Tree of Life but before you'll be able to
climb them, you'll have to place the STONE HORN and the STONE HARP on the smaller
fountain. Doing so will stop the waterfall, dry the pool allowing you access to the stairs.
Doing this will get you to the Tree of Life.
When you arrive at the Tree of Life you will be contacted by Ellesime who will tell you that parasites are draining the very
life of the tree and they must be removed. You'll have to kill all three and will also need the 4 LARGE NUTS
found in the first room of The Palace.
Doing this will allow you to face Jon Irenicus and battle him.
| Suldanessellar - All Items |
|
This is a full list of all Magical
Items found within Suldanessellar. Their locations can be found
by viewing the rooms separately through the solution as they are also covered
in the Room Statistics.
- 20 Darts of Wounding
- 40 Darts of Lightning
- 20 Darts +1
- 80 Arrows of Ice
- Cloak of Elvenkind
- Identify Spell [Wizard]
- Staff of the Woodlands +4
- Time Stop Spell [Wizard]
- Girdle of Stone Giant Strength
- 80 Arrows +1
- 40 Bullets +2
- 40 Darts of Stunning
- Gate Spell [Wizard]
- Elven Chain Mail
- Boots of Elvenkind
- Bladesinger Chain +4
| Suldanessellar - All Monsters |
|
This is a full list of all Monsters
found within the rooms on all levels of Suldanessellar,
their locations can be found by viewing the rooms separately through the
solution as they are also covered in the Room Statistics.
- Stone Golem
- Clay Golem
- Adamantine Golem
- Glabrezu
- Iron Golem
- Rakshasa
- Pit Fiend
- Suneer
- Trolls
- Demin
- Rajah
- Adsaam
- Sand Golem
- Nizidramanii'yt
- Jon Irenicus