-

- Forums
- Chatrooms
- Gallery
- Gameplay Videos
- Upload
- Articles
- Mod Reviews
- Shop SP: Games, Movies, Books

|
Dragon's Eye - Level 1 | Dragon's Eye - Level 2 | Dragon's Eye - Level 3 | Dragon's Eye - Level 4 | Dragon's Eye - Level 5 |
DRAGON'S EYE – LEVEL 5
Odd Little Girl
Ok, I enter, and an Odd Little Girl gives me cryptic warnings. Now I quicksave. There's a chest towards the northeast of this level that I want to cherry pick. It's possibilities upon entering the level are:
Water Elementals in IWD are very rare, so it is just not worth the tradeoff. The Red Knight's Shield is the way to go, and in fact is one of the very few shields that offers a +4 improvement to armor class. It will be Genevieve's shield for a long time.
Now to check this chest, I had Derrick cast Invisibility on the Black Thorn. The Black Thorn won't blow his cover by opening doors, so he travels the length of the extensive hallway, carefully checking and avoiding the traps. Once he reaches the chest, he unlocks the chest and checks what's inside. It set to The Red Knight's Shield the first time around, so I reload the quicksave.
Now I move head, where I have to fight 2 Yuan-ti Elites, 2 Yuan-ti Archers, and a Yuan-ti Priest. The Black Thorn and Derrick open fire on the Priest, while Genevieve, Halagrim, and Cassandra take care of the Elites. Once they go down, the Archers easily follow.
I continue to get weird messages from the Odd Little Girl.
Now, having reloaded, I have Derrick cast Invisibility on the Black Thorn. He then investigates the rooms past the north door, both to disarm a trap and to scope out the enemy position. There's a few Yuan-ti led by a Priest in the first room, so the Black Thorn positions himself behind the Priest and waits. Genevieve leads the charge. Once the Priest no longer has his back to a solid object, the Black Thorn nails him with a backstab, sending him into a morale failure. The battle is then easily won.
The Yuan-ti in the second room apparently heard the commotion and were waiting at the west door. Lanatir opens with a Fireball right away. The Black Thorn and Derrick take down the Priest with missile fire. Genevieve, Halagrim, and Cassandra take down the others.
There are a number of chests here, with various loot. One of the chests will have one of the following (which is set when you first enter this level):
I wasn't particularly concerned what I got in this chest. I'll just sell it anyway.
The High Archer
Traps are pretty pervasive on this level. For the next room, I had Derrick cast Invisibility on the Black Thorn. He then went in and disarmed all of the traps. I positioned the Black Thorn behind the foremost Yuan-ti Archer. Genevieve then led the charge, and the Black Thorn ensured a quick death for the first Archer with a backstab. The other 2 are then easily taken care.
The room to the south has a lot of Yuan-ti, Yuan-ti Archers, and the High Archer. This will be a massive fight, so I have Derrick cast Mirror Image on himself, and then Haste on the party. Everybody then charges in. Lanatir and Derrick unleash the Confusion + Slow combo. Derrick then casts a Lance of Disruption at 3 Archers to the side, and Lanatir follows up with a Fireball. Everybody else is hacking down the other Yuan-ti.
There will be a lot of Arrows +1 and Arrows +2 for the Black Thorn to accumulate. He also loots from the High Archer's corpse Sseth's Messenger (+1 long bow, arrows reach their target very fast), which will make for a decent interim bow for him.
The High Torturer
Again, for the next room to the east, Derrick casts Invisibility on the Black Thorn so that he can disarm the traps. The Black Thorn then positions himself for a backstab while Genevieve leads the charge in.
Now I follow the hallway east, where I have to fight a few Yuan-ti, and some Histachii, who are pretty easy. I then continue on, and kill a few Yuan-ti in a room to the north.
I then kill more Yuan-ti in a room east along the hallway, where I find spell scrolls for Ghost Armor and Dimension Door. Lanatir scribes the latter into his spellbook.
Just a little right of the bookcase that holds the scroll for Dimension Door is a secret button that opens a passageway to the chamber of the High Torturer. Combat is inevitable. The High Torturer is fairly easy to take down, but he is helped out by 3 Yuan-ti Champions who are pretty tough, so Lanatir chips in with single-target spells like Flame Arrow and Magic Missiles. The High Torturer leaves behind a Ring of Amplification (-20% for crushing, piercing, and slashing resistance). A nearby table has some miscellaneous treasure, as well as:
The High Baptist
Now I have an Invisible Black Thorn search for and disarm all the traps in the next room to the north. A hallway leads west and then north. There are several Yuan-ti Priests and Elites together in a fairly small room, so I go with the usual crowd-control followed by offensive spells. A throne to the north will have a Pearl Necklace, plus a Studded Leather Armor +2, which becomes a temporary upgrade for the Black Thorn.
Now I open the doorway to the east. A bunch of vanilla Yuan-ti and Histachii are here. There's nothing remarkable about this fight except for the lesson of avoiding a fight in the doorway, and retreat to a space where you have the room to surround and gang up on the monsters. The High Baptist and his minions aren't all that difficult either.
Baleful Mail and The Red Knight's Shield
There's another room to the north. I have Derrick cast Invisibility on the Black Thorn, and then he goes into the room and disarms the traps.
There are also a large number of Yuan-ti Elites, led by a Priest here. By the time the Black Thorn rejoins the party, a couple of the Elites have started to wander around and end up noticing my party. Thus, combat begins at the door. The usual recipe follows, Entangle plus Web plus Spike Growth, with Fireballs in short order.
Now the party enters the room, and there is another door to the north. There are only a Priest and a couple of Elites here. The Black Thorn sets himself up for a backstab and quick death for the Priest. A few more Elites arrive, and they are bunched together, so it is high-time for Derrick to cast Slow on them.
The room to the west has only a couple of vanilla Yuan-ti who are easily killed. The first chest by the door has The Red Knight's Shield (+4 armor class, not useable by Chaotic characters) that I set earlier. Genevieve now has her shield for much of the game.
The chests by west wall will have a few potions, as well as the Baleful Mail (armor class 3, immunity to Charm Person, Dire Charm, Confusion, Command, and Rigid Thinking, not useable by Good Characters). I'll end up selling this.
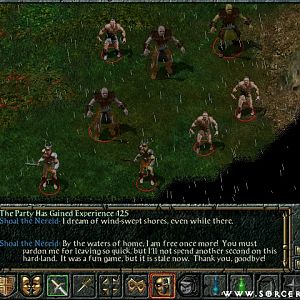
Yxunomei
Now comes the fight against the final boss of Dragon's Eye. She initially appears as the Odd Little Girl I encountered previously, but it will become apparent that she's a Tana'ari Demon known as a Marileth.
My former strategy used to consist of Hasting everybody, and then running around the perimeter trying to take out her minions, but this approach had its flaws. One was that one of her Yuan-ti Priests would often hit my party with a Dispel Magic spell. Another is that Yxunomei often starts off combat with Cloudkill. And my party is still low-level enough that the Cloudkill could kill my party members outright. So I decided a different strategy was in order.
First, I find that the crowd-control method works just as well here. Web plus Entangle plus Stinking Cloud plus Spike Stones will not only hold the Yuan-ti in place, but it will also prevent her Priests from casting spells. Halagrim can throw in a Silence 10' Radius for good measure. Fortunately, this also kept Yxunomei out of it for a long while. Lanatir pumps out both Fireball spells that he has memorized.
Now the crowd-control zone I set up won't cover everybody. So Genevieve and the other warriors move on ahead to take out the Yuan-ti who are south of the zone. There are a few traps in this room, but they aren't particularly a big deal. What is more important is taking out Yxunomei's support as quickly as I can, and this is worth not taking the time to disarm the traps first.
Once Yxunomei does manage to break out of the crowd-control zone, it is too late. All her support is gone, and I gang up on her. I get xp rewards both for killing her, and taking the Heartstone Gem.
There are several chests here, some of which are trapped, that contain various treasures, as well as randomized ammunition. The one item of interest is the Dead Man's Face (+1 armor class, immunity to Horror and Cloak of Fear, -2 Charisma), which makes for a nice interim helmet for Halagrim.
Arundel's Death
Now I head back to Kuldahar, only to find Neo-Orog Marauders going around attacking the townspeople. So I do the rounds, killing any Orogs I find.
Now I go back to Arundel's home, only to find an imposter impersonating him before he teleports away. I go upstairs, to find that the real Arundel is mortally wounded. He directs me to go to the Fortress of the Severed Hand. He leaves behind the Staff of Nature's Wrath +1 (can cast Entangle or Flame Strike with limited charges). I'll just sell it.
Now it is time to start chapter 3.