-

- Forums
- Chatrooms
- Gallery
- Gameplay Videos
- Upload
- Articles
- Mod Reviews
- Shop SP: Games, Movies, Books
|
|
Black Raven Monastery | Underdark | Drider Lair | Z'hinda Citadel
Those foolish, arrogant monks! Their laws and their codes made them what they were, and destroyed them in the end
We arrived at the monastery to find ourselves in the midst of a power struggle among the monks - fueled, and possibly even begun, by an emissary sent from the Legion of the Chimera. We revealed his treachery to the monks' leader, Aruma, only to learn that she herself was firmly in the palm of the legion. When she attacked us, the so-called ethos of the other monks demanded that they come to her aid - even though she had already betrayed them!
Then, shortly after being thanked by that duergar-worm Barud for solving his problem with the monks, he too turned on us. Still, it seems only fitting that he chose a tomb for the site of his own demise.
Alia Shield-Maiden, the Annals of Halgren
 When you first enter the Underdark you will be approached by a drow named Malavon Despana. He says he has an offer to make you, and invites you into his camp, promising you that it is safe. Once you accept, youll be escorted inside the drow camp where you will meet Kadresh Olonrae and Viizra Aribani. It would seem that this small camp of drow are having a problem with some driders: drow that have been transformed into spider-like monstrosities. The driders, led by Malavons sister Ginafae, have turned against the drow and have slowly begun taking over strategic positions within the Underdark. Not only does this prevent the drow from exerting and expanding their influence, but it will prevent your passage as well. Additionally, the driders have formed an allegiance with the Legion of the Chimera, further strengthening their position. Malavon requests that you and your party seek out and remove the drider threat. Malavon also asks that you try to convince his sister, Ginafae, to return to the drow camp.
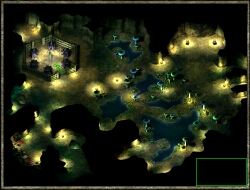
Malavon, Kadresh and Viizra all sell various items and healing. Most of the items are quite expensive, but you just might find a thing or two that you like. However, they wont buy much from you. If you speak with Viizra, she might give you a warning about a group of drow assassins hidden somewhere in the cavern. Kadresh can tell you a little bit more about the area, such as some merchants to the south, and a group of Mind Flayers who have moved into an old drow citadel to the west. He also suggests that you explore the area closely - treasure from countless battles over the years can be found throughout the region. There are, in fact, three very small areas inside which you can find some hidden treasure: in the north central, south central and east central regions of the map. You should find some magical arrows, a Wand of Bulls Strength, and a Wand of Cure Moderate Wounds.
Merchants of the Underdark
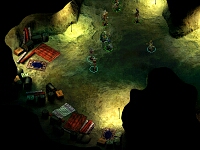 If you need to empty out your inventory, or are simply looking to make some purchases for your party, then head south from the drow camp. Take care as you move about the area; packs of spiders will occasionally jump out at you from darkened corners. When you reach the caverns directly south of the drow camp, youll find three very different merchants: a derro named Myrvek, a drow by the name of Wode the Guileful, and Heggr Splitsteel, a dwarf. The shifty guy standing beside Wode is Valas Rorstarr, her bodyguard. None of these merchants is particularly pleasant, but with their inventory they dont really have a need to be; you can find some very good, and very expensive, items here. Each of the merchants specialises in a certain types of items, so speak to each one in turn. Be careful that you dont upset them though - theyre all rather touchy and can get angry at the merest slight. In particular, Heggr is sensitive about the company he keeps, and either a dwarf or duergar talking to him about his companions can easily make him feel threatened enough to attack.
Eventually, you may wish to provoke the merchants into a fight - depending on your partys alignment, of course. It would be best, however, if you wait until you are just about ready to leave the Underdark before provoking them. And, as stated earlier, its not hard to get them angry at you. If you do end up having to fight them all, be prepared for quite the haul! Among other items, you should find: a Ring of Fire Resistance, Quarterstaff +2, Amulet of Protection +1, Leather Armor +2, Ring of Knowing, War Hammer +3, Sling +1, Sparking Bullets +1, Spear +3, Light Crossbow +2, various scrolls and ammunition. Dont forget to check the chests and containers behind them either.
As you continue along through the area, youll soon meet a Mind Flayer named OinchackOlp, accompanied by its thralls. Like most Mind Flayers, OinchackOlp doesnt have a very high opinion of humans or humanoids in general. He does, however, happen to have a use for you. Very bluntly, he tells you that he has lost a blue stone somewhere around here, and he figures that the Driders have picked it up. He wants it back, no ifs, ands or buts. Oh, and he says hell give you something.
 When you return with the Blue Stone, which you'll find in the drider lair shortly, you can either give it to him, or refuse to give it back to him. Giving it to him is the simplest route, and will net you the Mercykillers Belt (3900 xp for returning the stone). If you refuse to return it, OinchackOlp curses you, tells you that you will regret this and then he and all of his thralls attack you. This isnt an overly difficult fight, as long as you are prepared for it. The Mind Flayer will try to dominate each member of your party, one by one. Luckily there are several spells that will prevent or remove this effect, such as Dispel Magic, Restoration, and Chaotic Commands. Also be aware that some of the thralls are invisible; there are at least three Duergar Thrall Fighters also nearby but currently invisible. If you dont get to the Mind Flayer quickly, when the battle starts to go against him he transports himself away. In addition to keeping the stone (Incandescent Blue Ioun Stone) you will receive 3900 xp for refusing to give the stone to OinchackOlp.
Drow Assassins
Just north-west of the drow camp, right above the wall, is a small open corner. Although you cant see them, there is a group of drow assassins waiting to jump you here. They will wait until you are well within this small alcove before revealing themselves, and then they attack. They arent particularly difficult, although they will try to single out your weakest party member first. If the drow use this tactic against your party, you may find that Otilukes Resilient Sphere is a very useful spell at this point. Casting the spell on the party member they have singled out (usually a thief, wizard or monk) will keep that character alive, while the assassins continue to bash away at the indestructible sphere. These drow are fairly well equipped; from them you can loot some Chainmail +2, a Cloak of Displacement, a Flail +3, and the Buckler of Denial.
The Driders
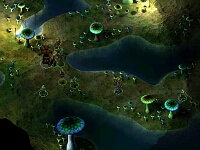
You will find the entrance to the driders lair in the central east portion of this area. In fact, there are three entrances: north, central, and south. But first, you have to get past the guard. There are two Driders waiting for you here: Sorn and her brother, Nadal. Its very rare that you will be able to speak with any driders, so you should take advantage of this opportunity.
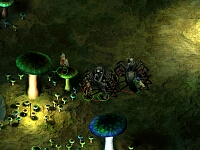 Sorn does all the talking for the pair; Nadal merely hisses and snarls at you. Sorn tells you that this is Drider territory, and you must leave the area immediately. Depending on who in your party is speaking with her, you may have several options, one of which is to attack them outright. Characters with good Bluff and Diplomacy skills in particular will have several options available to them. Asking about an object that turns drow into driders could land you in a fight, unless you have good Bluff skills. If youre successful, you will be able to learn about the Viciscamera, and its creator, Imphraili the Transmuter. Mentioning Malavon Despana at any time will cause them to immediately attack you. You can also ask about their allegiance to the Legion of the Chimera. Again, you will be attacked unless you can talk your way out of it by asking to speak with the Driders leader, Ginafae. You may also be able to convince Sorn that you are an emissary delivering some reagents to Imphraili the Transmuter, in which case she tells you how to find her. Since you can only pursue one of these conversation threads, choose wisely before proceeding! If at the end of your conversation Sorn and Nadal decide to attack you, someone with good Intimidate skills can threaten them and they just might leave you alone.
When you are finished with Sorn and Nadal, whether you fought them or talked your way out of it, you will see three entrances to the Driders lair. Each entrance will place you on a slightly different location on the next map. The north entrance will get you closest to Ginafae, and the central entrance is closest to Imphraili. And, as Sorn might have told you at the end of your conversation with her, every drider you meet from now on will be hostile towards you. So, when youre ready, head on to the next area: the Drider Lair.