Baldur's Gate 2 Online Walkthrough by Montresor


CREATING A CHARACTER  |  GENERAL TIPS AND TRICKS  |  NPCs  |  ITEM LISTS  |   SHOPS   
Shadows of Amn: Chapter 1  |  Chapter 2  |  Chapter 3  |  Chapter 4  |  Chapter 5  |  Chapter 6  |  Chapter 7  
Throne of Bhaal  |  Watcher's Keep  
About the Walkthrough  |  Organization of the Walkthrough  |  About the Maps  |  About the Author  |  Where to Begin
Disable all ads!

Overview of Chapter 5  |  Quests in Chapter 5 
Areas in Chapter 5
The Underdark  |  Adalon's Lair  |  Ust Natha  |  The Beholder Dungeon  |  The Mind Flayer Dungeon  |  The Kuo-Toa Dungeon  |  The Exit Area  

THE UNDERDARK

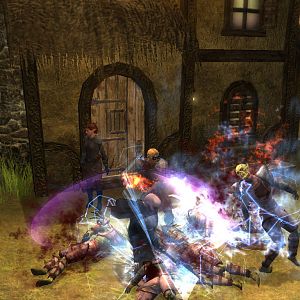
No matter whether you take the portal in the Asylum or you try to travel back to Amn with Saemon Havarian, you end up in the Underdark. Your task here is to follow Irenicus and Bodhi, and hopefully find your way back to the surface!

  1. This is where you arrive in the Underdark.

  2. Here you may be attacked by a single Kuo-Toa. He drops a Crossbow, about 40 Kuo-Toa Bolts, and minor treasure.

  3. Here you will meet three Svirfneblin, or Deep Gnomes, called Carlig, Uder Mordin, and Finderlig. Give them reasonably nice answers, and they will tell you that Irenicus and Bodhi have come by and that they have entered the Drow City of Ust Natha at 27.

    Carlig has a shop with some mundane weapons and armor and a variety of scrolls. Click here for shop inventory.

    Speak to Uder Mordin a bit, and he will tell you about a Mage who was Imprisoned somewhere in the vicinity. Buy a Scroll of Freedom from Carlig and let one of your Mages use it from a Quick Item slot and you will release the Mage at 7.

  4. Here is the Air Elemental Gate. As long as you are within sight and you haven't released Vithal, it releases a steady stream of Air Elementals.

  5. Here is the Earth Elemental Gate. As long as you are within sight and you haven't released Vithal, it releases a steady stream of Earth Elementals.

    This is also where Vithal meets you after you have fetched his Book of Rituals.

  6. Here is the Fire Elemental Gate. As long as you are within sight and you haven't released Vithal, it releases a steady stream of Fire Elementals.

  7. Use a Scroll of Freedom anywhere in the Underdark area, and the imprisoned mage Vithal will be released here. He gives you Vithal's quest.

    If killed at the end of the quest, Vithal drops Scrolls of Incendiary Cloud, Wail of the Banshee, and Time Stop, along with the Skull of Death.

  8. Here you will run into a Drow war party with a couple of Priestesses and a couple of Mages. You should find a Drow Full Plate +5, some Drow Elven Chain +3, and a Drow Long Sword +3 among the loot.

  9. Click six of the sides of this sphere to release various enemies. Taken from left to right:

    (x=1840, y=1870): Releases Madman Aganalo, a mad fighter who just insists on fighting you... His attacks can cause a short bleeding. He drops Jhor the Bleeder +2, which explains the bleeding.

    (x=1860, y=1940): Releases Raevilin Strathi, a Mage who also insists on fighting. Besides a Quarterstaff, he drops Scrolls of Summon Efreeti and Conjure Earth Elemental.

    BUT: If one of your healers can cast Heal (6th level Cleric spell) on him after he goes hostile, he will regain control of himself and leave peacefully after giving you the Bastard Sword Albruin +1. The party gains 15,000 XP for this non-violent solution.

    (x=1920, y=1930): Releases Giti, a Githyanki warrior. You already guessed that he wanted to fight you, right? He drops the Spear +3 Backbiter (watch out; it's cursed!), a Scroll of Improved Haste, and mundane items.

    (x=1990, y=1920): Before clicking this, prepare for a difficult battle. Out comes a Lich, Alchra Diagott, and yes – he insists on fighting you! He puts up several protections before trying to get off a Time Stop spell. When he goes down, he leaves behind Scrolls of Delayed Blast Fireball, Spell Turning, and Summon Nishruu.

    (x=2030, y=1890): Releases Bedlen Daglefodd, a young Svirfneblin who got himself Imprisoned by accident. He thanks you profusely before leaving. This is part of the solution to the Free the Svirfneblin Boy quest.

    (x=2030, y=1850): Releases Gont of Riatavin, a fighter who can easily be talked into leaving peacefully. If you do so, he will tell you a bit about the area's layout. He drops nothing extraordinary and is only worth 7,000 XP anyway.

  10. Here are three Spore Colonies and a Myconid King. Try to have Chaotic Commands on as many party members as possible in order to avoid their Confusion spells.

  11. In this enclosed area are three Mind Flayers. You can't get in here but somehow they can get out. If they spot you, they will leave and shortly after attack from the east.

  12. Here is where Solaufein will meet you in connection with the Teach the Deep Gnomes a Lesson quest.

  13. Here is the exit to the Kuo-Toa Dungeon.

  14. Here is a bridge leading into the Svirfneblin settlement. Give the guard any reasonable answer to be allowed to enter peacefully.

  15. In this room you will meet Goldander Blackenrock. He offers you a quest to rid the settlement of a dangerous creature they have awoken from the deep.

    Too deep we delved there, and woke the nameless fear! :-)

    By all means accept. In return for your service, he promises you a Light Gem that allows you to enter Adalon's Lair at 26. Adalon is a creature – Goldander is a bit vague on the details – who can apparently help you find Irenicus.

    When you return from the battle, Goldander gives you the Light Gem and the Skullcrusher +3. Nice item which you could have used a bit earlier – like BEFORE he sent you to battle a creature that takes +3 weapons to hit!

    None of the numerous chests and closets in this room contain more than minor treasure.

  16. Here is Therngle Dagleford who will want you to find his missing son, if you didn't release him already. The missing son can be liberated from the imprisonment sphere at 9. Report back to Therngle for 10,000 XP and a pair of Bracers of Defense AC 4.

    Therngle also has a well-stocked shop. Click here for shop inventory.

  17. The Innkeeper sells lodgings if you wish to rest in a safe place. You also need to ask him for the Book of Rituals that you need for Vithal's quest.

  18. Here is where you have to fight a Balor for Goldander Blackenrock. Prepare for the battle (Protection from Fear, Haste, whatever), then click the hole to make it appear. You'll need +3 weapons to hit the abomination, so make sure you have such weapons. Also, try to have Free Action on your characters, as the Balor will try to cast Paralyzation spells on them.

    Once you have killed the Balor, use the Stoneshape scroll Goldander gave you to seal the entrance once and for all.

  19. After you have cleared out the Mind Flayer Dungeon, you will meet Simyaz and his Githyanki friends here. They demand that you give them the Silver Blade – and if you do that, they *still* want to fight you! Besides the Silver Blade (if you gave it to them!) they drop nothing of note.

    NOTE: I have sometimes found that after killing the Giths, I couldn't find the Silver Blade on their bodies. Which is of course annoying if you are planning to have Cromwell forge the Silver Sword, or if you just wish to give it to Kruin when you get back to Athkatla. If this happens, you can create the Silver Blade from the CLUAConsole by issuing the following command:

    CLUAConsole:CreateItem("misc8u")

    Please see here for information on activating and using the CLUAConsole.

  20. This bridge is guarded by a large group of Kuo-Toa, including a couple of Kuo-Toa Priests. Beware Confusion and Domination spells. You may also want to avoid fighting them all at once.

    The loot isn't fantastic but you should find some Kuo-Toa Bolts.

  21. Here is where Solaufein will meet you in connection with the Rescue Phaere quest.

  22. Here is the entrance to the Beholder Dungeon.

  23. Here is the entrance to the Mind Flayer Dungeon. Before you enter, you'll want to prepare a bit. Make sure your Clerics and Druids have memorized a few Chaotic Commands spells. Once you enter, you'll have to fight your way past several Mind Flayers and Umber Hulks to get out again, and Chaotic Commands protects against their Paralyzation, Domination, and Confusion attacks.

  24. The first time you leave Ust Natha, on your way down to meet Solaufein at 21, you will be attacked here by a war party consisting of a Priestess called Chandrilla, a Kobold named Simbja, an Imp called Pitch, a Mage called N'ashtar, an Ogre Fighter called Boz, and a Thief called Damien. Besides plenty of mundane items and minor treasure, Boz drops the Dragon's Breath +4 Halberd and Damien drops a Potion of Healing and some Potions of Invisibility. N'ashtar drops a Scroll of Abi Dalzim's Horrid Wilting and two Potions of Icedust.

  25. The first time you try to pass this bridge, a Drow war party teleports in and attacks.
    Among the loot is Drow Full Plate +5, Drow Long Sword +3, Drow Crossbow of Speed, Drow Bolts +1, and Drow Bolts of Stunning.

  26. Here is the entrance to Adalon's Lair. You need the Light Gem that you get from Goldander Blackenrock at 15 in order to enter here.

  27. Here is the entrance to the Drow city of Ust Natha. You can only get in if your party is disguised as Drow. Adalon will take care of that when you get her quest to rescue her eggs.

    In order to enter, you need to answer the guard correctly. Answer firmly that you are Veldrin of Ched Nasad. If Viconia is in your party, her first-hand knowledge of the Drow comes in handy.

    Giving a humble answer like "I beg you to let me enter" or a patently stupid answer like "I am [CHARNAME] from the lair of Adalon" will turn the Drow hostile, and you will have to fight your way through Ust Natha to get Adalon's eggs.


Amazon.com
Amazon.ca
Amazon.co.uk
Sorcerer's Place is a project run entirely by fans and for fans. Maintaining Sorcerer's Place and a stable environment for all our hosted sites requires a substantial amount of our time and funds on a regular basis, so please consider supporting us to keep the site up & running smoothly. Thank you!

Disable all ads!