-

- Forums
- Chatrooms
- Gallery
- Gameplay Videos
- Upload
- Articles
- Mod Reviews
- Shop SP: Games, Movies, Books
|
|
Origins | Ostagar | Lothering | Circle Tower | Warden's Keep (DLC) | Return to Ostagar (DLC) | Stone Prisoner (DLC) | Brecilian Forest | Redcliffe | The Urn of Sacred Ashes | Orzammar | Deep Roads | Denerim | Final Onslaught |
Village of Honnleath | Wilhelm's Cellar | Shale |
WILHELM'S CELLAR
Wilhelm's Special Brew
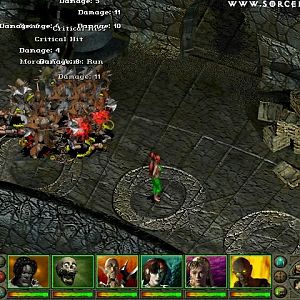
The first fight is a room that, contrary to initial appearances, has a LOT of Darkspawn. So Aldarion opens the door and blankets the room with Tempest plus Blizzard, as well as an Earthquake from Wynne. The party hangs back in the hallway leading to the door and allows things to take care of themselves. Once I actually enter the room another wave arrives, but I kill them rather routinely. Towards the end of the video I find a gift for Oghren, Wilhelm's Special Brew.
Matthias
For the next fight, let's just say I'm not eager to climb up the stairs and into the waiting arms of the Darkspawn. So Alistair goes on ahead to lead some of the Darkspawn down the stairs. I then kill them off easily. This effectively cuts the Darkspawn force in half. It is afterwards that I charge forward. Aldarion gets the Genlock Emissary with a Crushing Prison. He, Alistair, and the Wolf then make taking out the Emissary the first priority. It becomes a mop up after that.
The video concludes with Aldarion speaking with Matthias, who gives the quest to find his daughter.
Journal of Enchanter Wilhelm
I go ahead through a tunnel, which has a few Strange Crystal Clusters that act as containers for crystals that Shale can equip. The higher the level when you come here, the better the crystals you find.
I then enter a room that has several Shades and a Dust Wraith which are going to come after me from several angles once I trigger their appearance. I am able to outlast them in physical combat. The Dust Wraith leaves behind the Harvest Festival Ring (+2 Strength, +2 Dexterity, +4 attack). This will be one of Leliana's rings for the balance of the game, due to its obvious benefits. Note that the +2 Strength will allow her to equip one of the most powerful weapons in the game.
I continue on through another tunnel with more Strange Crystal Clusters.
Kitty
Here is where you have a roleplaying choice, whether it is to free Amelia from Kitty, kill Kitty but doom Amelia as well, or let Kitty possess Amelia. The rewards vary depending on the choice you make. Falling in with what Kitty wants would lead to Kitty rewarding me with Wilhelm's Magus Staff (+3 Willpower, +25% fire resistance, +10% fire damage, +10% electrical damage). I chose to free Amelia, partly because I prefer that as a roleplaying choice and partly because I prefer different items from the staff which I will describe below. A reliable way to do it is to lie to Kitty and pretend you're going to go along with what she proposes.
The first step is the puzzle to dissolve the wards. The solution is to line up the tiles so that the flames gout from one corner, to the next corner, and then to the corner opposite from where the flames start, forming 'half a square' so to speak. The video from 2:40 to 6:40 shows an example of how to do this. Aldarion immediately switches over to his staff once the puzzle is completed.
Once that is done I recant on my acceptance of Kitty's offer, so combat naturally ensues. Kitty is a Desire Demon that can cast highly damaging spells, and will be supported by several Rage Demons. Aldarion immediately hits the Desire Demon with a Crushing Prison. He then positions himself so that he can nail both the Desire Demon and as many Rage Demons as he can with a Cone of Cold. Keep in mind that Rage Demons are especially vulnerable to cold damage, so I use that to my advantage to get rid of them as quickly as possible. The rest of the fight becomes much easier after that.
I then loot from Kitty:
Dulen Harn
On the way back to Matthias will be fights against more Shades that aren't difficult. Matthias then gives me an xp reward and the proper command phrase for the Golem outside. Note that if you had sided with Kitty, you could trick Matthias into thinking that the possessed Amelia is truly the daughter he knew, and still get the xp reward and command phrase. The repercussions of how you choose to deal with Kitty and Amelia are what items you get as a reward, and your companions' approval. Alistair, Leliana, and Wynne approve of freeing Amelia from Kitty's grasp, but would disapprove of falling in with Kitty's request. Morrigan would be the exact opposite on both choices.
Now it is time to wake up Shale.