-

- Forums
- Chatrooms
- Gallery
- Gameplay Videos
- Upload
- Articles
- Mod Reviews
- Shop SP: Games, Movies, Books
|
|
Severed Hand, Level 1 | Severed Hand, Level 2 | Severed Hand, Level 3 | Severed Hand, Level 4 | Four Towers | Ilmater Ritual | Final Battles
We have reached the uppermost main floor of the hand, and still we must go further. There are four smaller towers that continue on from here; within one we should find the unfortunate envoy who delivered the offending pastries to Isair and Madae so long ago. What strangeness, that a war could be started by such small things. Surely there has never been a more mighty baker than the one who concocted those ill-fated treats!
Alia Shield-Maiden, the Annals of Halgren
CHAPTER 6: THE FOUR TOWERS
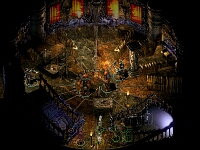
War Tower
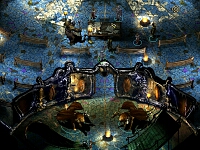
You will have to visit the War Tower at least twice, and probably three times. On your first visit, you can free the prisoners who will give you a number of additional quests. One of these - from the priest of Ilmater, Toral Sorn - is essential to advancing the game, so you should make this first visit to the War Tower as early as possible. Having completed one or more of these quests, you should return to get the experience points you have earned. The War Tower is also your starting point for the final showdown with Isair and Madae; once you enter its top floor to attack the envoy from the Cabal of Dragonkin, you will not be able to leave again.
 When you first enter the War Tower, you will find yourself in a prison area. Its clear you are not supposed to be here; you will be attacked immediately by three elite neo-Orogs, 2 elite half-goblins, and a Greater Feyr. The key you will need to release the prisoners is on the table nearby.
The Priest of Ilmater, Toral Sorn, is in the cell to the far right. He will tell you about the Ilmater Sanctification Ritual, which you can use to weaken Isair and Madaes grip on the Severed Hand. It will turn the stagnant waters running through the building back into elven holy water. You can then take some of this holy water and use it to purify the radiant pool that Isair and Madae use as their source of power. Even then, the benefits of this ritual will not be complete. Once you have tainted the pool, the Globe of Essence will weaken to the point where you can destroy it. This will make the Glabrezu Guards lose their immortality so you can permanently destroy them, freeing the slaves.
To perform the Ritual, Toral Sorn tells you, you will need an Ilmater Holy Symbol, a Tome of Ilmater, the Bonds of the Faithful, and some Tears of Suffering. Fortunately, you can find all of these in the building. The Ilmater Holy Symbol is in the southernmost room of the third floor in the Primary Tower, and indeed you probably already have it in your inventory by this point. The Tome of Ilmater is in the Wizards Tower library. Toral Sorns own Bonds of the Faithful were removed during a torture session, and you will find them just upstairs on the second level of the War Tower. As for the Tears of Suffering, Toral Sorn suggests you obtain them from a suffering slave. Jerre Stoh, the slave foreman on the first floor, will be only too glad to offer his tears for Ilmater. When you have completed the ritual, you can return to inform Toral Sorn for 750 xp.
In the cell to the far left, you will find the unfortunate envoy who delivered the tainted gifts to Isair and Madae. Puddy Talltale will provide a substantial experience point reward for freeing him, but asks you to help him find a way home as he does not think he could survive the journey on foot. Orrick the Gray, in the Wizard Tower, is the person to speak to about this. When you return from the Wizard Tower to give Puddy the good news, you will get 4950 xp. Next to Puddy, in the same cell, is an unfortunate named Carl. Presumably as a result of his imprisonment and torture, Carl is irretrievably insane, and trying to talk to him can drive you crazy too. There are no quests or rewards for pursuing conversation with Carl, so you might as well just leave the poor fellow alone.
In the center cell, you will find the archimandrite from the Black Raven monastery, Ormis Dohor, with a handful of his monks. He has been cursed with a spell that has transformed him into the form of a lemure. Tyrannar Brutai Mar, in the cleric tower, has the antidote. If you obtain it for Ormis, not only will he reward you with 1500 xp, but he will bring his monks to your aid in the final battle with Isair and Madae.
War Tower Level Two
 The second level of the war tower is the torture chamber. Here you will encounter four lemure slaves, a wight lemure slave, Pustule the Sick (who is surprisingly hardy) and the torturer, Harcourt Rustblade. You wont get much information out of any of them before a fight breaks out. It is worth taking out Pustule first as he can do a lot of harm before he goes down - his weapon, Pustules Flail, does poison damage and can cast Contagion. Pustule is immune to piercing and resists slashing damage, but can be quickly subdued with a bludgeoning weapon. Be sure to pick up his flail. Harcourt presents much less of a challenge, and can be looted for the Composite Shortbow of Resistance and Vipers Fang. On a table at the back of the room, you can find the Bonds of the Faithful. There is also a cupboard that contains a random magical item.
War Tower Level Three
 On the next floor up, you will find two Greater Boneguards, two Slayer Knights of Xvim, two demon knights, a red neo-Orog, and another neo-Orog named Obbak. They are guarding a stairwell and a gate. The gate just leads to a dead end, so you can disregard it, but the stairwell leads to a rooftop where you will ambush the envoy from the Cabal of Dragonkin at the end of the game. You will not be able to get through the stairwell until you have Captain Pudus keys, which you will get from the Officer Tower when you have completed all quests and are ready for the final battles. You can talk to Obbak, if you like, but he will just tell you to come back later and talk to Stubnok. Once you do have the keys, later in the game, you can go right past these assorted monsters and up the stairs. However, theres no reason not to kill them now for additional experience if you are so inclined.
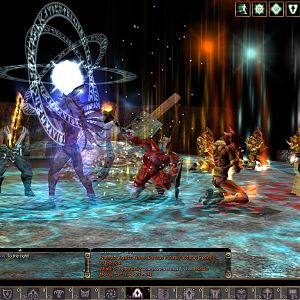
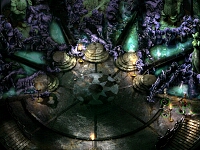
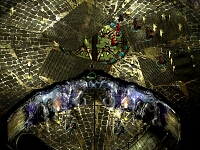
The first thing youll encounter as you cross the doorway to the Wizard Tower is the puzzle Vese Nejj may have sent you to solve. Five portals hover in the air before you, and you have to click on them in a specific order to gain access to the tower itself. If you hit the wrong portal, your entire party will take quite a lot of damage. The first time you click a correct portal, nothing happens. If you hit two correct portals in a row, a yellow line forms in the air between them. A nearby stone has instructions on it that pretty much give away the game. What you need to do is trace a five-pointed star with those yellow lines, starting from the top portal and moving clockwise. Click on the top portal, then skip the next portal clockwise and click on the second portal. Repeat this until a star hovers in the air before you, at which point you will be teleported into the Wizard Tower.
If you have a quest from Vese Nejj to solve the portal puzzle at the entrance, you must leave and report the solution to him before going around talking to people or he will think you have betrayed him and refuse to give you a reward or additional quests. You dont lose anything by returning to him at this time; you can always come back here afterwards.
Wizard Tower Level One
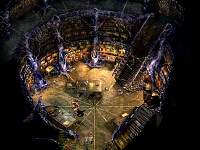
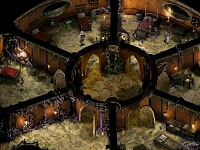
 You find yourself in a small circular area divided into 6 rooms and a central hub. The central hub contains an iron golem but he isnt hostile. There are interesting characters in each of the rooms, but the main item of interest is in the room to the west. Here you will find Orrick the Grays spellbook, which you need to complete Vese Nejjs second quest. Once youve collected this, head up the stairs to level two.
Wizard Tower Level Two
 The second level of the wizard tower is a library with an upper balcony. Here you will find two items: the Tome of Ilmater, which you will need to carry out the Ilmater Ritual, and Orricks Book of the Mythal, which you need to complete Vese Nejjs second quest. Having collected these you can proceed to level three.
 You will now find yourself in Orrick the Grays astrolab. If you are completing Vese Nejjs quest, just pick up Larrels Bones from the table to your left and leave without speaking to Orrick. On your next visit (or this one if you arent working for Vese) you will need to talk to him. He will tell you that he is researching powerful mythals (protection spells). If you tell him you have decided to stop working for Vese Nejj, hell give you further information. Specifically, he created a Radiant Pool on the third floor for Isair and Madae, but it has caused a vile growth to form all over the building. He suggests you find the priest of Ilmater, who can tell you how to taint the pool so that Isair and Madae can no longer draw strength from it.
If you return to the tower later in the game, and ask again about the progress of his research, Orrick will tell you hes discovered the mythal was bound to the plane of Limbo. He warns you that if the mythal shifts, you must flee the building immediately or be trapped forever. Once you have visited the War Tower and agreed to help Puddy Talltale find a way home, ask Orrick if he can teleport Orrick to safety. You will get 4950 xp for reporting your success to Puddy.
You dont actually need to visit the Cleric Tower until you are ready to complete the Ilmater Sanctification Ritual, and even then all you will have to visit is the first floor. However, there are a lot of good battles and useful treasure items to be found throughout the tower, so for full enjoyment of the game you will probably want to explore it fully. You will also need to visit the top floor of the tower if you want to find the antidote to help Ormis Dohor.
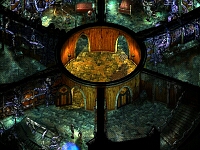
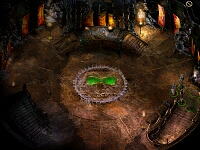
 The first level of the cleric tower is a sort of multifaith shrine, in which the statues of various other gods all cower before the statue of Iyachtu Xvim. This is where you will have to perform the Ilmater Sanctification Ritual when you have all the components. The ritual is described in its own section because you will probably not be ready to perform it on your first visit to the Cleric Tower. You can find more information here.
Unless you somehow managed to kill Yquog the Barghest Whelp back in Chapter 1, you are going to face him and three goblin whelps when you first enter the Cleric Tower. You will be much better prepared to fight him now, but you may not have to. If your Bluff or Intimidate skills are good, and if youve been collecting dead cats and people on your travels, you can try to scare him. You will get 1000 xp for flustering him with disturbing stories, bad puns, and displaying you collection of corpses, or 2250 xp if you scare him so badly with your nasty props that he flees in terror. Once youve scared off or killed Yquog and his cronies, you can head up the stairs to the next fight.
Cleric Tower Level Two
 The main feature of the next floor up is a vaguely skull-shaped teleporter in the middle of the floor. Avoid it if you can; until your entire party is equipped with Holy Symbols of Xvim, you will take electricity damage if you set foot on it. Tyrannar Brutai Mar, who has the potion needed to cure Ormis, is in this room and will use the teleporter to flee to the fourth level of the cleric tower. Around the teleporter you will also find several Hatemasters and Ruinlords, who of course will attack you on sight. There are several useful potions on a nearby table but use your Search skill before picking them up to avoid setting off a Stinking Cloud trap. You can find Holy Symbols of Xvim on the bodies of the two Ruinlords.
You should now have three Holy Symbols of Xvim; the two you found in this room, and one you picked up in the southernmost room on the third floor of the primary tower. If your party has three or fewer members, you can step into the teleporter now and it will take you to the top (fourth) level of the Cleric Tower. Otherwise, you can ascend the stairs to the third floor and collect two more Holy Symbols. The sixth symbol is on Ruinlord Garuk, back on the second floor; you will not get it until you destroy the Globe of Essence later in the game.
Cleric Tower Level Three
 The third level of the cleric tower is a place of worship, and a congregation has gathered for the sermon. This is quite a fight; none of your opponents are particularly tough but there are a lot of them. The rewards are substantial, including the Stormcaller hammer, Plate Mail +1, two Holy Symbols of Xvim, several scrolls, potions and gems. There is a staircase to the fourth floor in this room, but it only leads to a small locked room. To access the fourth floor, you must collect as many Holy Symbols of Xvim as you have party members and use the teleporter on the second level of the tower.
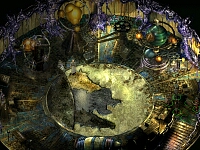
 You can only reach this level by using the teleporter on the second level of the Cleric Tower. When you do so, youll find yourself in the center of a hub with rooms all around. Tyrannar Brutai Mar immediately attacks you, calling on the ghosts of your slain enemies to assist him: Sherincal, Guthma, and Beastlord Harshom. You are at a significant tactical disadvantage at the beginning of this fight, and would be well advised to push your party through any of the surrounding doors to gain a more defensible position. You will get 1500 xp for finding the Tyrannar Brutai Mar, plus of course you can collect the antidote for Ormis to get additional experience. When youve finished, and looted all rooms (avoiding the traps on the chests), just go down the stairs to find yourself on level three of the Cleric Tower. Be sure to return to Ormis Dohor with the antidote to get your reward.
There is only one quest item in the Officer Tower, and you will not be able to complete it until nearly the end of the game. When you learn from Riki of the envoy from the Cabal of Dragonkin, Captain Pudu will be on the top floor of the Officer Tower. At this point, you can ascend to get the keys from him. If you wish to go earlier than that, all you will be able to do is start some optional fights for additional experience points and minor treasure, because Pudu will not yet be there and there are no other quests here.
Officer Tower Level One
 There are two Chimeras guarding the doors connecting the stairwell to the room beyond. Inside the room, an assortment of half orcs, half goblins, Yuan-Ti halfbreeds, Slayer Knights of Xvim, a bugbear captain, and a red half dragon gather around a neo-Orog named Sprawg for a lesson in battle tactics. It seems your delegate pass extends to this tower, because you are not attacked unless you go out of your way to cause offence. You will likely be able to get experience points for killing Sprawg, depending on the level of your party. Sprawg wields the Monkey Paw of Discipline which you can pick up after the battle.
Officer Tower Level Two
 You again find yourself outside a room in which a lesson is going on. Morvyn and Eltob are teaching martial arts and Xvimian philosophy to five Xvimians, guarded by two elite bone guards. Eltob has nothing to say, but Morvyn will attack you if you interrupt his lesson by talking to him a second time. On a nearby table you will find a Robe of Enfusing and Cloak of Protection +2. You can also pick up some good darts from one of the attack mannequins.
Officer Tower Level Three
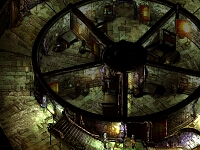 The third floor has been divided like a wheel into five rooms, in each of which you can pick up some minor treasure items: scrolls, potions, ammunition and gold. Most of them are in dangerously trapped containers so be very careful. When youve collected your loot, head on up to the fourth floor.
Officer Tower Level Four
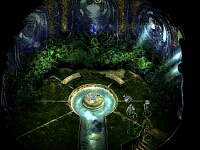 You will now find yourselves in a beautiful garden. If the envoy from the Cabal of Dragonkin has not yet arrived at the Severed Hand, the only person you will see here is a goblin named Bisbe. He is madly cleaning to prepare for the arrival of Captain Pudu and his ladyfriend Vyxein. All he is willing or able to tell you is that Captain Pudu is the Captain of the Guard at the Severed Hand. Be sure to inspect the room to collect some minor magical weapons and ammunition. If you have already been notified of the arrival of the envoy, however, Captain Pudu (a half-goblin) and his half-dragon girlfriend will be here. You may be able to use your Bluff skills to get the keys you need from him, but more likely you will have to kill them both. Once you have obtained Captain Pudus keys (1500 xp), you can go to the War Tower. The top floor, where the envoy is waiting, will now be accessible to you. See Final Battles for more.