-

- Forums
- Chatrooms
- Gallery
- Gameplay Videos
- Upload
- Articles
- Mod Reviews
- Shop SP: Games, Movies, Books
|
|
Severed Hand, Level 1 | Severed Hand, Level 2 | Severed Hand, Level 3 | Severed Hand, Level 4 | Four Towers | Ilmater Ritual | Final Battles
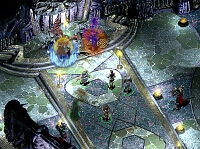
The Legion of the Chimera will no longer receive the aid of Iyachtu Xvim. During the ritual that would remove his taint from this place, Xvim himself appeared before us to prevent the completion of the ritual. Soon after his appearance, we were surrounded by a small army of demons, come to the aid of their master. But by the strength of our blades and the will of Tempus, we have finally rid this place of that fiend. With Xvim removed, we were able to deal one more blow to the demonspawn by destroying the globe of essence.
And now we move to the very top of the Hand to confront yet another group who would join with the Legion of the Chimera. Perhaps we will be able to convince them otherwise, as we convinced Xavier Torsend to put the Legion behind him. If not, then once again our blades must speak for us.
Alia Shield-Maiden, the Annals of Halgren
When you report back to Riki after either the successful completion of the Ilmater Ritual or your alliance with Iyachtu Xvim, she will tell you that an envoy from the Cabal of Dragonkin has arrived on the roof of the War Tower and intends to meet with Isair and Madae. This must not happen; you will have to intercept them. To access the rooftop, you will need a key held by Captain Pudu in the Officer Tower.
Captain Pudu's Key
 On the top level of the Officer tower, half-goblin Captain Pudu may be found in a tete-a-tete with his half-dragon girlfriend Vyxein. You may be able to use your Bluff skills to get the keys you need from him, but more likely you will have to kill them both. Captain Pudu is by far the tougher of the two so take him out first. Once they have both been dealt with, pick up the key, some half-plate armour, and Gauntlets of Weapon Expertise from Pudu.
Once you have obtained Captain Pudus keys (1500 xp), you can go to the War Tower for the confrontation with the envoy. Be warned that this is the first of two final battles, and once you enter the top floor of the War Tower where the envoy is waiting, you will not have an opportunity to leave. Be sure to visit Riki to stock up on any ammunition or other items you will need, and memorise the spells you will want handy for the first confrontation.
The Envoy from the Cabal of Dragonkin
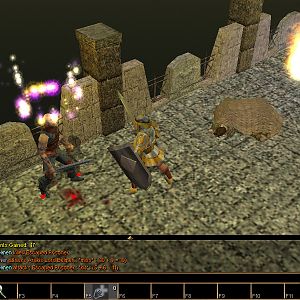
 When you return to the War Tower, you will find that your key unlocks both the gate and the door to the stairwell. The gate leads nowhere so disregard it and go up the stairs. There you will meet the envoy and its escort guards: the half-dragon Nalakora, two unnamed half-dragons, a Slayer Knight of Xvim, a red wizard, a half orc, a neo-Orog priest, and a Slayer Knight of Xvim named TRsosl Malign. Nalakora expresses concern that a second group of escort guards - or so she assumes your party to be - has appeared. The legitimate guard leader, TRsosl Malign, responds by promptly attacking your party.
The neo-Orog priest and Nalakora will be your toughest challenges in this battle so try to take them out first. The two Slayer Knights of Xvim will be the next toughest. The others will not present much of a threat and can be dealt with later. You will be able to pick up some interesting treasure from the corpses, including the School Cap, Gauntlets of Weapon Expertise, and Flaming Burst Mace of Disruption. Unfortunately you wont have an opportunity to sell them, but you should be able to find a use for them among your party members.
As soon as you descend from the roof, you will be taken to Isair and Madae, so take the time to sort out your spellbook and rest before leaving for the final battle.
 When you go back down the stairs to the fourth level of the War Tower, you will be met by a wizard named Buvai deNaly. He has instructions to take you to Isair and Madae and will not take no for an answer. You will get 2250 xp for finding Isair and Madae before the fight begins.
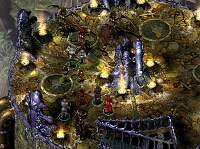
You will find yourself at the feet of the thrones on the third floor. Isair is sitting in the throne to the left, and his sister to the right. Behind them is the wizard Mourn Torgh. Flanking your part to the left is Zilvar Torgh, and to the right is Serak. Also in the room, but invisible, are Tilzen Ghaun, Phaen Xyltin and Buvai deNaly. If Ormis Dohor agreed to help you, he and four monks will teleport in behind you to provide an effective rear guard. Although it makes little difference this late in the game, you will get the experience for any kills his group makes, as if they were creatures you had summoned.
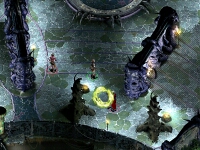 Buvai deNaly will cause your party a lot of grief if you dont find and deal with him as quickly as possible, because he can summon very high-level creatures faster than you can kill them. He is to the right of the battle, hiding behind a wall. The summoned creatures you see appearing are his work. While the main force attacks Isair and Madae, send at least one character to take him out. He is not difficult to hit, and a high-level rogue can probably take him down to almost dead with one good sneak attack.
The main thrust of your attacks, of course, should be Isair and Madae. More specifically, you should focus on one or the other and do as much damage as you can. They are both quite hard to hit, partly because they are protected by a number of powerful spells. Isair is usually protected by Fire Shield and Seven Eyes, and inflicts cold damage. Madaes favorite spells include Blasphemy, Divine Shell, Iron Skins, and Protection from the Elements. As a result, she is more or less immune to electricity and they are both highly resistant to fire damage. Electricity will damage Isair at least the second time it strikes him, since Seven Eyes only protects against the first attack of a particular type. Acid also works reasonably well against both of them, although Isair can evade thrown spells such as Vitriolic Sphere. You may want to save your spells until their protections have worn off, near the end of the battle. Watch carefully as the battle progresses to determine which of your party members are successful in hitting them. Anyone who consistently fails to do so should be delegated to attacking other enemies such as Mourn Torgh.
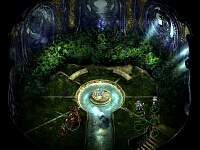
When one of the twins is damaged to Hurt, the two of them teleport away to the radiant pool. You will need to follow them to complete the battle, but you should take the time to heal your party members first. You may also want to loot the corpses littering the room in case you can find something of use to your party; of particular note is the bastard sword +4, the Robe of the Evil Archmagi, and rings of protection you will find on Mourn Tough. Unfortunately you wont be able to rest. As soon as you leave the throne room, you will be teleported to the radiant pool.
Isair and Madae are waiting near the pool, and if you purified it earlier in the game, they will not have been able to use it to heal themselves so they will still be in the same condition in which they left the battle. Fortunately, their spell protections should have worn off by now, so they will be considerably easier to hit. They have a few henchmen with them, including two Slayer Knights of Xvim, but none should distract you from finishing the twins off as quickly as possible. Continue focusing your attention on the twin you managed to Hurt before, because your goal is to get him or her down to Almost Dead. When this happens, Orrick the Gray will appear to tell you that the Severed Hand is shifting to the plane of Limbo, and you must flee or be trapped here forever. At this point, you will get 7425 xp for defeating Isair, Madae and the Legion of the Chimera. You must run to the stairwell now to flee the game. As soon as you make it to the stairwell, you have won the game. You have saved Icewind Dale- again!