-

- Forums
- Chatrooms
- Gallery
- Gameplay Videos
- Upload
- Articles
- Mod Reviews
- Shop SP: Games, Movies, Books
|
|
Origins | Ostagar | Lothering | Circle Tower | Warden's Keep (DLC) | Return to Ostagar (DLC) | Stone Prisoner (DLC) | Brecilian Forest | Redcliffe | The Urn of Sacred Ashes | Orzammar | Deep Roads | Denerim | Final Onslaught |
Deep in the Wilds | Leliana and Sten | Lothering | Lothering Chantry | Chanter's Board | Leaving Lothering | Camp |
LELIANA AND STEN
My immediate priorities upon entering Lothering are to get Leliana and Sten as companions.
Bandits on the Road
When you first arrive, you will of course get waylaid by bandits. I chose the dialogue option that goaded all of the bandits into attacking me, in order to get the most xp out of it. Here I demonstrate a common tactical motif; Morrigan starts off with Mind Blast to hold everyone in place, so that Aldarion can get them all in a Cone of Cold. He then follows up with a Shock spell on the same Bandits that have been frozen in place. Now the key here is to try and kill the regular bandits as quickly as possible to isolate the leader. Aldarion and Morrigan proceed to pick off the weakened regular Bandits with single-target spells. At some point, the Leader begins to target Aldarion so he has to use a Lesser Health Poultice. Nonetheless, I am able to get rid of all the regular Bandits before bringing down the Leader himself to near death.
I then show how to extract the maximum benefit. Aldarion obliges the Leader to hand over everything the Bandits have stolen over to the party. This includes at least a gold crown, as well as a magic ring, the Surveyor (+1 Willpower). I will ultimately have Oghren wear it, but it does make for a nice interim ring for Aldarion in the meantime. I then kill the Leader for a little more xp. The video concludes with the party looting a couple more crates.
Next Steps
Here is a cutscene of Aldarion discussing the next course of action with Alistair and Morrigan.
To the Dane's Refuge Inn
Here I go around getting whatever random items I can find, engaging in a few inconsequential dialogues, and gradually making my way to the entrance to the Dane's Refuge Inn.
Leliana Joins
Now I enter the Dane's Refuge, and it's time for Leliana to enter the stage. A fight against Loghain's men is inevitable. I again repeat the tactical motif of Morrigan whipping out Mind Blast right away, so that Aldarion can take aim with Cone of Cold followed by Shock. Aldarion knows he will have earned a lot of 'aggro', so he immediately thereafter protects himself with Force Field. This buys time for Max and Morrigan to take out the other Soldiers, while Alistair keeps the Commander busy. Soon only the leader is left, and he's brought down quickly. He begs for his life, but I kill him for the xp.
Leliana now joins my party. Max the Mabari Hound is out since, as I've explained during his profile page, I regard him as a marginally useful companion. By comparison I've been starving for a Rogue ever since I first went to Ostagar. I take the time to loot some of the containers around the Dane's Refuge. I then equip Leliana with items that I've been saving up for her, including a bow, Enchanted Daggers, and leather armor pieces.
The Qunari Prisoner
The video begins with heading north from the Dane's Refuge, and listening in on an argument between a few locals and some Chasind Barbarians who had to flee Darkspawn troubles to the south.
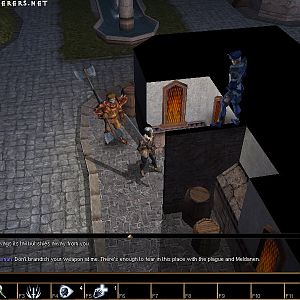
There will be a cage a little north and west of where the Chasind had been. Inside is a Qunari warrior named Sten, who is rather melancholy and resigned to his expected fate. I promise to gain his freedom for him in exchange for him seeking redemption by helping me against the coming Blight.
There are multiple ways to go about securing Sten's freedom. I could pick open Sten's lock and make off with him then and there.
Instead I head into the Chantry, which is towards the southeast corner of Lothering. In the northeast corner of the Chantry itself will be the Revered Mother. Incidentally, at 6:45 of the video, I show a book called the Imperial Chantry that can be clicked on for a Codex entry and 50xp. At any rate I need the Revered Mother's permission to release Sten and obtain the key to his cage. There's more than one way to secure the release during dialogue.
Firstly, the Revered Mother will ask for a donation. The larger a donation, the more likely a Persuasion or Intimidation check is to succeed and convince the Revered Mother to hand over the key to Sten's cage.
Another way, in the event that you didn't donate enough and didn't make a skill check, is to threaten physical violence to the Revered Mother so that she hands over the key. This course of action will win approval with Morrigan, but lose it with Alistair and Leliana.
However, as shown in the video, it's so much easier when Leliana is with me when I speak to the Revered Mother. Basically, I choose the dialogue option that doesn't involve any skill checks and then Leliana helps to persuade the Revered Mother that it will be to everyone's benefit to release the Qunari.
The video concludes with me using the key to get Sten out of his cage and then him joining the party. I equip him with a Chainmail armor set and the Chasind Flatblade that I brought along in anticipation of fitting out Sten. Sten joins my roster of joinable characters, but he won't be adventuring with the party just yet. I want to keep the party of Aldarion, Alistair, Leliana and Morrigan for the time being.
Now it's time to explore Lothering itself.