-

- Forums
- Chatrooms
- Gallery
- Gameplay Videos
- Upload
- Articles
- Mod Reviews
- Shop SP: Games, Movies, Books
|
|
Brecilian Forest | The Camp | Circle Tower | Denerim | The Final Battle | Haven | Landsmeet | Lothering | Orzammar | Ostagar | Redcliffe | Ruined Temple Areas available as Downloadable Content: Honnleath | Return to Ostagar | Warden's Keep |
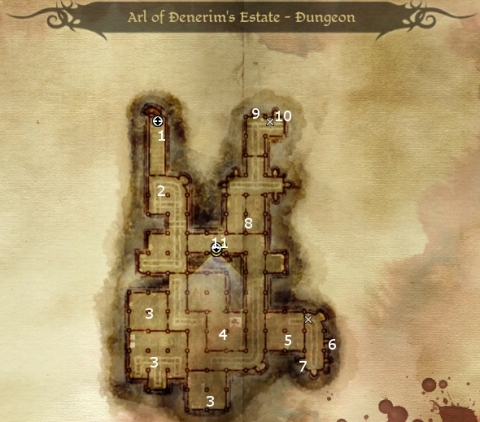
Arl of Denerim's Estate - Dungeon

 Now the door at #4 holding Queen Anora will no longer be held by a magical spell, and you can open it. Queen Anora will show up disguised in armor, and wants to leave immediately. The problem is, in the room just a little to the west, Ser Cauthrien will be waiting for a large contigent of Loghain's Guards. This can be a really tough fight, both because of the sheer numbers and because Ser Cauthrie is herself an extremely powerful foe. She can dish out damage in the neighbourhood of 90 to 110+ with each swing of her sword. She also has high resistances in pretty much every category.