-

- Forums
- Chatrooms
- Gallery
- Gameplay Videos
- Upload
- Articles
- Mod Reviews
- Shop SP: Games, Movies, Books
|
|
Phandalin
16th Level
I start making my way back to Crossroad Keep. South of the bridge to the Neverwinter, just a little east off the road, will be a house that's revealed by a Search check and yields 4 Cold Iron. I am able to sell them to Highcliff for 80 trade bars each.
I return to Crossroad Keep and rest up. I also start selling to make some gold. In particular, I've accumulated a fair amount of Glowing Water Essences and the odd Radiant Water Essence from battling Water Elementals, not all of which I showed. I split the Glowing Water Essences so I can sell them to Jacoby per pair for 900gp each. I sell a single Radiant Water Essence for 1,000gp. I keep 2 Glowing Water Essences and 1 Radiant Water Essence for myself, in case I get a chance to use them for OC style crafting recipes.

I speak to Daerred again at #7 of the Crossroad Keep. He announces that the Adventurer's Guild is now open. As a result he and Brother Maxil and Juen and Candril can now offer training in the Teamwork Feats. I'll say more on this as I go along.
For now, Daerred himself offers the option to a cohort who joined the main characters - he gives any such character a chance to get the same amount of xp as the main characters. The price is 1gp per 1xp. I have Umoja speak to Daerred, and he pays 1,749gp to catch up to the rest of the party. Finch will have to wait for now.
I'm close to the next level of experience, so I start to grind it out again. Some Ancient Traps that can be sold off, plus a couple of Ores, can be found through Search checks behind Crossroad Keep.
I reach the 16th level of experience for most party members. I have each party member add skill points in Concentration and Survival during this level up, if they didn't have any ranks in those skills. There's a specific reason why.
The Teamwork Feats, in order to be eligible to train in them, will each have a Leader Prerequisite and a Party Prerequisite. The Leader Prerequisite is a skill or feat that the character speaking to Daerred, Maxil, Chandril, or Juen has to have to qualify for the Teamwork Feat. The Party Prerequisite is a skill rank or a feat that everyone in the party has to have. Each teamwork feat has both a Leader Prerequisite, and a Party Prerequisite.
Note also any Prerequisites that require feats, either Leader or Party, cannot be satisfied by equipment. Any Prerequisites that require skill ranks require base skill ranks taken during level ups, meaning that feats (e.g. the Wanderer feat given by Volo) and equipment and ability bonus modifiers cannot satisfy the skill Prerequisites.
One of the Teamwork Feats has a Party Prerequisite of Concentration +1. Some of the other Team Work feats require either Survival +1 or Survival +2. Another one requires each party member to have either Listen +2 or Spot +2.
So my skill targets during the 16th level up are +1 Concentration and +2 Survival for any characters who did not previously have them. Logan can only get to +1 Concentration and +1 Survival, so he'll have to wait another level up to get +2 Survival.
Phandalin Trading Post
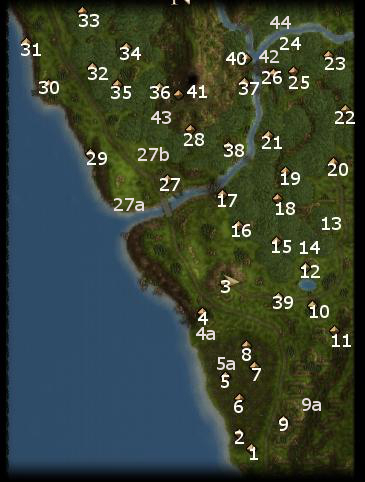
I stop off at Highcliff and purchase 5 Ores. I travel to the town of Phandalin at #10 to set up a trading post. Phandalin is the ideal next choice since, like Highcliff, it is a short distance away from Crossroad Keep and thus the Caravans will come in with income faster. The cost is 200 trade bars and 5 Ores.
I pay another visit to Jacoby. His wares will now include Adamantine armors, Mithral Armors, armors made from Wyvern scales that provide saving throw bonuses vs. poison, as well as +2 weapons of various sorts.
I speak again with Caravan Master O'Dell, and gladly shell out the 3,500gp, 7,000gp, then 10,500gp to maximize the return on caravans between Crossroad Keep and Phandalin.
The Cold Iron Mining Company
Phandalin is supposed to be capable of producing Cold Iron as a resource. But it isn't there, not yet. I go back to Phandalin, and enter the common room of the tavern. Danley wants me to investigate his suspicions about the nearby Cold Iron Mine, which is at #11 on the Sword Coast map.
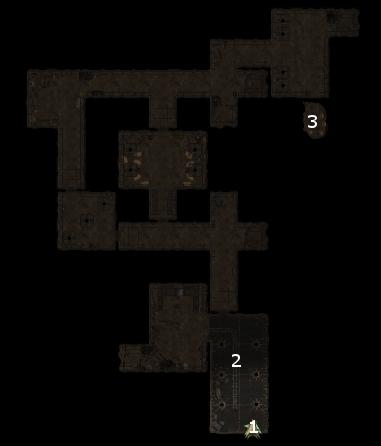
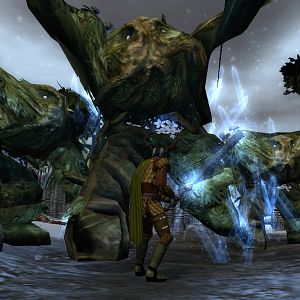
Once I arrive there at #1 on the Cold Iron Mines map, I buff up to the max. Up ahead at #2 are two miners, Daniel Merriweather and Chester Paulson. They'll try to make me go away without a fuss. A Spellcraft or Spot check will suffice to expose them as Ogre Magi. Umoja is capable of doing it on his own as well. The Ogre Magi go down without much of a fight. Daniel leaves behind a Falchion +1. Chester leaves behind Gromcheck's Walking Stick (Quarterstaff +1, +3 Concentration, +3 Spellcraft, 10 spell resistance).
There will be a LOT of Goblins, Orcs, Bugbears, and Ogres scattered throughout the Mines, so taking them out takes a lot of effort. I have Gallard issue a 'stand your ground' command before going on ahead and leading the first massive rush back into the waiting arms of the party. Physical combat helped along by Noxious Blast / Eldritch Chains from Vandala suffices. I then have to go around hunting for the rest and eventually route them all out.
At #3 will be a couple of chests with a Hide Armor +2, 600gp, and several random items.
I deliver the good news to Danley, and get rewarded with 1,000xp and 1,000gp. Phandalin will now be capable of producing Cold Iron as a resource.
Belueth the Calm
I sidetrack to another endeavour with a view towards being able to satisfy Leader requirements. One of the teamwork quests requires that the Leader have +4d6 sneak attack damage. Another one requires that the Leader have the Iron Will feat and Concentration +8.
Belueth the Calm is the ideal candidate to satisfy those Leader requirements, since she's just one Rogue or Shadow Thief level short of +4d6 sneak attack damage, and she can acquire Iron will and Concentration +8 during level ups. So I head north to Neverwinter, enter the Temple of Waukeen, make a Diplomacy check to reduce her asking price of 3,000gp, and then recruit her.
Now the sticking point is that she will need about 90,000gp to catch up with the rest of the part through training under Daerred. So I wait it out for a while, letting caravan wagons from Highcliff and Phandalin periodically make their way to Crossroad Keep. It is when the wagons reach Crossroad Keep that my trade bar income increases. And indeed, I wanted to wait until I had a steady stream of income from both Highcliff and Phandalin before I could tackle the side project involving Belueth.
I wait until my trade bar total reaches about 5,500 after collecting income. I had about 10,000gp as it is. I then convert all of my trade bars for gold through the majordomo.
Now I switch out Finch for Belueth temporarily. I then enter the Adventurer's Guild and pay Daerred the about 87,000+gp to train Belueth to raise her levels. Now she easily gets her +4d6 sneak attack damage on her next level up, and adds Iron Will and +8 Concentration during subsequent level ups.
Now I switch Finch back into the party in place of Belueth.
Protection Money
Sa'Sani gives me another quest, to stop a bunch of trolls raiding caravans to the east. The cave is located at #12, on the north shore of the lake across from Phandalin.

I enter at #1 and buff everyone up. Scattered through the area will be many Ogres and Trolls. A buffed party is able to handle the combat, with some assistance from Vandala's Eldritch Blast. Two of the Ogres will drop Hide Armors +2.
At #4 will be the leader, an enormous Troll named Tuka Akut. I manage to wear him and his remaining Ogre minions down in physical combat. Tuka Akut leaves behind a Ring of Protection +2, which Umoja now wears, plus a Ring of Major Acid Resistance (+30 acid resistance), which Vandala now wears.
At #5 will be a chest protected by a Fake Wall. To open the Fake Wall, a character with a good enough Search skill needs to activate his Search mode (i.e. the magnifying glass icon towards the bottom-right corner of the screen) to reveal a lever that opens the Fake Door. The chest itself has a Battleaxe +1, a Light Shield +1, a Shortbow +2, and several random treasures.
I report back to Variel at Crossroad Keep, and get 1,900xp as a reward.
Finch advances another level, so now I take the opportunity to begin satisfying requirements for the Shadowdancer prestige class for him, which include +10 Hide, +8 Move Silently, +5 Tumble, and the Dodge and Mobility feats. I add +5 Tumble during this level up.
He also takes Cure Critical Wounds as his spell selection. A healing option in case I need to use it.
Group Trance
I speak to Chandril in the Adventurer's Guild. The Teamwork quest I want from her requires the leader to be either an Elf or a Half-Elf, and everyone in the party having at least +1 Concentration. I have the latter. Having Finch speak to Chandril fulfills the former.
To complete the quest, I travel to the Elven Tower located at #13 on the world map and meditate there. The resting time for the party gets shortened to 4 hours.
Wild Elf Female
Now a special encounter comes up, the Wild Elf Female. She turns out to be a Dryad who will attack, along with a Worg and a few Treants. None of them drop anything of value, and there's otherwise nothing else significant to the encounter.
Nes'tr'ryu
Another special encounter appears on the overland map, the Blue Dragon named Nes'tr'ryu. I decide to kill her. The party charges, and Vandala rips down the dragon's magic buffs with Devour Magic. After that, Vandala starts pelting the beast with Vitriolic Acid / Eldritch Chains. I eventually manage to wear it down.
I get three Blue Dragon Scales and a Blue Dragon Scale. I, and am pretty sure everyone else, am not aware if these items can be used to craft any magical items. I also get 600xp for my troubles.
Drow Kinslayer
Yet another special encounter appears, the Drow Kinslayer. It's a battle between Wood Elves and Drow, with the player having the choice to side with either one against the other, or leaving altogether.
If you side with the Drow, the Elven Ranger will leave behind Arrows +1 and Boots of Elvenkind (+5 Move Silently). Also, following the battle, if you have a Drow party member speak to the Drow Priestess after the battle, the Priestess will give an Eye of the Spider Queen. Just having it in a character's inventory will confer a +1 saving throw bonus vs. poison. It allow allows the character to use Web (3) once a day. Only evil characters can use it though.
My choice was to side with the Wood Elves. The battle is easily won. The Drow Priestess leaves behind:
Skullcrusher
At #14 is the home of Skullcrusher (an apparent homage to the Skullcrusher from the Pool of Radiance gold box game). I buff up to the max when I enter. I gather very tightly around Skullcrusher. There's a reason for this. I could come and go peacefully. I could also provoke him into attacking me by either opening his nearby chest, or asking him if he has any valuables (which I did.)
He instantly puts up some magical buffs and summons six Ivory Shieldmaidens. Janette casts Battletide. Umoja immediately opens with a Fire Storm spell. Gallard meanwhile notices a large trap just behind him and disarms it. Vandala uses Devour Magic on Skullcrusher to tear down his buffs, making him easier to wear down.
You'll notice that there are more traps scattered about the cabin once combat starts. I issued a Stand Your Ground command after the Shieldmaidens have been killed, to avoid tripping any traps since I want the xp for disarming them.
Skullcrusher leaves behind:
My next destination is the town of Thundertree.