-

- Forums
- Chatrooms
- Gallery
- Gameplay Videos
- Upload
- Articles
- Mod Reviews
- Shop SP: Games, Movies, Books
|
|
Origins | Ostagar | Lothering | Circle Tower | Warden's Keep (DLC) | Return to Ostagar (DLC) | Stone Prisoner (DLC) | Brecilian Forest | Redcliffe | The Urn of Sacred Ashes | Orzammar | Deep Roads | Denerim | Final Onslaught |
Caridin's Cross | Ortan Thaig | Dead Trenches | Anvil of the Void | Cadash Thaig | Oghren's Quest | |
ANVIL OF THE VOID
Branka
I travel to the Anvil of the Void. I now encounter Branka for the first time. She promptly seals the way back behind me. I have to see things through to the end. Also, Oghren will be a mandatory companion for this part of the game.
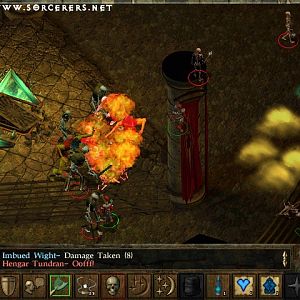
There will be plenty of Darkspawn in the cave ahead, and they won't all come at once. I edge slowly forward, and invite the Genlock Alpha to come forward by himself so that I can kill him without any of his allies distracting me. After that, I dive right in and slaughter the Darkspawn.
Two more waves will come. There's no rush. I let them come to me so that I can get in the first blows. Wynne sets up an Inferno-based Grease Fire for the second wave, while Aldarion zaps the Genlock Emissary with a Mana Clash as soon as he's within the spell's reach.
I also let the third wave approach. Leliana drills the Ogre with her bow to bring down its health significantly. Wynne seals its fate with a Glyph of Paralysis, making it an easy kill.
Poison Gas Chamber
At the end of the tunnel is a large chamber that is filled with poison gas (inflicts nature damage) and also has several Golems in it. Charging straight into the room with abandon is a recipe for suicide, no matter how high your level may be.
I keep the party back, and then I have a single character go into the chamber in order to bait the Golems into giving chase. The idea is to lead the Golems out of the chamber and to my party that is waiting in the tunnel. This way I kill the Golems piecemeal as they come to me in a slow and steady stream instead of all at once. Furthermore, the danger of the chamber itself is minimized as I am now free to simply walk in and hit the levers to turn the gas off.
Golems and Traps
The next room has two Blade Traps in them. Getting close to one of the traps will also awaken two of the four Stone Golems in the room. The Stone Golems, once they awaken, will start off with Hurl, which can damage multiple party members. They can also use a Quake power that can both damage and stun multiple party members. This fight can thus be quite a dangerous one.
I show a method for minimizing the danger. Wynne casts Lifeward on Leliana beforehand. Leliana then goes on ahead and disarms the first Blade Trap. The first two Golems awaken and hit Leliana with Hurl. Since Leliana becomes the only target, and since her health recovers once her Lifeward triggers, the Hurls get absorbed harmlessly. Leliana then leads the Golems back to the rest of the party, where they are killed one at a time. I repeat the process for the second Blade Trap and the next pair of Golems.
Spirit Anvils
I continue on ahead and run into a strange device. It consists of a large construction in the middle with four faces on each of its sides. There are then four anvils that surround the central structure. Each face can transmit energy to the anvils, thus spawning Dwarven Spirits that will attack the party. There is only one way to damage the central structure. That is to kill a spirit quickly enough so that the anvil that spawned it begins to glow. Once an anvil starts to glow, I can then click on it to inflict 500 damage on one of the faces of the central structure. It is only once all four faces have taken 1500 damage that the central structure will be destroyed. Note also that summoning spirits will be more frequent and intense the closer the central structure gets to final destruction.
It is a rather involved and lengthy process, but is definitely doable as long as I work quickly enough and keep my party's health on the up and up. Wynne adjusts her script to keep Cleansing Aura active instead of Spell Wisp, since her combat spells won't really be applicable whereas Cleansing Aura's ability to passively recoup health over the long haul is most certainly helpful. She also guzzles Lyrium Potions whenever she needs to.
Caridin
I move on ahead and find Caridin, the Dwarven Paragon who has been turned into an enormous Steel Golem. Branka soon shows up and wants the Anvil for herself. The choice boils down to:
Only Branka is left eventually. She has high physical resistance and good spell resistance, so I simply gang up on her and wear her down. When she is about halfway down, she'll use the Lyrium veins to create duplicates of herself, but these aren't difficult to bring down. It is only a matter of time before I overwhelm her. She leaves behind:
Paragon-Forged Crown
Here is where Caridin forges a Crown for me so that I can choose who will be the next king of Orzammar. He then casts himself into the lava.
A King is Crowned
Now I return to the Chamber of the Assembly in Orzammar. Who becomes the next king of Orzammar is completely up to me. Note that neither choice is completely free of ethical or moral concern, as the epilogue will reveal either way. Prince Bhelen will be more tolerant and beneficent towards the Casteless, but also becomes a tyrant and absolutely ruthless towards any political enemies. Lord Harrowmont will abide by the traditional caste restrictions, and ends up a rather ineffectual and short-lived ruler. I ended up choosing the latter.
Kardol
I step outside the Chamber of the Assembly and am greeted by the leader of the Legion of the Dead, Kardol. I use a Persuasion check to convince him to join the war against the Blight on the surface.
Bhelen Fanatics
Now I have to defend myself twice against Bhelen Fanatics, once in the Diamond Quarter and again in the Commons. Wynne gets the jump on them each time with a Fireball. I show another nuance during the second fight, Wynne defending herself by planting a Glyph of Repulsion at her own feet. This is a standard method of neutralizing aggro, as it will often knock back incoming monsters who are going aggro on Wynne. Keep in mind that Dwarves will have high resistance, so it won't work all of the time against them.
Golem Registry
I go back to the Anvil of the Void for a simple quest. In the near corner of the Anvil's chamber will be a large stone structure with tablet writings on its face. It's simply a matter of making a tracing of the writings and then bringing the tracings to Shaper Czibor for an xp bonus and a Golem crystal as a reward. There is a bug whereby the party won't actually get the crystal, but the same mod that fixes "The Shaper's Life" quest will fix this issue as well.
My next destination is the Cadash Thaig.