Dragon Age: Origins Online Walkthrough by David Milward
The Raw Fade
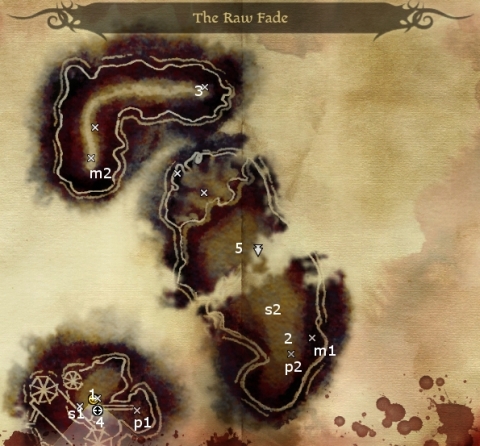
A few observations are in order for travelling this part of The Fade. First, it is often the case that you will not be able to explore a particular area of the Fade all at once. Certain portions of it may be inaccessible. Don't worry, this is a matter of design. The fact of the matter is that certain pathways or doorways can only be used if you acquire certain forms as you progress through the Fade. With persistence, it will only be a matter of time before you find all the forms you need and can return to those portions that you were previously unable to access. The maps in this walkthrough or notated to account for this as follows:
Fade Portals - These portals don't need any special form to travel through. Unless specifically noted otherwise, these portals will be marked in this fashion: P1 on means a portal that will connect the portal at P2 on your map. P3 means a portal that will connect to a portal at P4 on your map, and so on.
Mouse Holes - You need the Mouse form to be able to get through these. Unless specifically noted otherwise, these will be marked in this fashion: M1 on means a mouse hole that will connect the portal at M2 on your map. M3 means a mouse hole that will connect to a mouse hole at M4 on your map, and so on.
Fire Barriers - You need the Burning Man form to get through these without burning to death. These barriers will be indicated by a 'b' on your map.
Massive Doors - You need the Golem form to open these doors. These doors will be indicated by a 'd' on your map.
Spirit Doors - You need the Spirit form to open these doors. Unless specifically noted otherwise, these doors will be marked in this fashion: S1 on means a spirit door that will connect to the spirit door at S2 on your map. S3 means a portal that will connect to a spirit door at S4 on your map, and so on.
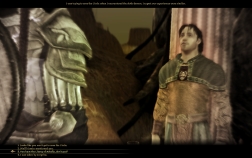 Here is where you start out. Here you'll meet Niall, who offers information on this portion of the Fade and the Sloth Demon that controls it.
- Here is a Mouse that is being attacked by a Lesser Rage Demon. Once you kill the Demon, the Mouse will teach you the Mouse form so that you can travel through Mouse Holes.
- This particular Fade Portal takes you back to #1.
- Here is a Fade Pedestal that allows you to travel to another part of the Fade.
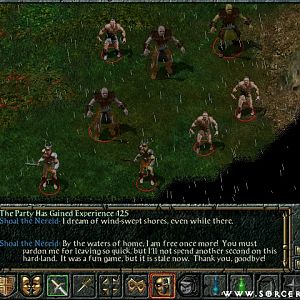
- You need to get here through the Spirit Door marked by S1. Once here, you'll have to kill the Desire Demon, Yevenna, plus two Shades. The Spirit Door marked S2 will take you back where you came from. Yevenna is one of the servitor demons you must kill in order to be able to reach the Sloth Demon.
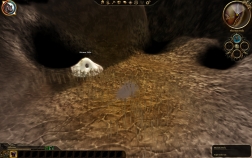
When you click on the Fade Pedestal, you'll see a scheme of the particular part of the Fade that you're trapped in, as seen in this image. Your ultimate goal is to reach the Inner Sanctum in order to confront the Sloth Demon. But first, you need to defeat 5 elite Demons who serve him. One is Yevenna, the Desire Demon who resides here in the Raw Fade. The others are in the Burning Tower, Mages Asunder, the Templar's Nightmare, and 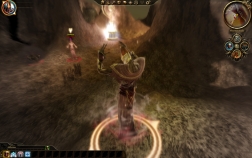 the Darkspawn Invasion. As you progress through these areas, you may notice that certain areas labelled simply as 'A Nightmare' become accessible. These areas are where your companions are trapped. You don't have to visit these areas, but you should if you don't want to face the Sloth Demon alone. You can help the companions out of their nightmares, but they'll disappear on you again shortly afterwards. Their nightmares are as follows:
Morrigan is in a nightmare involving a Demon posing as her mother, Flemeth. Morrigan isn't fooled however, and urges you to kill the spirit.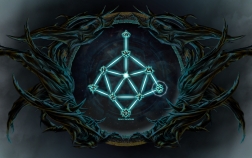
Sten is convinced that he's holding post along with a couple of other Qunari soldiers. It will take some effort to convince him to snap out of it.
Zevran is convinced that he's undergoing a test of pain on the rack to prove he's worthy of the Antivan Crows. Once you force a fight with the Torturers, Zevran won't help you cause he'll still be terrified.
Wynne will be trapped in a dream where she's convinced herself that she was to blame for failing to save young mages of the Circle. With persistence, the 'dead mages' around her will rise and attack, convincing Wynne that there is deception at work.
Leliana will be convinced that she's performing prayers for forgiveness and meditations under the guidance of a Chantry Sister. Speaking to both of them can goad the Chantry Sister into revealing itself as a Greater Shade.
Alistair will be convinced that he's having supper with his sister, Goldanna, and her children. The invitation is open to you as well. Persisting will goad Goldanna into speaking with a low, disturbing voice.
The Mabari War Hound will be enjoying a good nap. It´s simply a matter of convincing it to wake up. No battle is necessary.
Oghren will be in a tavern being mocked by other Dwarves. In this case, its actually helpful to play along with the nightmare, and convince Oghren to give the other patrons a 'clobbering'.
Shale will be dormant, in much the same state as when you may first have walked into Honnleath. As with the War Hound, it's also a matter of convincing her to 'wake up'. And there's no battle here either.
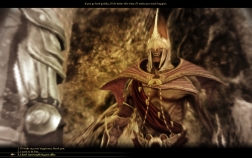 Once you've defeated all of the 5 elite Demons, you can now reach the Inner Sanctum. There you will confront the Sloth Demon. Your companions will arrive, although they may not help you if your approval rating with them isn't good enough. Now the fight begins. Sloth transforms into an unusually powerful Ogre. Tempted as you may be to give it your all, try to spread the use of your resources out over the long haul, because this is actually a series of fights as the Sloth Demon takes on different forms. Next is a Rage Demon form, hit it with cold spells if you have them. Next is an Abomination form. Next is a Shade form. As you go the distance, keep in mind that there are two Lyrium Veins that you can use to replenish Health and Mana. The final form is his true form that resembles an Arcane Horror. This is where hopefully you've conserved a meaningful balance of your resources. He can cast spells like Spirit Prison and Blizzard. When he tries to get off Blizzard, try to interrupt him with something like Winter's Grasp or anything similarly immobilizing. Once you've defeated him, you'll be returned to the Templar Quarters.
| Sorcerer's
Place is a project run entirely by fans and for fans. Maintaining
Sorcerer's Place and a stable environment for all our hosted sites requires a substantial amount of our time and funds on a regular basis, so please consider supporting us to keep the site up & running smoothly. Thank you! |

 Here is where you start out. Here you'll meet Niall, who offers information on this portion of the Fade and the Sloth Demon that controls it.
 the Darkspawn Invasion. As you progress through these areas, you may notice that certain areas labelled simply as 'A Nightmare' become accessible. These areas are where your companions are trapped. You don't have to visit these areas, but you should if you don't want to face the Sloth Demon alone. You can help the companions out of their nightmares, but they'll disappear on you again shortly afterwards. Their nightmares are as follows:
 Once you've defeated all of the 5 elite Demons, you can now reach the Inner Sanctum. There you will confront the Sloth Demon. Your companions will arrive, although they may not help you if your approval rating with them isn't good enough. Now the fight begins. Sloth transforms into an unusually powerful Ogre. Tempted as you may be to give it your all, try to spread the use of your resources out over the long haul, because this is actually a series of fights as the Sloth Demon takes on different forms. Next is a Rage Demon form, hit it with cold spells if you have them. Next is an Abomination form. Next is a Shade form. As you go the distance, keep in mind that there are two Lyrium Veins that you can use to replenish Health and Mana. The final form is his true form that resembles an Arcane Horror. This is where hopefully you've conserved a meaningful balance of your resources. He can cast spells like Spirit Prison and Blizzard. When he tries to get off Blizzard, try to interrupt him with something like Winter's Grasp or anything similarly immobilizing. Once you've defeated him, you'll be returned to the Templar Quarters.