-

- Forums
- Chatrooms
- Gallery
- Gameplay Videos
- Upload
- Articles
- Mod Reviews
- Shop SP: Games, Movies, Books
|
|
THAYMOUNT
Skyla Avolov
I return to the Avolov home in Mulsantir. I get a 1000 xp reward and a Periapt of Wisdom +8 for freeing Skyla Avolov from the Slumbering Coven.
Fourth Door - Outgoing
The party heads into the Shadow version of the Veil Theater. Now that I've spoken to the Slumbering Coven, I have the Keeper of Doors open the Fourth Door so that it leads to Thaymount.
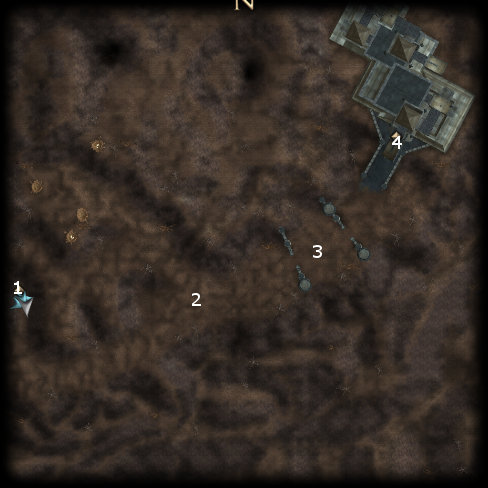
Passage to Thay
I arrive at #1, and begin by doing some pre-buffing. Just ahead will be a few Gnoll Guards, who are easily overwhelmed in melee battle. Nearby at the top of the hill to the left will be a couple of Wyverns, who are also easily killed. Note that I sometimes use the "Follow Me" command in order to keep the party together in between fights, and avoid them splitting apart after chasing foes in different directions.
Also near the top of the hill to the left will be a few Fire Elementals. They are not hostile to begin with, so you can save them up for when you need spirit energy in the future, whether it's to use Provoke Spirits and then Devour Spirit, or to use Suppress in their presence.
At #3 will be several Gnolls guarding a series of gates, including Archers that fire from the watchtowers. It's a pretty simple matter to kill off the Gnolls on the ground, and send a single character up a ladder to kill an archer when I get around to it. The second gate is locked and guarded by an Academy Guard Captain. It's pretty easy to unlock the gate and then kill the Captain. He leaves behind an Adamantine Full Plate and a Halberd +5 after dying.
The door at #4 leads to the Academy Classrooms.