-

- Forums
- Chatrooms
- Gallery
- Gameplay Videos
- Upload
- Articles
- Mod Reviews
- Shop SP: Games, Movies, Books

Prologue | Chapter 1 | Chapter 2 | Chapter 3 | Chapter 4 | Chapter 5 | Tales of the Sword Coast | Chapter 6 | Chapter 7 | |
GULLYKIN
Jenkal
Now I go up the stairs where I encounter a traitorous Halfling named Jenkal, who's been allowing the Kobolds to steal into Gullykin.
Jenkal was pretty easy to cut down in vanilla BG1. In SCS, he makes pretty frequent use of Potions of Invisibility to try and set up backstabs. Also, he'll hide and then flee if he's reduced to about half health.
If you want to collect the xp for him, the ideal solution is Command Word: Sleep. It has a very fast release time, and knocks him out long enough for the party to kill him.
I then loot the containers, and leave the Halfling Guards in his house when I am caught breaking into a chest.
I then bump the north edge of the bump to reveal another area.
Gandolar Luckyfoot
Now I continue to explore various houses for treasure. If guards catch me picking a chest, I always choose the combative option and then simply run away to avoid any loss of reputation.
At the south edge of the village is Gandolar Luckyfoot, who rewards me with 200gp for ridding Gullykin of the threat from the Firewine Ruins.
The video concludes with a coupe of routine fights that are won with straight physical combat.
Molkar
The video begins with another fight against a whole bunch of Kobolds. Sleep and chop away can get pretty boring after a while, so I just blow them away with a Fireball.
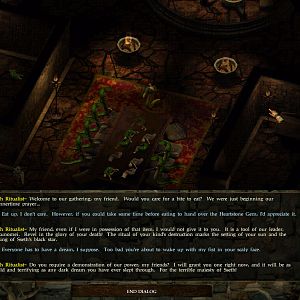
South and east will be a group of bounty hunters led by Molkar. Morvin is a Dwarven fighter. Drakar is a Cleric, while Halacar is a Gnome Illusionist. First, I have Kivan go into stealth and mark their location. I then cast all of Stinking Cloud, Web, Entangle, and Silence 10' radius, from just outside the fog of war before Khalid goes ahead and starts the dialogue. Note that crowd-control is most effective against lower-level enemies who have a harder time making saving throws under 2nd edition rules. As enemies become higher level, their chances of making all of their saving throws in order to get out of a crowd-control zone improve. Even so, crowd control proves effective. Molkar is forced to stick his neck out. Halacar and Drakar managed to make their saving throws against the crowd-control spells, but failed their saving throws against Silence 10' Radius (note how the more saving throws they're forced to make, the more you increase the odds that at least one of them will fail). As such, they're forced to come forward and die in melee combat.
Once all is said and done, only Morvin is left. Even when crowd-control doesn't keep everyone confined, it can still work 'divide and conquer' in your favour. Kivan then circles around the pond and along the south edge of the crowd-control zone. He then gets in some free shots on Morvin with his bow. Once Morvin breaks out, it's a done deal.
The bounty hunters leave behind a Longsword +1, a Morningstar +1, and a Chainmail +2.
Next up is the Spider Wood.


