-

- Forums
- Chatrooms
- Gallery
- Gameplay Videos
- Upload
- Articles
- Mod Reviews
- Shop SP: Games, Movies, Books
|
|
Origins | Ostagar | Lothering | Circle Tower | Warden's Keep (DLC) | Return to Ostagar (DLC) | Stone Prisoner (DLC) | Brecilian Forest | Redcliffe | The Urn of Sacred Ashes | Orzammar | Deep Roads | Denerim | Final Onslaught |
FAVORS FOR CERTAIN INTERESTED PARTIES
The Bartender in the Gnawed Noble Tavern offers a series of less than legal quests. There's also a nearby chest that has a random item in it. One line of quests is for a rogue named 'K', and another line is for his rival, 'D'. There is, however, one quest that is for a third interested party, described just below.
Correspondence Interruptus
The quest is to find 12 scandalous Love Letters scattered throughout Ferelden. Their locations (and in the order shown on the vide) are as follows:
Solving Problems
This is a quest for 'D'. It involves getting rid of three dead bodies in deals gone bad. The body bags can be found at:
Negotiation Aids
This quest for 'K' is as straightforward as it gets. Give the Bartender 15 Toxin Extracts. If you're short on the required 15, Varathorn in the Dalish Camp sells them without limit.
Sign of Safe Passage
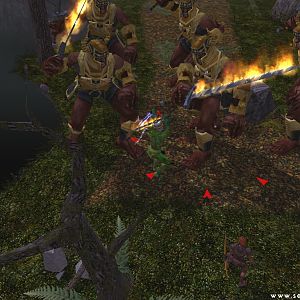
This quest for 'D' is to deliver a sign of safe passage to his allies. I travel to the West Brecilian Forest. The map of the forest will reveal the Firing Point, which is just a little east of the initial entry from the Dalish Camp. The Grey Warden, and only the Grey Warden, needs to fire a bow over the ravine. It also has to be a bow, and not a crossbow. Aldarion has pretty good Dexterity from the way that I developed him. If your Grey Warden's build doesn't emphasize Dexterity, you may want to hold onto a lower tier bow in your inventory in anticipation of this quest.
Once I do fire the bow, several Mercenaries appear behind me for a fight. This is a very easy fight in any event. I return to the Bartender for my reward.
Untraceable
Another straightforward quest, and this one is for 'K'. Give the Bartender 15 Garnets. If you find yourself short of Garnets, you may want to do the Market Day quest for Slim Couldry to get some easy ones.
False Witness
The next quest for 'D' is to get rid of three false witnesses. They are:
Dead Drops
The next quest for 'K' is to drop off payment at the following locations:
Harsh Decisions
The last quest is to kill 'K' for 'D'. I travel to anywhere else on the Denerim map, and this prompts a random encounter with 'K's Lieutenant and his Thugs. Aldarion, Alistair, and the Blight Wolf take care of the dual-wielding Thugs. Wynne hits the Archers to the right with a Fireball-based Grease Fire, and Leliana finishes them off with her bow. The Lieutenant leaves behind a note called "Hideout Directions", which reveals 'K's Hideout on the Denerim map.
I then travel to the Hideout. 'K' and his Thugs are easy enough to kill off in straight physical combat, although Wynne adds that extra edge with a Glyph of Warding. I then return to the Bartender for my reward.
Now it's time to take care of business in the Elven Alienage.