-

- Forums
- Chatrooms
- Gallery
- Gameplay Videos
- Upload
- Articles
- Mod Reviews
- Shop SP: Games, Movies, Books
|
|
Origins | Ostagar | Lothering | Circle Tower | Warden's Keep (DLC) | Return to Ostagar (DLC) | Stone Prisoner (DLC) | Brecilian Forest | Redcliffe | The Urn of Sacred Ashes | Orzammar | Deep Roads | Denerim | Final Onslaught |
MISCELLANEOUS QUESTS
Unbound
This quest involves following a series of clues to track down a powerful undead monster. Note that once you loot the undead monster for any of items after killing it, the Dirty Back Alley will no longer be available through the map of Denerim. It is thus advisable to complete the Blood of Warning and Notices of Death quests first before attempting this one.
The clues are as follows:
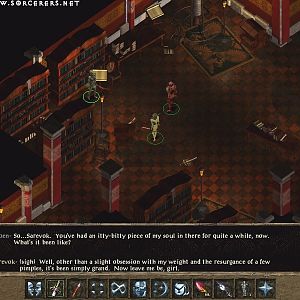
Inside will be Gaxkang the Unbound, with whom a fight is inevitable. Gaxkang will initially start off appearing as an Arcane Horror that can use spells like Misdirection Hex, Drain, Winter's Grasp, Cone of Cold, Spirit Blast, and Curse of Mortality. Furthermore, Gaxkang can switch back and forth between his Arcane Horror form and a Revenant form that has all of the standard Revenant abilities like Telekinesis and Double Sweep. Gaxkang also has a lot of health, so this can be a really grueling fight.
I start off by having Aldarion hit Gaxkang with a Mana Clash. It won't kill the undead monster outright but it takes away about a quarter of its health, which makes things significantly easier. If Mana Clash gets resisted, I'll simply reload and start over.
I then have Aldarion and Alistair stay on top of him with melee attacks. Leliana hangs back and pelts him with her bow. Wynne also stays back and pecks away with her staff. She is also very diligent about using spells like Heal, Group Heal, and Lifeward when any party members get anywhere close to half-health. The other party members of course don't hesitate to use Health Poultices in case Wynne's cooldown periods won't elapse soon enough. Wynne also won't hesitate to drink a Lyrium Potion if she needs to recover Mana.
Gaxkang will always leave behind the Keening Blade (+2 armor penetration, +6 attack, +3 cold damage), which is probably the best longsword in the game. It will be Alistair's main weapon for the remainder of the game, and combining the Blade with Duncan's Shield is easily one of the best possible sword-and-shield combinations in the game.
Gaxkang will always leave behind one or a few random items. There's a small (but not negligible) chance that one of those items will be a shield called Fade Wall (+3 defense, +20% to healing effects received, +2 stamina regeneration in combat, +25 stamina). I find it worth it to do the fight over and over again until I get the Fade Wall, which will be Aldarion's shield for the rest of the game. Its boons to stamina and stamina regeneration are very welcome. Some shields do provide a better defense bonus, but Aldarion already puts his defense through the roof with Arcane Shield and his other items as it is. Spellweaver plus Fade Wall is probably the best sword-and-shield combination for an Arcane Warrior in the game.
A chest in the back of the room has some treasure plus a pair of gloves called the Elementalist's Grasp (+5% cold damage, +5% electrical damage, +5% fire damage, +5% nature damage, +5% spirit damage). Neat item, but not all that great unless you have a Mage that draws on spells using all the available types of damage. A better set up, in my opinion, is a Mage who specializes in or two types of damage and equips items that provide bonuses to those types of damage well above what the Elementalist's Grasp provides (e.g. +20% fire damage from the Cinderful Gauntlets).
Honor Bound
Waiting just outside the Gnawed Noble Tavern is Ser Landry, whom I've avoided up until now. He wants to challenge me to a duel. I can use Intimidation or Persuasion to talk him out of it, but there's no reward for doing so. I therefore fall in with his request for a duel. He'll then join his Seconds just a little west of the Wonders of Thedas. I win the battle as a matter of course by hitting three of them right away with Cone of Cold and then Shock. Wynne shatters one of the Seconds with a Stone Fist. They'll leave behind a random item or two. Ser Landry also leaves behind the Engraved Mace (+1 Dexterity, +1 damage, +5 mental resistance), but I've definitely got better by now.
Back Alley Bandits
There are two possible random encounters when travelling from one part of Denerim to another. I show the first one here.
The party starts off near a gate. There will be two groups of Bandits, one to the left and another to the right. There will also be a tripwire at the gate, which as far as I can tell cannot be disarmed. It is thus wise to kill both groups of Bandits at a distance.
The group on the left is easier to get a view of, so Wynne roasts them with an Inferno-based Grease Fire. The second group is hard to get a view of without first triggering the tripwire, so I try a different approach. Aldarion hits them from off-screen with a Blizzard to get their attention, but also to lead into a Storm of the Century. Wynne also casts Earthquake to cut off passing through the gate. The party then retreats to let the Storm of the Century do its work.
Anton Wither, Sixth Corpsewalker
The second random encounter has me at the opposite end of another Back Alley, at the top of the stairs. I click on a nearby black vial to start a fight with another Revenant, which by now is pretty easy.
I then go down the stairs and towards the gate. There will be some Bandits on the other side of the gate. This time they'll close the gate in an effort to divide the party. The answer is simple. Aldarion walks ahead by himself, and hits the level so that the rest of the party can join in. Wynne pretty much decides things with a well-placed Fireball.
Isabela the Duelist
Now I go back to the Pearl. Just a little to the left will be Isabela, still there after she drove a few men off. I can talk to her and acquire the Duelist specialization. There are two possible routes here. One is to go to bed with her. In fact, there are quite a few possibilities here including threesomes or foursomes, depending on who is in the party and whether or not they are 'hardened'. I decide against this approach, since Aldarion is in a relationship with the 'unhardened' Leliana.
The other route is to make a Dexterity check against her while playing a game of cards with her. Aldarion has been raising his Dexterity consistently for almost the entire game, so he makes the check the first time around. Note that if your Grey Warden character consistently fails at the Dexterity check, either Leliana or Zevran will then help you out.
Now I intend to explore the Deserted Building.