-

- Forums
- Chatrooms
- Gallery
- Gameplay Videos
- Upload
- Articles
- Mod Reviews
- Shop SP: Games, Movies, Books
CHAPTER 1 | CHAPTER 2 | CHAPTER 3 | CHAPTER 4 | CHAPTER 5 | CHAPTER 6 | CHAPTER 7 | CHAPTER 8 | CHAPTER 9 | CHAPTER 10 | |
COPPER CORONET
Scroll Scribing
I return to the Slums District, upon which I return to the Planar Sphere. Along the way, I run into Slavers trying to prevent an escape and a corrupt Guard taking a bribe. I intervene to save the slave, and get a 5,500xp bonus for it.
I then go into the Planar Sphere, and get the Dagger of Avastrian +1 from my apprentices. I then give them the safe assignment, scribing the scroll of Mislead instead of the Abi-Dalzim's Horrid Wilting or the Meteor Swarm, either of which is pretty much guaranteed to kill at least one of the apprentices. And again, I make sure I get 'in a few days' so that none of the apprentices end up getting themselves killed.
The video concludes with another love talk from Jaheira.
Hendak and Lehtinan
Now I enter the Copper Coronet. I rest up, and then speak with Lehtinan and pursue the dialogue options that involve 'other entertainment'. I also have Jaheira tell off Salvanus, for the sake of completeness.
The back rooms are roughly split into three sections. There's a north-south running hallway on the west side, the prisoner cells on the north side, and the gladiator pits on the right side. I go along the west side hallway first scoring a little treasure along the way, including the Gloves of Pickpocketing (+20% to Pickpocket). These will become part of the Gloves of the Master Thief pretty soon.
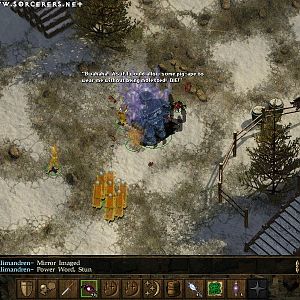
I then go east down a different sets stairs that leads to another hallway, one that runs north to the Prisoner Cells. The Guards here will attack me, but they're low level and easily killed. The Mages aren't anything to worry about either, as they best they can do is single-target spells for offence, and Mirror Image for defence. Keldorn easily dispenses with the latter with his True Seeing ability.
I then speak with Hendak, who pleads with me to free him and the other slaves. So I head southwards into the Gladiator pits, and take out a Winter Wolf easily. I then make my way further in and find the Beastmaster, who sics his animals and Minotaur on me. Again, I could easily kill them in phyiscal combat but I move things along faster with a Death Spell. I then kill the Beastmaster to get the Tuigan Bow (+1 short bow, 3 attacks per round) and his key.
I then use the key to free Hendak and the rest of the Slaves. Be careful to avoid blocking Hendak's route to Lehtinan, otherwise you risk him going hostile and losing out on quest xp. I follow behind him and help kill off the Slaver Guards, who are low-level and easy.
When I return to the main room of the Copper Coronet, Hendak issues his challenge to Lehtinan. Unlike in vanilla BG2, I can't assume that Hendak will necessarily win as SCS Lehtinan is quite capable of winning this duel now. I have Jaheira cast a Heal on Hendak whenever he appears to have taken a little too much damage. The party gains 48,750xp as a reward.
Note that Bernard now has a different inventory that I can buy from. But I don't just yet, not until my reputation has gone up more.
Hendak has another request for me, to route out the Slavers who are operating from a ship on the north side of the Slums District. He suggests going underground through the Sewers instead of approaching the front of the ship. So I head up north to the hallway that leads to the Prisoner Cells. A smaller hallway branches west and leads to the sewer entrance.
Lilarcor
Now I descend into the Sewers. The fights here are all easy, including the Hobgoblins that Imoen blows away with a Skull Trap. A little to the south is a large room with a sewer grate in the middle. I easily kill off the slimes here, and then click twice on the grate to get a hand. This will be one of four items needed to find a magic sword.
I continue east and click on the dead body to get a ring, the second item. I then go north and kill a Mustard Jelly, and then up the stairs and kill a couple Myconids.
I then continue all the way south, and then turn east. I find a sewer gulley. Imoen disarms a trap on a gangway leading across. I then go north, where there are several Kobolds led by a Shaman. Imoen blows most of them away outright with another Skull Trap. Avastrian finishes off the Shaman and picks up his staff, which is the third item.
The party continues south, and Imoen disarms another trap. They continue west and find an old man named Quallo, along with his Carrion Crawler buddy. I speak to Quallo repeatedly in order to get clues regarding the sword. The clues reveal the apparent order, Hand first, Ring second, blood of a friend third, and the staff fourth. I kill the Carrion Crawler to get the blood of a friend.
I continue north, and blow away another group of Hobgoblins. Now a little north and west will be a room filled with Sewer Pipes, which is the location of the sword in question. A voice will make clear that a puzzle needs to be solved first. I show the sequence at about 9:35 to 11:15 of the video. The end result is that I get Lilarcor (+3 Two-handed sword, immunity to Charm and Confusion). Certainly this a powerful and useful sword, but the voice is gonna drive me crazy so I intend to sell it.
Slavers
Now I go up the stairs to the Slavers' hold inside of the ship. Captain Haegan and his crew aren't especially tough, and I can overwhelm them physically even when obliged to spread out. Jaheira has her love talk that involves her wanting to know "... how my last battle went." This is the dialogue that will trigger the second appearance by Dermin, but not until I get back outside. Imoen then searches for traps and loots the containers for various treasure.
I then loot Captain Haegan's key, and use it to open a cell door to the north. I kill the Trolls on the other side easily enough. I then choose to give the captive girl 100gp to make good her escape, and get a +1 to reputation for it.
I go back and then up the stairs leading west. More Slaver Guards come in from the west. Note that I don't rush forward, as there's a trap at the end of the walkway. Instead, Keldorn brings down the Wizards' protections with Dispel Magic and then the party can eliminate them with missile fire.
After this the video largely consists of me wasting low-level Slaver Guards, and then Imoen checking for tracks and looting containers.
Once I get outside through the door towards the southeast corner I kill the last guarding standing just outside the door. Dermin then shows up and urges Jaheira to leave me.
I then report my success to Hendak in the Copper Coronet. I get +1 to reputation, and 38,000xp for every party member.
Now that my reputation is 18, I now check out Bernard's inventory. It consists of a lot of weapons, and some spell scrolls. Some of the more notable items include:
Jaheira and the Harper Hold
Now that Dermin has appeared a second time, I head over to outside the De'Arnise Keep. I then rest. Jaheira leaves on her own. Somebody named Terminsel arrives, and gives me a note where Jaheira explains herself.
I then head back to the Harper Hold in the Docks District. I fight three Mercenaries who are easily defeated. One of them leaves behind a Studded Leather +2.
I then go upstairs and have Jaheira join up again. I buff up before heading back downstairs. There's more Harper Mercenaries to fight. I start off with a spell sequence. Avastrian casts Slow ahead and at the Harpers. Anomen casts Silence 10' Radius. Imoen casts Greater Malison. Jaheira waits until they come forward, and aims an Insect Plague at the Mercenary closest to the Harper Mage. Minsc waits until the Greater Malison has hit, before using his Horn of Silence on them. After that, the battle pretty much takes care of itself. The loot includes a Leather Armor +1, a Dagger +1, a Flail +1, a Sling +1, and Bracers of A.C. 7.
Avastrian replaces his Bracers of A.C. 4 with the latter. The reason why becomes apparent soon. The party heads over to Cromwell's. He assembles two Rings of Protection +1, the Gloves of Pickpocketing, the Ring of Danger Sense, the Ring of Lock Picks, and the Bracers of A.C. 4 into the Gloves of the Master Thief (armor class 3, +1 to saving throws, +25% find traps, +25% open locks, +20% pickpocket) under the Item Upgrade mod. These will be Imoen's gloves for the rest of game, as they are an ideal item for a dual-classed Mage/Thief who cannot advance her thieving skills anymore. I used to have Imoen wear the Bracers of Archery, but her THAC0 will still be pretty good even without as part of the setup that I have in mind for her.
My next destination is Trademeet.