-

- Forums
- Chatrooms
- Gallery
- Gameplay Videos
- Upload
- Articles
- Mod Reviews
- Shop SP: Games, Movies, Books
CHAPTER 1 | CHAPTER 2 | CHAPTER 3 | CHAPTER 4 | CHAPTER 5 | CHAPTER 6 | CHAPTER 7 | CHAPTER 8 | CHAPTER 9 | CHAPTER 10 | |
SIGIL TROUPE
Lord Ketlaar Argrim
Well first, I respond to Sergeant Natula's message and head back to the Planar Sphere. Teos shows up, and then I get attacked by Sergeant Natula and several minions, including a few Warriors, a Dwarven Thief, a Cleric, and a Monk. The fight is perfectly winnable with standard methods, Slow, Defensive Harmony, etc. Given that I'm surrounded by all sides, using party-friendly offensive spells is perfectly sensible. And indeed Imoen and Anomen prove quite devastating with Abi-Dalzim's Horrid Wilting and Storm of Vengeance respectively.
Afterwards Teos returns and gives me a special Rune of Imprisonment to use on Lord Argrim, and tells me that Argrim can be found in the Crooked Crane Inn. Imoen equips the Rune in one of her quick-item slots.
I then head over to the Crooked Crane Inn in the Bridge District. I go up to the second floor. There's a bit of a lovers' quarrel going on, but I make a deliberate decision to stay out of it. The reason being that if I encourage them to get back together, I'll take a -1 hit to reputation later on.
Lord Argrim's men are easy enough to kill. Imoen, protected by both Stoneskin and Mirror Image, is easily able to use the Rune of Imprisonment on Lord Argrim despite the very slow casting time.
I then report back to Teos for 7,500xp, and he leaves. Morul soon shows up and becomes my resident apprentice who can brew potions for me once a week.
Lord Farthington Roenall
Now I'm at the point in the Jaheira romance where I need to rest outdoors to trigger the next love talk. The Druid Grove does nicely.
I then head to Waukeen's Promenade, where a messenger arrives to tell me that I'm needed back at the Keep. The short of it is that I rebuff Lord Roenall's demand to surrender the Keep to him, and tell him to get off my land.
I then head over to Waukeen's Promenade. Now that my reputation is 20, and I can enhance Avastrian's Charisma with the Friends spell, I can start buying expensive items. I get the Robe of Vecna (armor class 5, +10% magic resistance, -4 to spell casting times) for Imoen, which will be her robes for the rest of the game. The chief benefit is a drastic reduction in casting times, allowing Imoen to spit out many of her spells in an instant.
Raelis Shai
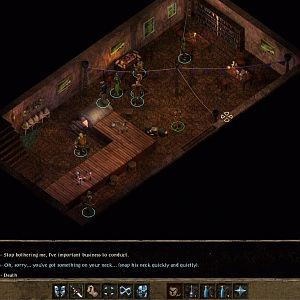
Now I head to the bottom floor of the Five Flagons Inn in the Bridge District. I then sit in on a play where Biff the Understudy blows his lead part. The leader of the Sigil Troupe, Raelis Shai, puts out a verbal call for adventurers. I then continue on to the northeast end of the bottom floor. Raelis Shai wants me to recover one of the troupe's actors, Haer'Dalis, as well as the gem he carried.
Cloak of Sewers
Now I head down to the Sewers beneath the Temple District. Right in the middle of the Sewers will be a Rakshasa and many of his Kobold Minions. I inch along slowly, and then have Anomen kill most of the Kobolds instantly with a Storm of Vengeance. Some of them come the long away around and behind me, but I kill them almost as easily.
I then charge the Rakshasa. My saving throws are now much better, so the Minor Spell Sequencer of Web + Stinking Cloud isn't nearly as dangerous as it used to be. I can thus overwhelm the Rakshasa. It leaves behind the Cloak of Sewers (+1 armor class, can change into a Rat, Mustard Jelly, or Troll). I have Minsc wear this, more to alleviate his armor class than anything else.
Tarnor the Hatchetman
Now I go a bit northeast, and then a bit northwest. There's a band of evil adventurers up ahead that includes Tarnor the Hatchetman, Draug Fea, and a Mage named Gallchobhair. This can be a tough fight for a lower-level party, more so in SCS.
I inch ahead to start the dialogue and then the fight. Imoen unleashes her own Minor Spell Sequencer of Web + Stinking Cloud in order to keep some of them back, and/or unable to cast spells. Anomen renders their entire field a hazard zone by starting off with a Storm of Vengeance, and then two Fire Storms. Keldorn makes sure they aren't protected from the damage by bringing down their protections with a Dispel Magic. Jaheira throws in an Insect Plague for good measure. Imoen also follows up with a Greater Malison to make them more likely to remain stuck. They soon roast under the barrage. The odd one that makes it through is easily cut down by my warriors.
The loot includes two Small Shields +2, a Plate Mail +1, a Full Plate Mail +1, a Helm of Charm Protection, a Quarterstaff +1, and Wyvern's Tail (+2 Flail, target must save vs. poison or take 5 points poison damage).
Mekrath and Haer'Dalis
Now I travel a little westward, and then open a secret door along the north well. Stairs on the other side lead to Mekrath's abode.
As soon as I step through I have to kill several Mephits. There will be a group of Yuan-ti in the room to the east and then north. I have Minsc scout out and mark their location. Anomen then goes east to an adjacent room, and then covers the Yuan-ti with a Storm of Vengeance and a Fire Storm. This leaves the Yuan-ti with a choice between roasting underneath, or getting smoked out. Once some of them do come out, Imoen unleashes her triple Skull Trap sequencer.
There's three Yuan-ti Mages who come out, and are protected. Keldorn uses Dispel Magic, and one of them has their protections removed. Avastrian quickly rushes forward and takes that one out. Anomen and Imoen hold up the other two by summoning a Skeleton Warrior and a Nishruu respectively. Keldorn then activates his True Seeing. This allows Imoen to get each Yuan-ti Mage one a time with Breach, rendering each one vulnerable to getting cut down by Avastrian.
Now the party travels through the hallway leading south, looting some containers along the way. They continue to follow the hallway to its end, and find the wizard named Mekrath. Mekrath immediately goes hostile, but since he's by himself Keldorn doesn't bat an eyelash at using Dispel Magic. Mekrath falls immediately afterwards. Some of the loot here will include a few Potions, a Robe of Fire Resistance, a Wand of Cloudkill, and a Rod of Resurrection.
I then return to the central room, and set free the Tiefling Bard named Haer'Dalis.
Now I continue on to the room to the east, and then follow the hallway to the north. Imoen disarms a couple of traps leading to the altar. The altar itself has a Harp of Discord (Confusion 3 times a day) and the Portal Gem that both Haer'Dalis and Raelis Shai want.
Harper Pin
Jaheira initiates the love talk involving seeking the end of Irenicus' life no matter the consequences once we emerge from the Sewers. That's the cue for me to head over the De'Arnise Keep, and have only Avastrian and Jaheira together in a bed room. Once I hit the 'z' button, the sequence for Avastrian and Jaheira then begins.
I then leave the Keep, whereupon Elminster arrives and rewards Jaheira with the Harper Pin (+5 to save vs. spells, immunity to Magic Missiles, immunity to electrical damage, Non-Detection). This will be Jaheira's amulet for the rest of the game.
Planar Conduit
First, I go to the Adventurer's Mart. I buy Vhailor's Helm (+1 armor class, Simulacrum 1/day) from the merchant on the north side. This will be Avastrian's helmet for the rest of the game. The Simulacrum power makes possible quite a few nifty tactics since the Simulacrum inherits the same items, including items in the quick-item slots, as the character wearing the helm as long you don't reload the game after creating the Simulacrum.
Now I head back to the basement of the Five Flagons Inn, and give the Portal Gem to Raelis Shai and Haer'Dalis. They use the Gem to attempt to summon a Planar Conduit. I easily kill off the odd monster that shows up through the Conduit. But well, the Sigil Troupe gets taken away by a group of extra-planar Bounty Hunters.
I decide to follow them to the Astral Prison.