-

- Forums
- Chatrooms
- Gallery
- Gameplay Videos
- Upload
- Articles
- Mod Reviews
- Shop SP: Games, Movies, Books
CHAPTER 1 | CHAPTER 2 | CHAPTER 3 | CHAPTER 4 | CHAPTER 5 | CHAPTER 6 | CHAPTER 7 | CHAPTER 8 | CHAPTER 9 | CHAPTER 10 | |
NORTH FOREST
Dao and Efreeti
There is a one-time Limited Wish that I forgot to make use of. The 'see all that there is' wish will yield Glasses of Identification (Identify Item 3/day). Couple this with my memorized instances of Identify Item spells, and I'll have little trouble identifying items for the rest of the game.
Now the party travels to the North Forest, where they easily kill a Dao Djinn and an Efreeti. Imoen unlocks the gravestone for a scroll and some treasure.
Cult of Cyric
I don't show it in the video, but Imoen changes her Horrid Wilting to an Incendiary Cloud. The party then rests up.
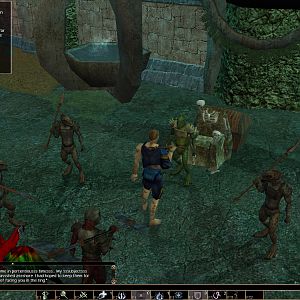
Imoen uses her Staff of the Magi to go invisible. She then explores her way south and west, and locates the Cult of Cyric. Here is where I show an interesting tactic. Imoen hits the Cult with an Incendiary Cloud from outside the fog of war, switches over to her bow, and then switches back to her Staff to go invisible again. This makes it difficult for the enemies to respond to Imoen as the character who caused them damage. Keep in mind that this isn't the surefire insta-win tactic that it used to be in vanilla BG2. SCS tweaks the AI so that at least some of them will make an effort to get out of the cloud. But the tactic is still worthwhile since it still kills some of them, and forces others away.
The tactic has also been worthwhile in that it has forced the enemies to divide themselves. The Mage manages to come at me, but I kill him with the standard True Seeing + Breach method. I rush forward and kill the Priest of Cyric, who is to the north and by himself. I then go south and finish off the remainder.
The loot includes a Two-Handed Sword +2, a Studded Leather +1, a Dagger +2, a Full Platemail, a Platemail +2, a Mace +1, and a Robe of the Evil Archmagi.
The video concludes with me killing a Greater Wyvern for 5,500xp.
Next up is the Forest of Tethyr.